Tony48
Go Kart Champion
Tony's Black GTI--pics galore
Firstly, I've thoroughly enjoyed everything I've been able to learn on this forum. It's been a great resource as I work on modifying a car for the first time. I should have started a build thread awhile ago to keep track of everything but oh well. My goals for this car are to create an enjoyable car that can be used as my daily and also maybe the occasional track day. I'd like to subtly make the car a bit more eye catching than it is in stock form. More than anything I want to enjoy working on the car/learning since I will treat the car as a constant project.
I bought my GTI in April '15 with 54k. It is the first car I’ve ever owned. It was bone stock with the following specs:
-2011 Deep Black Pearl
-6 speed Manual
-4 door
-Bi-xenon headlights
-Sunroof
-Plaid Seats
-RNS-315 Nav System
-OEM mudflaps


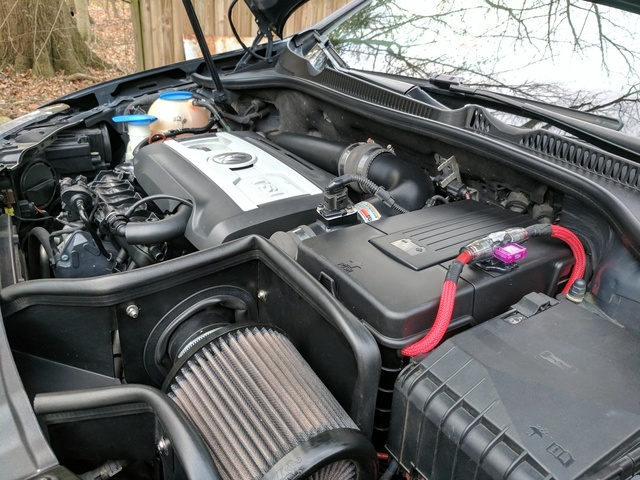
Engine:
-CTS K04 -- Ported / Polished / Ceramic coated by SoCal Porting
-Stratified Pro Tune & Cobb Accessport
-Integrated Engineering Cold Air Intake
-NGK PFR7B Spark Plugs
-Audi "Red Top" Coil Packs (06E905115F)
-Go Fast Bits DV+ Diverter Valve
-Forge Twintercooler FMIC
-CTS K04 Turbo Outlet Pipe
-iAbed Industries Billet Rear Main Seal
-Timing chains/guides/tensioners replaced w/ newest revision parts
-Spulen Coolant Distribution Silicone Hose Kit
_________________________________________________
Exhaust:
-ECS Tuning 3" downpipe w/200 cell cat. Vibrant J spacer.
-DEI Titanium Heat wrap from Downpipe Flange to Flex
-RAI Motorsports 3" downpipe w/ 300 cell cat. - Removed due to rust/crack
-Magnaflow Catback - Painted VHT Hi-Temp Black
-Neck down to stock diameter cut out and 3" pipe welded in for a true 3" turbo back
_________________________________________________
Drivetrain/Shifter:
-DIY RSR Clutch kit w/OEM flywheel
-034 Motorsports Street Density Motor & Trans Mounts
-VWR Racingline Subframe Mount
-Spulen Dog Bone Mount
-Dieselgeek Sigma 6 Short Shifter
-Dieselgeek Upgraded Shifter Shaft Bushing Kit
-Dieselgeek Super Pin
-Dieselgeek First Gear Getter
-Dieselgeek Cable Saver Replacement Cable End Bushing Set
-Shimmed shifter ball per Dieselgeek
-CTS Billet Shifter Bracket Bushings
-ECS Billet/Leather Shift Knob
-Clutch line flow restrictor removed
-eBay clutch stop
_________________________________________________
Brakes:
Front:
-Porsche Boxster S 986 Calipers Powdercoated Yellow
-Stoptech 321x30mm Slotted Rotors (Audi B5 S4 fitment)
-Akebono Ceramic Pads (EUR917)
-HEL Stainless Steel lines
-Apikol Caliper Brackets
_________________________________________________
Suspension/Chassis:
-ST X Coilovers
-Powerflex Front Control Arm/Rear Position Polyurethane Bushings/Brackets (ALK)
-SuperPro Front Control Arm/Front Position Polyurethane Bushings
-Aluminum Front Control Arms (B6 Passat fitment)
-Eibach 26mm Front Sway Bar w/H&R teflon/poly bushings
-Eibach 23mm Rear Sway Bar w/Energy Suspension greasable poly bushings/brackets
-ECS Tuning Adjustable Front Sway Bar End Links
-ECS Tuning Adjustable Rear Sway Bar End Links
-ECS Tuning Front Subframe Locking Collar Kit
-Ultra Racing Mid Brace
-Unibrace XB
_________________________________________________
Wheels/Tires:
-Motorsport Hardware Stud Conversion (72mm front & 68mm rear)Summer:
-OZ Ultraleggera, Black, 18x8 ET45
-Motorsport-Tech custom 6mm spacers (front wheels, to clear Boxster S calipers)
Winter:
-OEM Detroit's
-Michelin Pilot Sport A/S 3+ Tires
-ECS Tuning 15mm spacers (front wheels, to clear Boxster S calipers)
-ECS Tuning 10mm spacers (rear wheels)
_________________________________________________
Exterior/Cosmetic:
-US Millworks Tow Hook License Bracket
-Gloss Black Front & Rear Volkswagen emblems
-Volvo Rear License Plate Bracket (Part# 9154456)
-Golf R Upper Grille
-Custom Golf bar-style lower grille
-Klii Maryland Flag Rear Badge Inlay
-De-badged rear GTI emblem
-Color matched side markers (vinyl wrapped)
-Fog lights tinted yellow (Lamin-x)
-Windows tinted 35% Llumar Classic
-Front fenders rolled
-Carbon Fiber OEM-style lip
-Hood Insulation Blanket Delete
-Weathertech window deflectors (dark tint)
-ECS Tuning Hatch Pop Kit
-OEM Jack Point Adapters
-Black Coolant Reservoir Cap
-Aluminum windshield washer fluid filler neck
-Hella Supertone Horns
-Whispbar Roof Rack
-Kuat Trio Fork Mount Bike Carrier
-Soft Chirp alarm for locking confirmation (DEI 514LN)
_________________________________________________
Lighting:
-LED tail lights (Reps, as discussed in this thread) - Removed due to dead LED's
-Depo dark cherry LED tail lights
-LED City/Parking Lights DIY Here
-DeAutoKey LED fog light kit
-DeAutoKey LED Rear Blinkers
-LED Reverse Lights
-LED License Plate Lights
-LED Puddle Lights retrofit to side view mirrors
_________________________________________________
Interior:
-ECS Tuning Vent Boost Gauge
-Euro Cupholder
-Soundaktor removed
-Airbag warning sticker on visor delete
-Hardwired USB Charger (Double Apex style in far right dummy button)
-OEM Euro Switch
-ProClip angled dash mount for cell phone
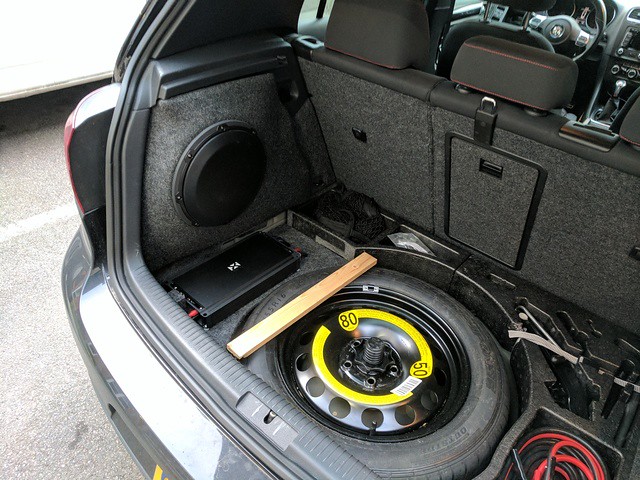
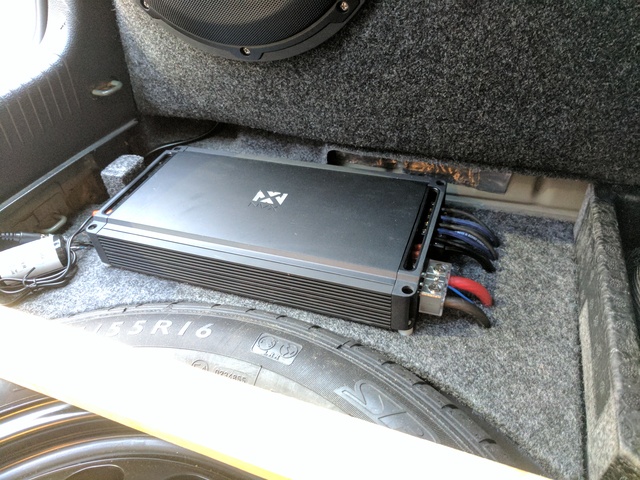
-5 channel sound system
Amp: NVX VAD11005
AudioControl LC7i
Front Speakers: Morel Maximo 6 Component
Rear Speakers: Morel Maximo 6 Component
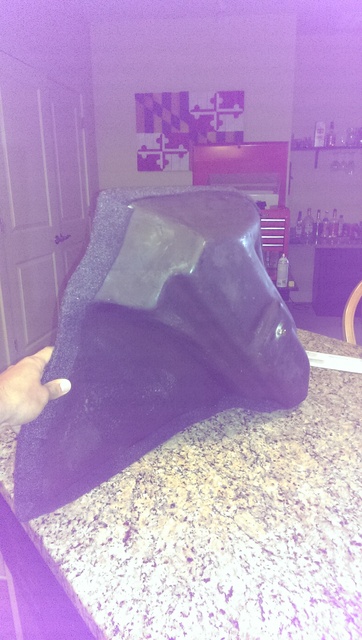
Subwoofer: JL Audio 10w3v3-2 in SRQ Customs Sidemount Enclosure
_________________________________________________
VAGCOM:
-Gauge Sweep
-Windows up/down via keyfob
-Fogs as cornering lights
-Disable rear wiper in reverse
-Front wiper teardrop
-Coded LED tail lights
-Coded LED Parking/City lights
_________________________________________________
Noteworthy Maintenance:
(starting at 54k when I purchased the car, not including routine maintenance):
-62k: I replaced the transmission oil with Motul Gear 300 75W90. It felt much notchier than OEM when cold but great when warmed up.
-65k: My water pump was leaking so VW replaced it for free at 65k.
-65k: A few days later the car felt like it was missing and threw a CEL so I took it to the dealer (before I owned VAGCOM) and they diagnosed and replaced a fuel injector for free. They noted heavy carbon build-up on the intake valves (no surprise there).
-72k: Bleed clutch & brakes. Removed the flow restrictor in the clutch line. This made a nice difference in how the clutch engaged.
-74k: The car threw codes P2015, P0088, P2279, & P2187 read via VAGCOM. I checked the intake manifold and the flap actuator arm was popped out of place. Took it to the dealer and they replaced the intake manifold for Free.99.
-74k: I had the dealership do the intake valve carbon cleaning. I was going to tackle this myself but paid 2hrs labor for them to do it while they replaced the intake manifold. The tech said they desperately needed cleaning. That, and the intake manifold replacement, resolved some hesitation issues I had ~4k rpm and made the car feel as though it was running much healthier.
-76k: Replaced the OEM battery in Oct. 2016--5years and eight months after the car’s build date.
-106k: Camshaft & Balance shaft timing chains/tensioners/guides replaced. Info, pictures, and tips here.
-106k: DIY RSR Clutch kit (gently used OEM DMFW) and iAbed Billet Rear Main Seal. Info, pictures, and tips here.
-126k: K04 installed w/Stratified tune via Cobb Accessport.
-146k: Carbon cleaned from intake valves (walnut blasted) and newest revision intake manifold installed.
_________________________________________________
Future Mods:
-Full timing system replacement. I plan on keeping this car a long time.
-DIY RSR Clutch kit
-iAbed Industries Rear Main Seal
-Stage II Tune (Cobb/Stratified???)
-Porsche Boxster brake setup
-Ignition service: R8 coil packs & OEM plugs
-034 or BFI Street Density Mounts
-Racingline VWR subframe mount
-Vinyl wrap
-ST Coilovers
-Polyurethane Control Arm Bushings
-Subframe mount collars
-Sway bars
-Carbon cleaning round 2
-Front ball joints & tie rod ends
-Aluminum front control arms
-Reupholster headliner
-Rear Seat delete?
-Powder coat OZ wheels
Firstly, I've thoroughly enjoyed everything I've been able to learn on this forum. It's been a great resource as I work on modifying a car for the first time. I should have started a build thread awhile ago to keep track of everything but oh well. My goals for this car are to create an enjoyable car that can be used as my daily and also maybe the occasional track day. I'd like to subtly make the car a bit more eye catching than it is in stock form. More than anything I want to enjoy working on the car/learning since I will treat the car as a constant project.
I bought my GTI in April '15 with 54k. It is the first car I’ve ever owned. It was bone stock with the following specs:
-2011 Deep Black Pearl
-6 speed Manual
-4 door
-Bi-xenon headlights
-Sunroof
-Plaid Seats
-RNS-315 Nav System
-OEM mudflaps
Engine:
-CTS K04 -- Ported / Polished / Ceramic coated by SoCal Porting
-Stratified Pro Tune & Cobb Accessport
-Integrated Engineering Cold Air Intake
-NGK PFR7B Spark Plugs
-Audi "Red Top" Coil Packs (06E905115F)
-Go Fast Bits DV+ Diverter Valve
-Forge Twintercooler FMIC
-CTS K04 Turbo Outlet Pipe
-iAbed Industries Billet Rear Main Seal
-Timing chains/guides/tensioners replaced w/ newest revision parts
-Spulen Coolant Distribution Silicone Hose Kit
_________________________________________________
Exhaust:
-ECS Tuning 3" downpipe w/200 cell cat. Vibrant J spacer.
-DEI Titanium Heat wrap from Downpipe Flange to Flex
-RAI Motorsports 3" downpipe w/ 300 cell cat. - Removed due to rust/crack
-Magnaflow Catback - Painted VHT Hi-Temp Black
-Neck down to stock diameter cut out and 3" pipe welded in for a true 3" turbo back
_________________________________________________
Drivetrain/Shifter:
-DIY RSR Clutch kit w/OEM flywheel
-034 Motorsports Street Density Motor & Trans Mounts
-VWR Racingline Subframe Mount
-Spulen Dog Bone Mount
-Dieselgeek Sigma 6 Short Shifter
-Dieselgeek Upgraded Shifter Shaft Bushing Kit
-Dieselgeek Super Pin
-Dieselgeek First Gear Getter
-Dieselgeek Cable Saver Replacement Cable End Bushing Set
-Shimmed shifter ball per Dieselgeek
-CTS Billet Shifter Bracket Bushings
-ECS Billet/Leather Shift Knob
-Clutch line flow restrictor removed
-eBay clutch stop
_________________________________________________
Brakes:
Front:
-Porsche Boxster S 986 Calipers Powdercoated Yellow
-Stoptech 321x30mm Slotted Rotors (Audi B5 S4 fitment)
-Akebono Ceramic Pads (EUR917)
-HEL Stainless Steel lines
-Apikol Caliper Brackets
_________________________________________________
Suspension/Chassis:
-ST X Coilovers
-Powerflex Front Control Arm/Rear Position Polyurethane Bushings/Brackets (ALK)
-SuperPro Front Control Arm/Front Position Polyurethane Bushings
-Aluminum Front Control Arms (B6 Passat fitment)
-Eibach 26mm Front Sway Bar w/H&R teflon/poly bushings
-Eibach 23mm Rear Sway Bar w/Energy Suspension greasable poly bushings/brackets
-ECS Tuning Adjustable Front Sway Bar End Links
-ECS Tuning Adjustable Rear Sway Bar End Links
-ECS Tuning Front Subframe Locking Collar Kit
-Ultra Racing Mid Brace
-Unibrace XB
_________________________________________________
Wheels/Tires:
-Motorsport Hardware Stud Conversion (72mm front & 68mm rear)Summer:
-OZ Ultraleggera, Black, 18x8 ET45
-Motorsport-Tech custom 6mm spacers (front wheels, to clear Boxster S calipers)
Winter:
-OEM Detroit's
-Michelin Pilot Sport A/S 3+ Tires
-ECS Tuning 15mm spacers (front wheels, to clear Boxster S calipers)
-ECS Tuning 10mm spacers (rear wheels)
_________________________________________________
Exterior/Cosmetic:
-US Millworks Tow Hook License Bracket
-Gloss Black Front & Rear Volkswagen emblems
-Volvo Rear License Plate Bracket (Part# 9154456)
-Golf R Upper Grille
-Custom Golf bar-style lower grille
-Klii Maryland Flag Rear Badge Inlay
-De-badged rear GTI emblem
-Color matched side markers (vinyl wrapped)
-Fog lights tinted yellow (Lamin-x)
-Windows tinted 35% Llumar Classic
-Front fenders rolled
-Carbon Fiber OEM-style lip
-Hood Insulation Blanket Delete
-Weathertech window deflectors (dark tint)
-ECS Tuning Hatch Pop Kit
-OEM Jack Point Adapters
-Black Coolant Reservoir Cap
-Aluminum windshield washer fluid filler neck
-Hella Supertone Horns
-Whispbar Roof Rack
-Kuat Trio Fork Mount Bike Carrier
-Soft Chirp alarm for locking confirmation (DEI 514LN)
_________________________________________________
Lighting:
-LED tail lights (Reps, as discussed in this thread) - Removed due to dead LED's
-Depo dark cherry LED tail lights
-LED City/Parking Lights DIY Here
-DeAutoKey LED fog light kit
-DeAutoKey LED Rear Blinkers
-LED Reverse Lights
-LED License Plate Lights
-LED Puddle Lights retrofit to side view mirrors
_________________________________________________
Interior:
-ECS Tuning Vent Boost Gauge
-Euro Cupholder
-Soundaktor removed
-Airbag warning sticker on visor delete
-Hardwired USB Charger (Double Apex style in far right dummy button)
-OEM Euro Switch
-ProClip angled dash mount for cell phone
-5 channel sound system
Amp: NVX VAD11005
AudioControl LC7i
Front Speakers: Morel Maximo 6 Component
Rear Speakers: Morel Maximo 6 Component
Subwoofer: JL Audio 10w3v3-2 in SRQ Customs Sidemount Enclosure
_________________________________________________
VAGCOM:
-Gauge Sweep
-Windows up/down via keyfob
-Fogs as cornering lights
-Disable rear wiper in reverse
-Front wiper teardrop
-Coded LED tail lights
-Coded LED Parking/City lights
_________________________________________________
Noteworthy Maintenance:
(starting at 54k when I purchased the car, not including routine maintenance):
-62k: I replaced the transmission oil with Motul Gear 300 75W90. It felt much notchier than OEM when cold but great when warmed up.
-65k: My water pump was leaking so VW replaced it for free at 65k.
-65k: A few days later the car felt like it was missing and threw a CEL so I took it to the dealer (before I owned VAGCOM) and they diagnosed and replaced a fuel injector for free. They noted heavy carbon build-up on the intake valves (no surprise there).
-72k: Bleed clutch & brakes. Removed the flow restrictor in the clutch line. This made a nice difference in how the clutch engaged.
-74k: The car threw codes P2015, P0088, P2279, & P2187 read via VAGCOM. I checked the intake manifold and the flap actuator arm was popped out of place. Took it to the dealer and they replaced the intake manifold for Free.99.
-74k: I had the dealership do the intake valve carbon cleaning. I was going to tackle this myself but paid 2hrs labor for them to do it while they replaced the intake manifold. The tech said they desperately needed cleaning. That, and the intake manifold replacement, resolved some hesitation issues I had ~4k rpm and made the car feel as though it was running much healthier.
-76k: Replaced the OEM battery in Oct. 2016--5years and eight months after the car’s build date.
-106k: Camshaft & Balance shaft timing chains/tensioners/guides replaced. Info, pictures, and tips here.
-106k: DIY RSR Clutch kit (gently used OEM DMFW) and iAbed Billet Rear Main Seal. Info, pictures, and tips here.
-126k: K04 installed w/Stratified tune via Cobb Accessport.
-146k: Carbon cleaned from intake valves (walnut blasted) and newest revision intake manifold installed.
_________________________________________________
Future Mods:
-Full timing system replacement. I plan on keeping this car a long time.
-DIY RSR Clutch kit
-iAbed Industries Rear Main Seal
-Stage II Tune (Cobb/Stratified???)
-Porsche Boxster brake setup
-Ignition service: R8 coil packs & OEM plugs
-034 or BFI Street Density Mounts
-Racingline VWR subframe mount
-Vinyl wrap
-ST Coilovers
-Polyurethane Control Arm Bushings
-Subframe mount collars
-Sway bars
-Carbon cleaning round 2
-Front ball joints & tie rod ends
-Aluminum front control arms
-Reupholster headliner
-Rear Seat delete?
-Powder coat OZ wheels
Last edited:


")