We apparently have an inherent water pump issue with our motors. I'm almost at 90k and I'm only now needing to replace it for the first time. I also know of people that have had several replaced before their warranty period was over, so it's hit or miss. Either way, this replacement can be as cheap as $70 if you DIY.
Option #1
Water Pump with Housing:
06H121026CQ or
06H121026CF
Water Pump Belt:
06H121605E
Option #2 (Not verified but could work)
Water Pump:
06H121026BA (should be $70-$80)
Water Pump Belt:
06H121605E
Water Pump Gasket:
06J121119
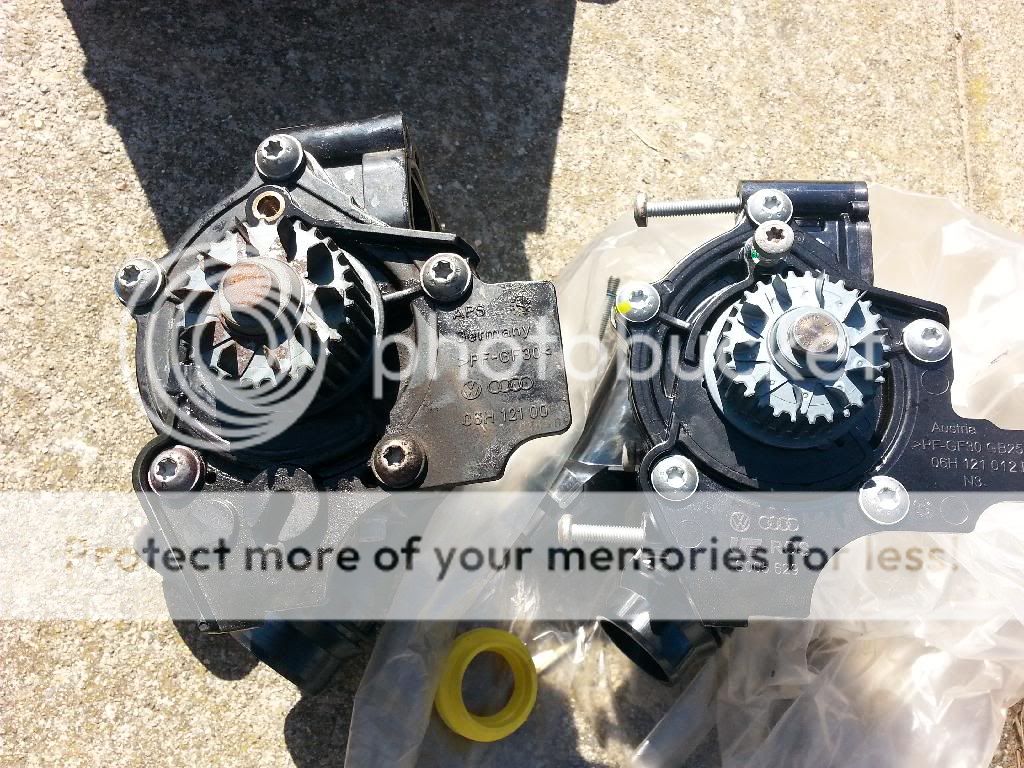
These are just the part numbers I used. Verify it fits your vehicle before buying. You can see in the picture below that the new pump doesn't look exactly like the one I pulled off my car (2009 model year). I went with Option #1 because I thought the housing was cracked, but technically you could go with Option #2 if just the pump itself is bad. I didn't really know what I was doing either so I got the whole thing to be safe. Also, it's recommended that you replace the belt while you're in there. If you buy the whole housing it comes with a replacement gasket, otherwise replace that as well. The last thing you want is to fix one coolant leak and cause another. Last but not least, have a few injector seal replacement kits in case your injector o-rings are damaged while removing/installing the intake manifold. It happened to me, it could happen to you.
Warning: Coolant may come out during any of these steps so be smart and don't put your face right underneath a loose hose. Be sure to have some G12 and distilled water ready to top off the system again after you're done.
Step #1: Jack up the front end of you car and put it on jackstands. Remove the lower radiator hose to drain coolant. Removing your overflow tank cap will help it flow faster. I removed the silicone hose that connects the intercooler to the throttle body pipe for more accessibility.
Step #2: Remove Intake Manifold
I followed
THIS DIY the first time I replaced it. I've done it several times now so it only takes me an hour or 2.
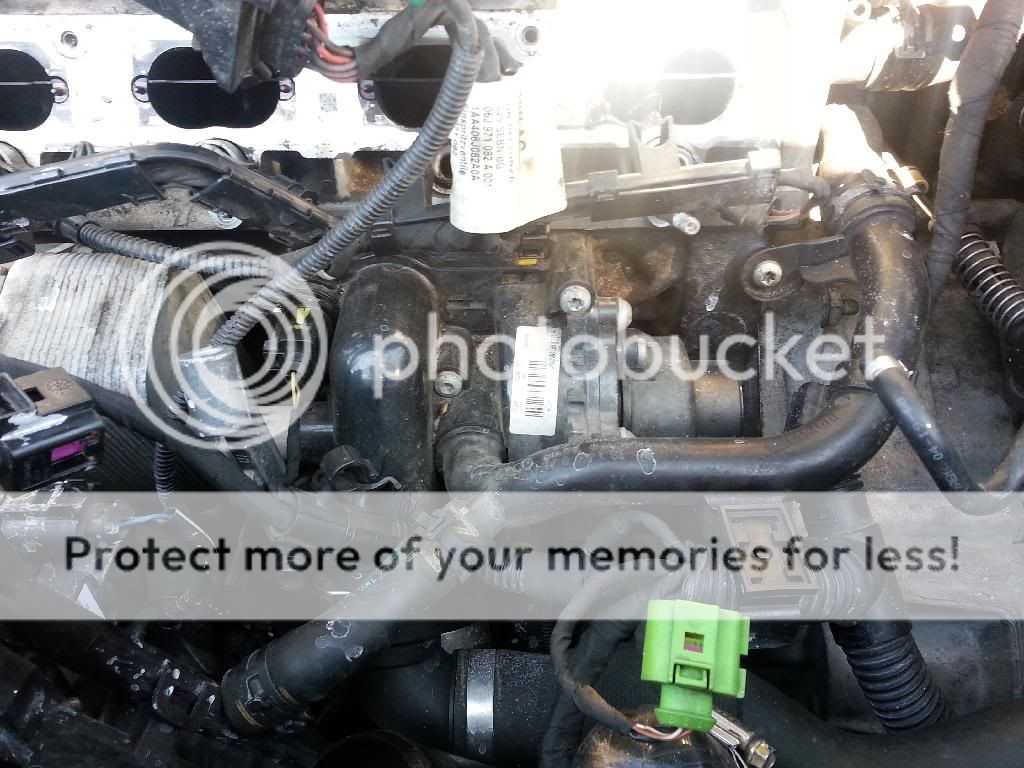
After removal the Water Pump is visible underneath the #3 injector (mine came out with the manifold).
Remove anything that may be in your way. I was pretty liberal with moving things out of the way because I wanted easy access and better pictures. Just make sure you remember what connector goes where, or mark them if necessary. I also removed the coupler that connects the throttle body pipe to the throttle body.
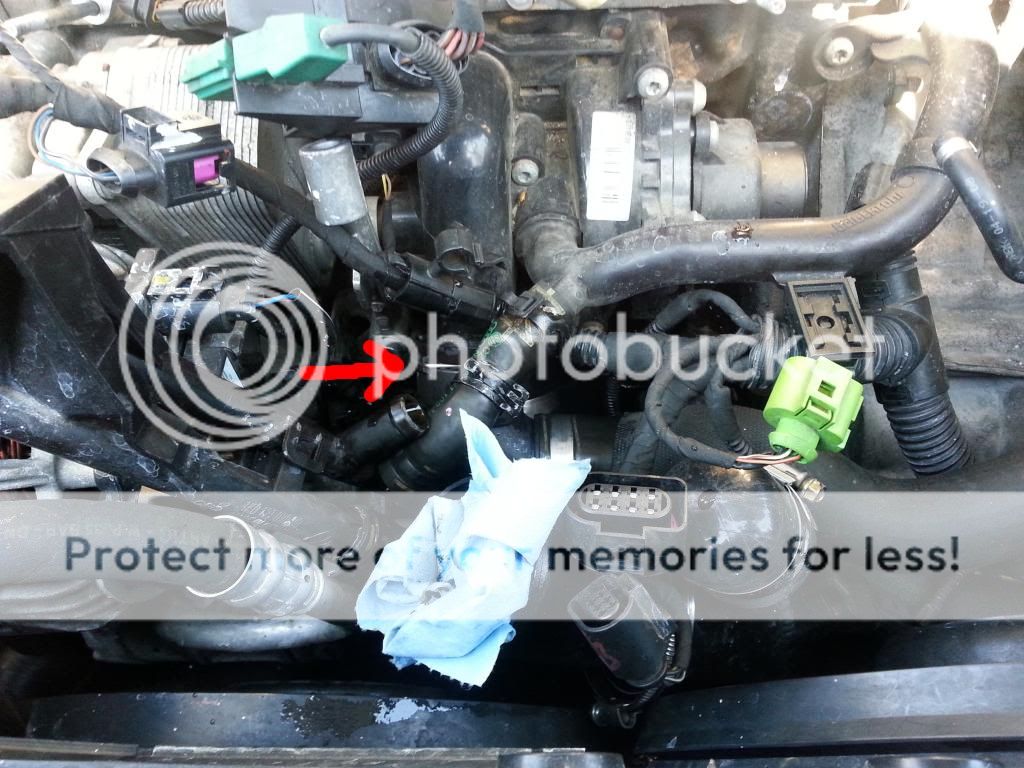
Step #3: Remove the clamp and pull off the indicated coolant line. i stuffed a shop towel in my throttle body pipe to prevent coolant from going in it just in case.
Step #4: Pry off this clip with a flathead screwdriver and pull off the coolant hose. It will take some effort and some coolant may come out, so be ready.
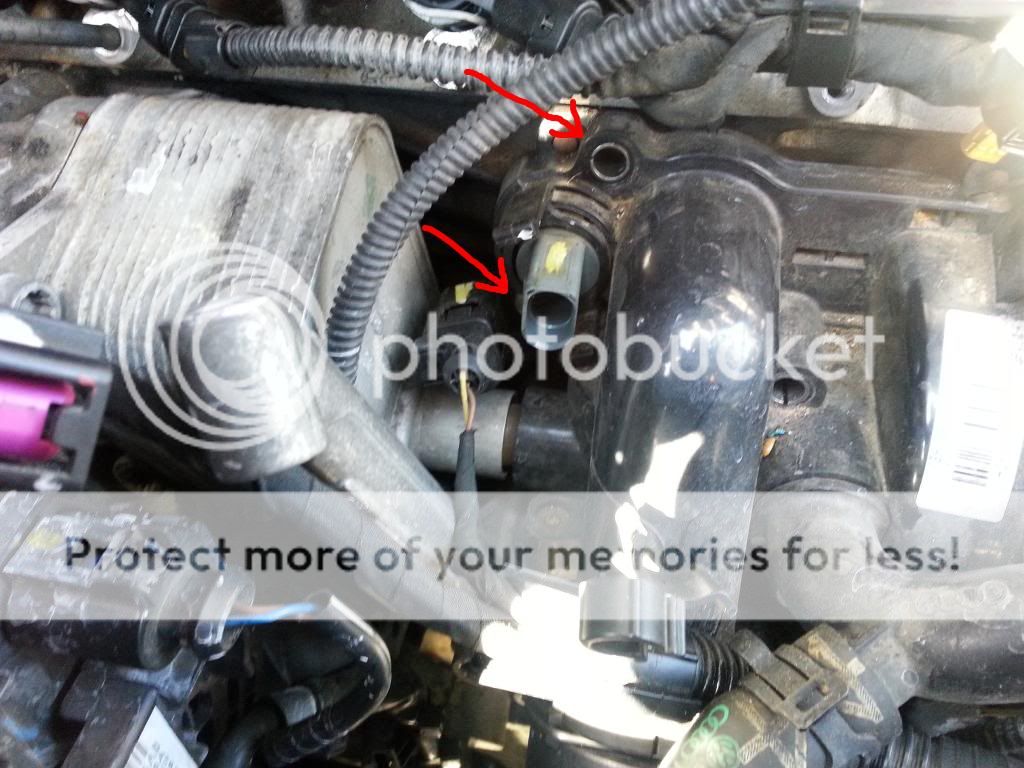
Step #5: There's a t30 bolt under this hose. Remove it and pull the hose off. More engine blood comes out.
Step #6: There's a 2nd coolant hose at the bottom of the pump housing. It has the same c-clip that needs to be removed. It may be easier to access from under the car.
Step #7: There are (2) bolts holding the belt cover to the pump housing and (5) bolts holding the pump housing to the block. (2) of those are by the temp sensor and are shorter, the other (3) are longer. Remember to remove the temp sensor connector before removing the pump assembly.
Belt cover bolts. One of the bolts is behind the coolant line. At this point the coolant line is removed from the housing so you can move it out of the way.
3 longer bolts. The 3rd lower bolt behind the coolant line can be seen better in the pic above on step #6. It's right by the arrow.
Temp sensor and 2 shorter bolts, one on top and one below
Step #8: Here's where I kind of wing it. The manual states that you need to remove the belt by loosening the balance shaft pulley down below the pump. I believe that was a 12mm bolt. You counter hold it by putting a socket wrench on the crank pulley bolt. That's a 2 person job, I couldn't figure out which way to turn it ,and my wrench kept slipping off, sooo I just slid the belt off of the water pump. It came off pretty easily. You can also see where the lower belt cover bolt goes in this pic, to the right of the balance shaft pulley.
Step #9: The housing should come off at this point. There is a connector to the oil cooler that needs to be slid off. It's orange with a black o-ring gasket on either end, and it can move radially. The manual says it should stay in the oil cooler, but when we pulled the pump off, it came off with it. We took it off the pump and put it back in the oil cooler, no problems with it.
Old Pump vs New. You can see some of the exterior differences. At this point, if you bought the cheaper option you'll need to take the 5 bolts off around the face plate and replace it. I took my old one apart but couldn't really find anything wrong with it, so I'm not sure where the leak came from. there is a thin rubber gasket sort of thing along the bottom of the pump gear that you can see it bubbled up in the 7:30 position. That's the general area where coolant was coming out, so maybe it was that. Also you can see where it was leaking past the belt cover in the close up pic of the belt above. It was coming out to the left of the numbers that are printed on the belt.=. On the new pump it's all hard plastic.
Step #10+: Install is the reverse of assembly. Getting the belt on and the oil cooler connector on will take some finesse. Also there are some dowels on top that locate the water pump, but they were covered in rust and would not go in readily. i lined up the pump bolts and tightened them down starting with the middle bolt, then the 2 by the temp sensor, then the other 2. Take your time and it should seal up.
Reattach all coolant and radiator hoses. Reinstall your intake manifold. Top off your coolant with 50/50 coolant/distilled water. Run the car up to temp, and add coolant as necessary. Check to make sure there are no leaks. Monitor for 24 hours and rejoice when coolant levels stay steady.

