GOLFMK8
GOLFMK7
GOLFMK6
GOLFMKV

I've jumped to the dark side

MLue1

Drag Racing Champion
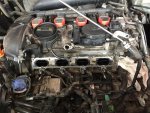
I've jumped to the dark side :23: at lerast for now. Got some motivation watching a few of videos on installing the head on the 2.0T so I started working on the 2.0T in the Tiguan.

Yup we had the dreaded Chain Tensioner failure a few years ago while I was having eye issues and surgery.

I've done Re&Re and retimed the valve train on my BMW M62 V8, so I'm not shy; but due to the fact that I no longer see very well, I had limited myself to just doing simple maintenance, but now... we'll see.:paddle:

The one of the videos is for the older FSI but alot of it is the same as the 1st gen EA888.
https://youtu.be/9h2TpX7pChg
https://youtu.be/v94BUU8BrQE
https://youtu.be/wGqF5xHx3tE

All i can say is thank god for Deutsche Auto Parts, there is simply no other parts supplier that do what they do. No afiliation, and I know alot of the big players in the industry, ...like Wayne at Pelican Parts.

Ya i know, I'll get of my soapbox now... .:sm3:

Cheers !
 
Last edited:

MLue1

Drag Racing Champion
Removed the Intake Manifold from the Tiquan engine today, took me a few hours to get the IM off, wife always took it to the dealer to get everything done so never had the pleasure. Compared to the 2.5 IM, this IM is a nightmare, VW connectors are the worst !


EDIT: Up next ... Turbo removal using these great instruction.
https://www.golfmk6.com/forums/showthread.php?t=30086
 

Attachments

  • 2.0 TSI Intake Manifold Removed (small).jpg
    2.0 TSI Intake Manifold Removed (small).jpg
    258.9 KB · Views: 1,427
Last edited:

MLue1

Drag Racing Champion
When you get to the timing system I have some good pics, links, and tips from when I did it on my car. Should save you some research time. Check the link in my signature.

Best of luck and keep the pictures and info coming :thumbup:
Thanks a bunch Tony.

Cheers!
 

MLue1

Drag Racing Champion
Resurrecting this old thread. I had forgotten all about it, or was it an indication of my interest, .....honesty at the time, I had taken over the lease of a great sports car and frankly got distracted. Then last year, eye problems returned in the form of two retina detachments in the same operated eye....so no worky on car stuff.
Since selling my house in South Carolina in August and the house in Markham ON, we are moving north to another beach area; I have started working on this Project again but this time with a deadline. Fix it or junk it, that directive came from the real Boss, ....nah she loves that Tiguan too much to junk it, ....women love Tiguans, so gotta fix it.... BUT before i move in November.

As some of you guys know I'm not one to post pictures, but since I have to take a sh!t load of them to help me put the thing back togeather I'll post up a few.
 
Last edited:

MLue1

Drag Racing Champion
One thing that was apparent with those YouTube videos while motivating, they make it look easier than it actually is, coz they are more often than not working on an engine on a stand, it is much more difficult when the engine is still in the car. Ya no kidding!
No Youtube video show all the steps to dismantle an engines but for this 2.0 TSI engine, I kept hearing everyone mentioning broken exhaust studs, so being sight challenged I didn't want to have to lean over this engine to deal with drilling out a broken exhaust stud. Luckily I remembered that when I was hanging around at my Buddy's Race Shop I saw three mechanics remove the Head off one of these EA888 engines in little more than a half hour; with both the Intake Manifold as well as the Exhaust Manifold and Turbo still attached to the head, while the engine block remained in the car. Ya that was a Race Car with no emissions or accessory stuff to worry about. Believe it or not the Intake Manifold, Cylinder Head and Exhaust Manifold/Turbo are designed to go on or off the block as a unit.

I had already removed the Intake Manifold from the engine, so I just loosely followed this procedure to remove the head with the Exhaust Manifold and Turbo attached.

Drain oil and removed coolant sensor and then the hose to drain most of the coolant from the engine.

Removed the bolts for the Down Pipe and the turbo

Remove the bolts for the turbo bracket to engine

Remove electrical connectors to the turbo

Remove 3 Banjo Bolts from the turbo and label the lines and Banjo Bolts

*Remove the hidden Torx bolt, behind the rubber hose on the turbo inlet, on reassembly I will replace it with a hex head bolt

Loosen the bolts for the Upper Timing Cover and Remove the connector to the Cam Adjuster, unbolt the Cam Adjusted from the Upper Timing Cover, remove the upper timing cover

Remove 4 bolts securing the Engine Mount

Use a wrench to rotate the Belt tensioner and Remove Serpentine Belt

Remove the many bolts holding the Lower Timing Cover, the Youtube video says that the bolts can be removed by rotationing the belt tensioner out of the way but I could not, so I removed the one bolt holding the tensioner on from the alternator side and relocated the tensioner.

Use a putty knife to break the lower timing cover seal in the upper left of the cover, do it right an you can reuse the Lower Timimg Cover. I use a carpet knife to break the remaining seal around the lower Timing Cover to remove it.

Use the special Tool (there are 3 types) to remove the Valve adjuster from the Cam Bridge
cam sprockets

Remove the Coil Packs and Spark Plugs

Remove the Air Oil Seperator/PCV Valve

Remove the Vacuum Pump from the Head

Remove the plastic coolant manifold at the back of the engine, that is attached to the hoses that go to the firewall

Remove all the bolts securing the Valve cover, hit the corner of the cover with a mallet to break the seal

Remove the Valve Cover and Cams from the head

Loosen and remove 10 T52 or M12 Head Bolts

Break the seal between the head and engine block; lift and remove the head and exhaust manifold with the turbo still attached


Click on the Link below to see the Pictures

 
Last edited:

MLue1

Drag Racing Champion
Engine Block and sealing surfaces all cleaned up, a bit of a chore for me but took my time and with my buddy Jack Daniels got her done.

Installed the head gasket onto the engine block right outa the package, making sure all the cut outs lined up.

My wife helped me put the head on the engine block. I put a 12 inch 1/4 inch extension down the hole for the front center cylinder head bolts, she just helped me line up and inserted the extension into the corresponding hole in the cylinder head and it slid nicely into place. You prolly asking yourself why I didn't mount the turbo and manifold on the engine.... well there is only so much a sight challenged guy can do. With two good eyes its easy to disassemble and reassemble, now I find easier to take stuff apart the challenge will always be putting it all back togeather.

You prolly sick of me writing with out pics so here are some, so far so good on this project, although I'm starting to fall behind to my target date.... .


PS. One important thing that is NOT covered or mentioned enough in any of the Timing Chain Tensioner Failures video and/or documentation: when replacing just the Cylinder Head and the Upper Timing Chain, you must make sure to use the timing marks on the Balance Shaft Pulleys as well as the Balance Shaft Chain are lined up with the blue links on the Balance Shaft Chain before installing and timing up the engine. You may have to rotate the engine a sh!t load of times to confirm this; easiest to do before you put the head on the block. Ultimately the Balance Shafts timing marks are in sync when the Engine Timing Marks at TDC, In the last and second to last pictures you can see that they are.

The Engine should only be rotated Clockwise.
 
Last edited:

MLue1

Drag Racing Champion
In every project a bit o rain must fall and this one is no exception.


Problem #1 If you noticed from the pic, I couldn't get the flat plastic connection that goes from the turbo to the intercooler to bolt up easily, this is usually a sign the something was not lining up, ...major challenge for me as I don't see details very well. I had to literally unbolt the turbo and reseat everything, making sure that the turbo was sitting properly on the gasket and on the bottom clamp and then tightening the 5 upper exhaust manifold bolts. What helped was to raise the engine to the position it would normally be in if the motor mounts were installed. Even then I still had to readjust the rubber hose connection to the turbo pipe, it bolts up but required more adjusting than I woulda thought.

Sorry no pics for this one,....


Problem #2 When I though I got back on track,....

 
Last edited:

MLue1

Drag Racing Champion
VW 2.0 TSI Exhaust Cam Washer and Bolt Important Info - KNOW WHICH BOLT YOU GOT FIRST, M6 T30 or M8 Triple Square and use some Loctite as well; as the rotation of the cam is in the direction to loosen the Bolt, if it is not secured. This is probably why VW/Audi upgraded to the larger M8 Triple Square Bolt, so they could tighten it more securely.

M6 T30 Bolt Torque to 8 Nm plus 90 degrees additional. Use new bolt.

M8 Triple Square Bolt Torque to 20 Nm plus 90 degrees additional. Use new bolt.

Click on the link below to see more info
 
Last edited:

MLue1

Drag Racing Champion
Reinstalling the three bolts that hold the Turbo Heat Shiedt was s real pain in the a$$ for me, even if I had normal vision it would have been a challenge. Anyway take a look at the pics and use the contours of the heat shield to help you to locate where the bolts are in order to remove or reinstall them. VW and their wonderful Engineering once again made something that's simple more complex than it should be.


MLue1

Drag Racing Champion
I reinstall the Vacuum Pump and High Pressure Fuel Pump,.... so sorry no pics

When I removed the Vacuum Pump and High Pressure Fuel Pump from the end of the Exhaust Cam housing, I just removed the 3 bolts (plus one small bolt for a bracket) that secure the Vacuum Pump, the High Pressure Fuel Pump was still attached to it at that point.

One of my Mechanic friends recommended that I should separate the two before reinstalling; and that's exactly what I did. I installed the Vacuum Pump first lubing the Square Cam with engine assembly Lube then making sure that the rectangle keys in the vacuum pump mated up with the corresponding slots in the end of the exhaust cam, then Torqued the T30 bolts to 9 Nm.

I removed the cam follower and roller assembly from the High Pressure Fuel Pump and inspected it and apply engine assembly Lube, the cam follower and roller assembly is keyed so no issues. Torqued blots again to 9Nm
 

MLue1

Drag Racing Champion
The following video was used to help us before, and during the installation on the Intake Manifold (IM). Deutsche Autoparts has since put out another video on the IM, but this video is specific to the EARLY EA888 engine in the MK1 Tiguan and the MK6 GTI.


Before Installing the Intake Manifold (IM), I did a dry fitting of the IM and all the hoses and connectors

 
Last edited:

MLue1

Drag Racing Champion
I have to say that installing the IM was the most challenging for me, even knowing the process from the video, there were just too much going on, delicate wiring and fuel connections for me to put it all togeather properly with my limited vision. Thanks to my friend Mark for giving me a hand.

As well thanks to Deutsche Autoparts for their great videos that help me wid the technical but most of all motivational, when you can see something being done it can propel you to achieve the same or greater.... .

All said and done, I fixed the engine for about $2k USD, including replacing cylinder head, crank holding tool and donut, new chain, new bolts, new guides, o-rings/seals, Permatex RTV & Anaerobic Sealant, oil filter, oil and coolant.

Final thing to do is to repackage the cylinder head core and send it back to Deutsche Autoparts in the original box that it came in.
 
Last edited:

MLue1

Drag Racing Champion
The Tiguan's ALIVE !!!

After turning over the engine several times at 20 seconds intervals to build oil pressure, we connected the coil packs and she started up right away without any problems on 4 year old gas no less.
After a couple of days, everything is still good, fluid levels are rock solid and no leaks were detected. The brakes are a bit soft and grumpy but that's another story.

Thanks for tuning in (y)
 
Last edited:
Top