6
You are using an out of date browser. It may not display this or other websites correctly.
You should upgrade or use an alternative browser.
You should upgrade or use an alternative browser.
Tony's Black GTI
- Thread starter Tony48
- Start date
Tony48
Go Kart Champion
I did some shifter upgrades last weekend:
EDIT: Jim has posted two videos that do a great job describing the install process and cover a lot of information that I cover in this post.
Dieselgeek Super Pin Install
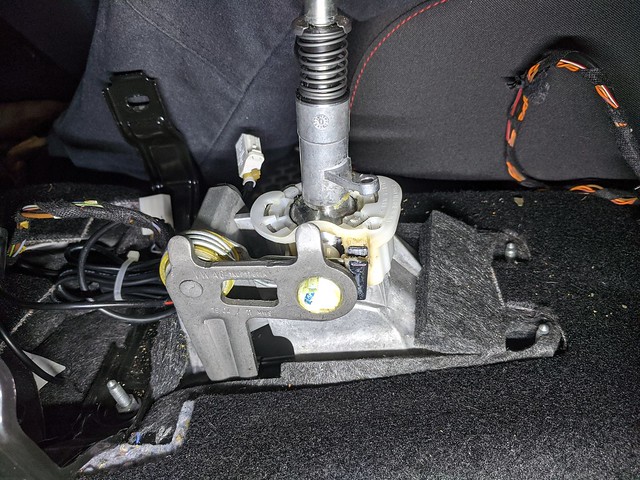
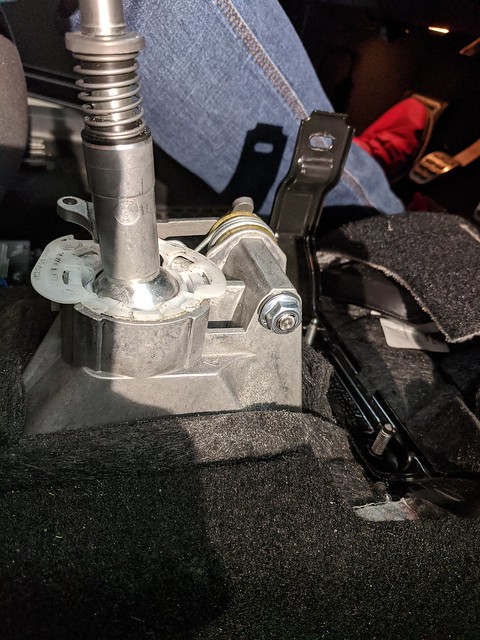
The Super Pin replaces the OEM pivot pin for the side to side bellcrank. This steel pin is riveted in place from the factory and uses a plastic bushing. As you can see from the video below, there is significant play when the shifter is moved side to side.

Click for video showing slop in OEM setup:
https://flic.kr/p/2iKDqaP
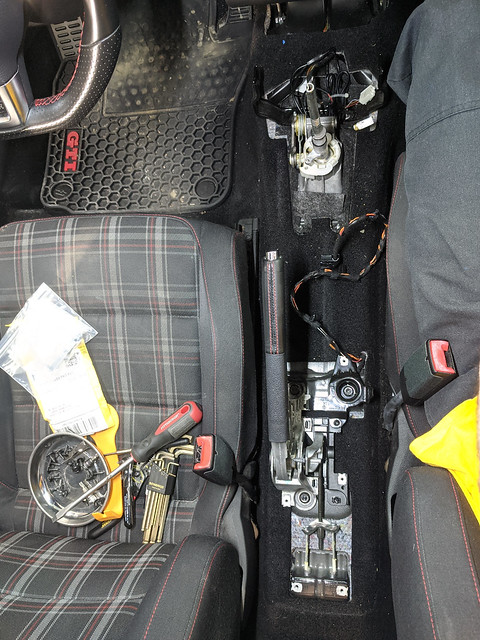
The entire center console and armrest assembly must be removed to provide the necessary access. Once that is done, use the Dieselgeek included drill guide to drill perfectly in the center of the rivet head. This drill guide is glued to the bellcrank with JB weld. After you begin drilling with a 5/16" or 8mm drill bit you knock the drill guide off with a hammer and continue drilling carefully until the head of the rivet is removed. The pin can then be knocked out the right side with a hammer and punch. I found it helpful to drill slightly into the pin using a 1/4" bit to relieve pressure from the bellcrank.


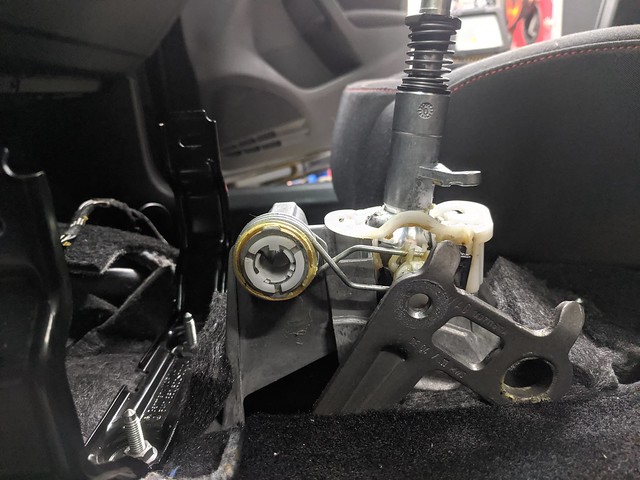
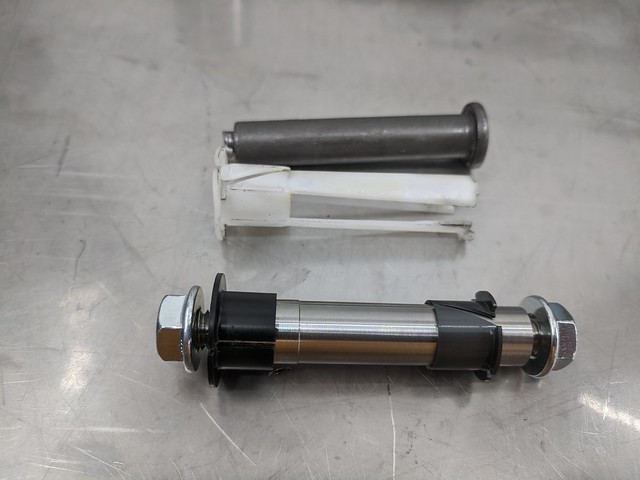
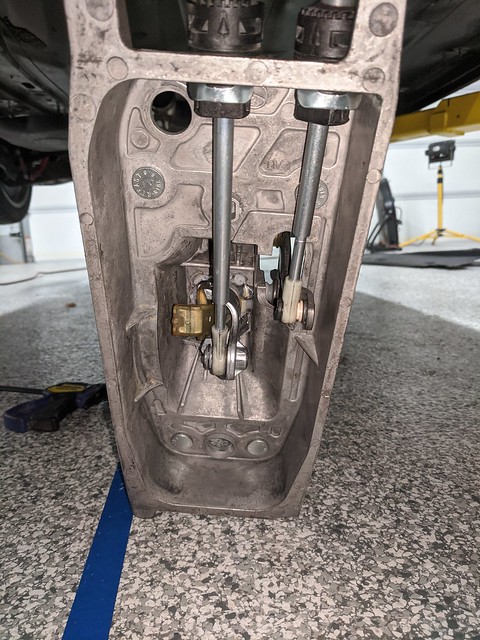
The side to side bellcrank is now held into the car only by the connection to the shifter cable. Drill the 7mm hole out with a 5/16" or 8mm drill bit. Now clean out the bore of the shift assembly and check for any debris or burrs. Place the black Super Pin bushing into the right side of the shift assembly. Slide the Super Pin into the shift assembly from the left. Push the grey Super Pin bushing into place in the left side of the shift assembly. This assembly will fit one way only so there is no way to assembly it incorrectly.

Place the bellcrank onto the threaded portion of the Super Pin and snug up the flange nuts to either side of the Super Pin. Tighten these slowly and make sure they are not so tight that they prevent the shift knob from returning to center when moved side to side in neutral. When you move the shift knob side to side you should be able to see the flange nuts turning with the Super Pin.

Click for video of Super pin in action:
https://flic.kr/p/2iLefMB
Conclusion
Install is complete! I had one small issue with my Super Pin install. The right side of the Super Pin was very tight in the shift assembly, so much that it would not rotate freely. I used some fine sandpaper rolled up to lightly sand inside the right side of the bore in the aluminum shift assembly. I did this a few times while test fitting in between. I wound up with a nice fit after only a few light sanding passes.
I have nothing but positive things to say about Jim at Dieselgeek. I'm very thankful he worked to get this product developed and ready for sale and for the helpful information he provided during install. The Super Pin really cleaned up my shift action and now that I've installed all of Dieselgeek's products I'm ready to call my shifter upgrades complete. Full list below:
- New Dieselgeek Super Pin
- Dieselgeek First Gear Getter
- Dieselgeek Cable Saver Replacement Cable End Bushings
- New OEM shifter bearing "cup" (VW p/n 1K0-711-699-A)
EDIT: Jim has posted two videos that do a great job describing the install process and cover a lot of information that I cover in this post.
Dieselgeek Super Pin Install
The Super Pin replaces the OEM pivot pin for the side to side bellcrank. This steel pin is riveted in place from the factory and uses a plastic bushing. As you can see from the video below, there is significant play when the shifter is moved side to side.
Click for video showing slop in OEM setup:
https://flic.kr/p/2iKDqaP
The entire center console and armrest assembly must be removed to provide the necessary access. Once that is done, use the Dieselgeek included drill guide to drill perfectly in the center of the rivet head. This drill guide is glued to the bellcrank with JB weld. After you begin drilling with a 5/16" or 8mm drill bit you knock the drill guide off with a hammer and continue drilling carefully until the head of the rivet is removed. The pin can then be knocked out the right side with a hammer and punch. I found it helpful to drill slightly into the pin using a 1/4" bit to relieve pressure from the bellcrank.
The side to side bellcrank is now held into the car only by the connection to the shifter cable. Drill the 7mm hole out with a 5/16" or 8mm drill bit. Now clean out the bore of the shift assembly and check for any debris or burrs. Place the black Super Pin bushing into the right side of the shift assembly. Slide the Super Pin into the shift assembly from the left. Push the grey Super Pin bushing into place in the left side of the shift assembly. This assembly will fit one way only so there is no way to assembly it incorrectly.
Place the bellcrank onto the threaded portion of the Super Pin and snug up the flange nuts to either side of the Super Pin. Tighten these slowly and make sure they are not so tight that they prevent the shift knob from returning to center when moved side to side in neutral. When you move the shift knob side to side you should be able to see the flange nuts turning with the Super Pin.
Click for video of Super pin in action:
https://flic.kr/p/2iLefMB
Conclusion
Install is complete! I had one small issue with my Super Pin install. The right side of the Super Pin was very tight in the shift assembly, so much that it would not rotate freely. I used some fine sandpaper rolled up to lightly sand inside the right side of the bore in the aluminum shift assembly. I did this a few times while test fitting in between. I wound up with a nice fit after only a few light sanding passes.
I have nothing but positive things to say about Jim at Dieselgeek. I'm very thankful he worked to get this product developed and ready for sale and for the helpful information he provided during install. The Super Pin really cleaned up my shift action and now that I've installed all of Dieselgeek's products I'm ready to call my shifter upgrades complete. Full list below:
- Dieselgeek Sigma 6 Short Shifter
- Dieselgeek Upgraded Shifter Shaft Bushing Kit
- Dieselgeek Super Pin
- Dieselgeek First Gear Getter
- Dieselgeek Cable Saver Replacement Cable End Bushing Set
- Shimmed shifter ball per Dieselgeek
- CTS Billet Shifter Bracket Bushings
- ECS Billet/Leather Shift Knob
Last edited:
uglybastard
Autocross Champion
damn fine writeup sir


YaMoBeThere
Passed Driver's Ed
Nice writeup Tony, I just ordered my Superpin yesterday, any advice or resources on removing the dash? You think it's worthwhile to try to address a leaky heater core at the same time?
Tony48
Go Kart Champion
Nice, good luck with install! And also hello fellow DC metro area citizen! Center console needs to be removed, not the dash. There aren't many good resources for removing the center console where the picture links are not broken/old. Perhaps look up euro cupholder installs? It's the same process to get the center console out.Nice writeup Tony, I just ordered my Superpin yesterday, any advice or resources on removing the dash? You think it's worthwhile to try to address a leaky heater core at the same time?
Unfortunately I think there's hardly any overlap work between this and getting to the heater core.
Grabbit
Go Kart Champion
To the OP regarding the broken exh. manifold stud. How did you ground your welder when you welded on the bolt to get it out? I have the same issue except the passenger side stud broke off in the head. Trying to drill a hole for an easy out has made mine worse. I'm really hoping i can weld a trimmed down bolt in there without removing the head.
Tony48
Go Kart Champion
Man, I feel for you. Best of luck. I grounded the welder straight to the head. Found somewhere convenient to clip on at the front of the engine.To the OP regarding the broken exh. manifold stud. How did you ground your welder when you welded on the bolt to get it out? I have the same issue except the passenger side stud broke off in the head. Trying to drill a hole for an easy out has made mine worse. I'm really hoping i can weld a trimmed down bolt in there without removing the head.
Tony48
Go Kart Champion
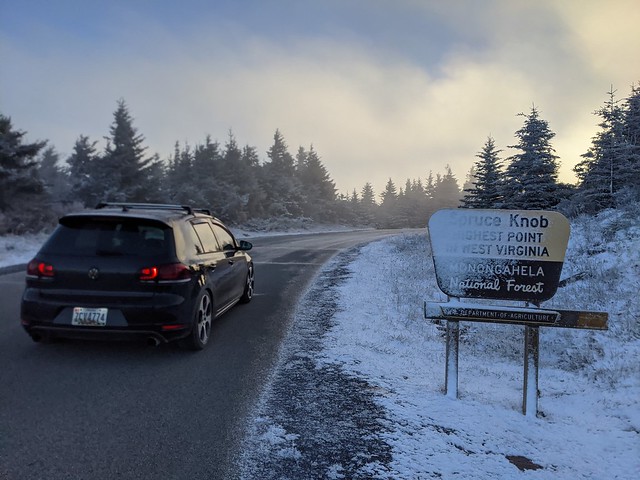
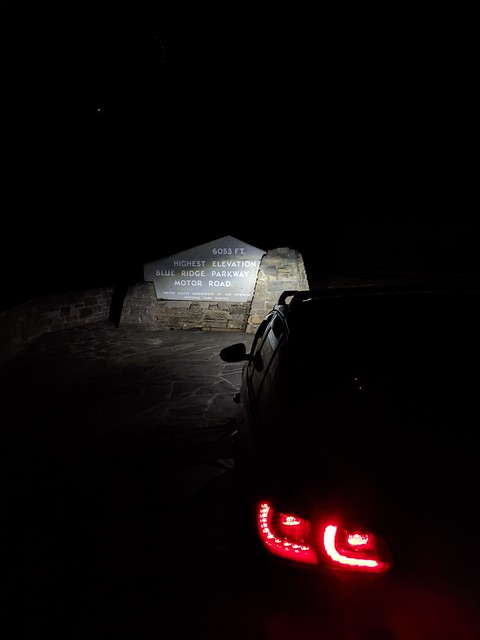
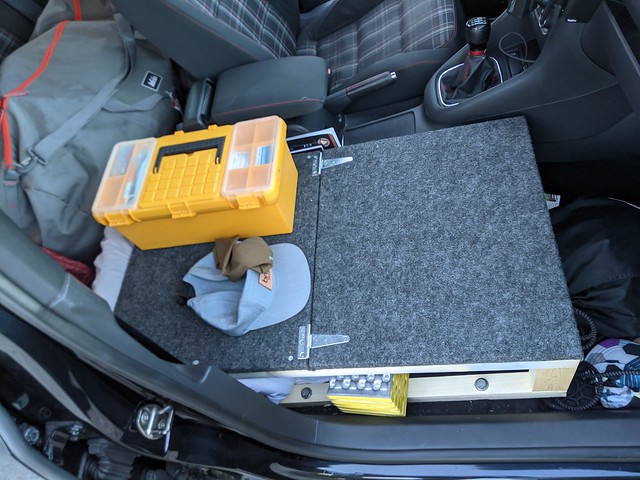
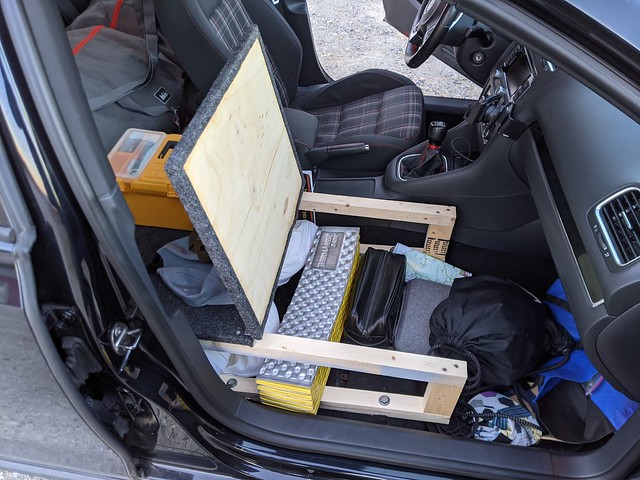
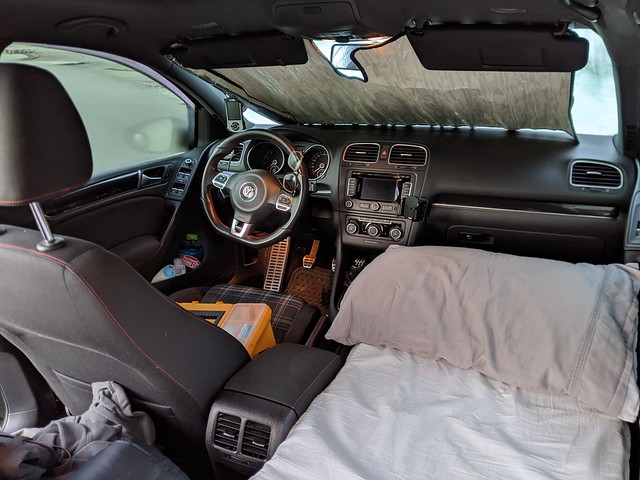
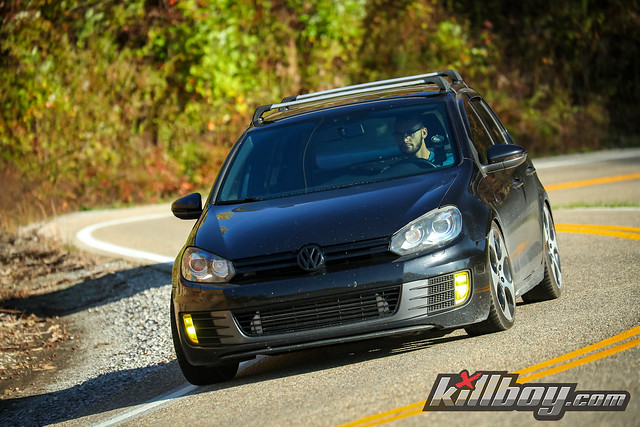
What's up guys! Been a couple months since I've been on the forum. I quit my job and had a few weeks before starting a new job so I took a solo road trip through the Southern Appalachians. Maryland, Virginia, West Virginia, North Carolina, Tennessee, South Carolina, Georgia, Shenandoah National Park, Great Smokies National Park, Blue Ridge Parkway, and countless other parks in 8 days.
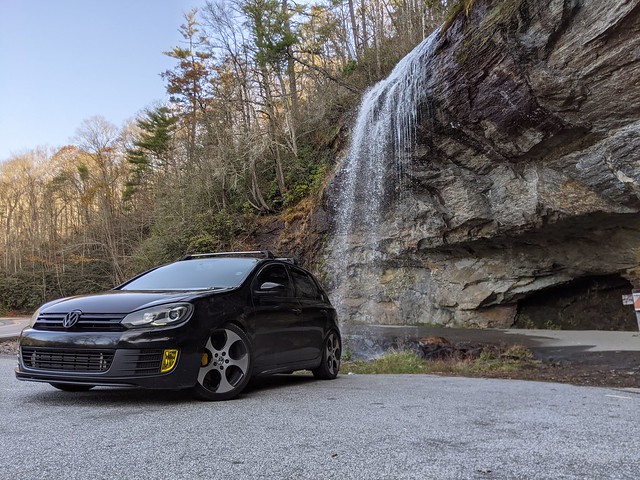
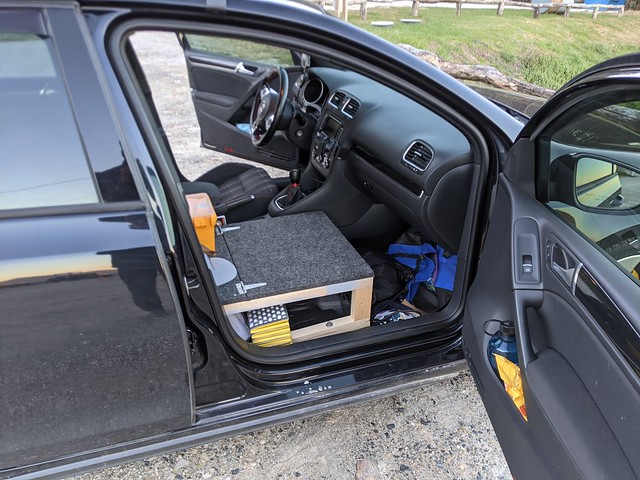
I took out the passenger's seat and made a platform to bolt in it's place. Spent almost every night of the road trip in the car. Drove the Tail of the Dragon, a ton of other great roads, did lots of hiking and craft beer drinking, drove up mountain switchbacks on snowy gravel roads in the dark, all kinds of crazy stuff. Ended up being 1800+ miles and 46hrs of driving. Big shout out to @Cole2999 for the road trip inspiration.
Here's a link to the full photo album on flickr and some selected photos below. I posted a bunch on instagram too if you want to check me out there @tony.grz.
 PXL_20201030_184719833 by Tony G, on Flickr
 PXL_20201030_194702253 by Tony G, on Flickr
 PXL_20201031_121619380 by Tony G, on Flickr
 PXL_20201102_102448564 by Tony G, on Flickr
 PXL_20201103_140825145 by Tony G, on Flickr
 PXL_20201104_191306155.MP by Tony G, on Flickr
 PXL_20201104_221048575 by Tony G, on Flickr
 PXL_20201104_221055330 by Tony G, on Flickr
 PXL_20201104_221106290 by Tony G, on Flickr
 PXL_20201104_221239859 by Tony G, on Flickr
 PXL_20201105_120349109 by Tony G, on Flickr
 PXL_20201030_214320262 by Tony G, on Flickr
 PXL_20201105_120200609 by Tony G, on Flickr
 3133127 by Tony G, on Flickr
I took out the passenger's seat and made a platform to bolt in it's place. Spent almost every night of the road trip in the car. Drove the Tail of the Dragon, a ton of other great roads, did lots of hiking and craft beer drinking, drove up mountain switchbacks on snowy gravel roads in the dark, all kinds of crazy stuff. Ended up being 1800+ miles and 46hrs of driving. Big shout out to @Cole2999 for the road trip inspiration.
Here's a link to the full photo album on flickr and some selected photos below. I posted a bunch on instagram too if you want to check me out there @tony.grz.
PXL_20201030_184719833 by Tony G, on Flickr
PXL_20201030_194702253 by Tony G, on Flickr
PXL_20201031_121619380 by Tony G, on Flickr
PXL_20201102_102448564 by Tony G, on Flickr
PXL_20201103_140825145 by Tony G, on Flickr
PXL_20201104_191306155.MP by Tony G, on Flickr
PXL_20201104_221048575 by Tony G, on Flickr
PXL_20201104_221055330 by Tony G, on Flickr
PXL_20201104_221106290 by Tony G, on Flickr
PXL_20201104_221239859 by Tony G, on Flickr
PXL_20201105_120349109 by Tony G, on Flickr
PXL_20201030_214320262 by Tony G, on Flickr
PXL_20201105_120200609 by Tony G, on Flickr
3133127 by Tony G, on FlickrTony48
Go Kart Champion
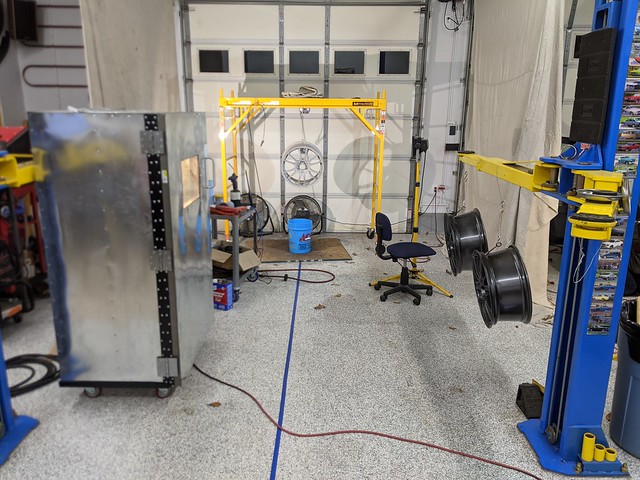
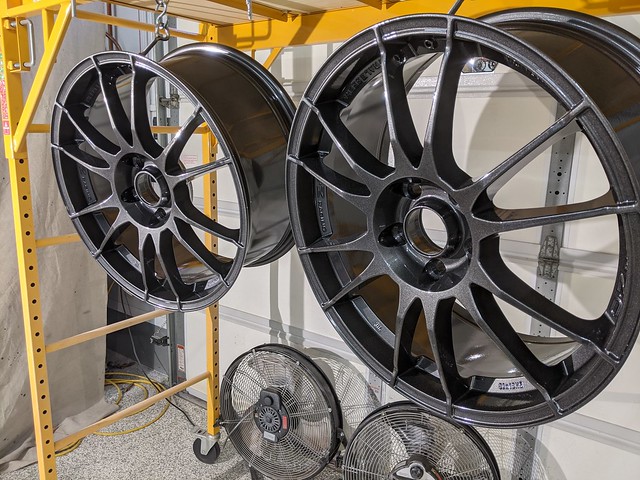
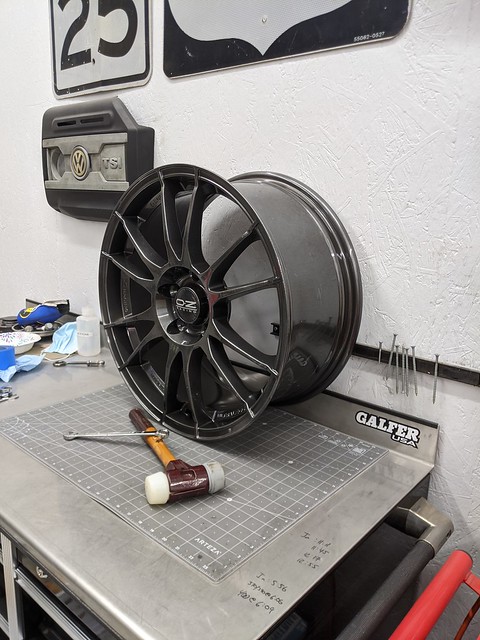
Oh, and I almost forgot -- I finally had the time to powder coat my OZ Ultraleggera's! I think they look great and it's awesome to have a full powder coat setup in the garage now. The wheels are up on the shelf in storage for the winter. In the spring I'll buy my first set of summer tires and get them mounted up!
 PXL_20201115_230411220 by Tony G, on Flickr
 PXL_20201116_182607574 by Tony G, on Flickr
 PXL_20201116_183522089 by Tony G, on Flickr
 PXL_20201116_185113761 by Tony G, on Flickr
 PXL_20201116_185239568 by Tony G, on Flickr
 PXL_20201116_182328494 by Tony G, on Flickr
PXL_20201115_230411220 by Tony G, on Flickr
PXL_20201116_182607574 by Tony G, on Flickr
PXL_20201116_183522089 by Tony G, on Flickr
PXL_20201116_185113761 by Tony G, on Flickr
PXL_20201116_185239568 by Tony G, on Flickr
PXL_20201116_182328494 by Tony G, on FlickrMrFancypants
Autocross Champion
I got up to the Dragon a couple of weeks ago. The weather has been good this year.
Tony48
Go Kart Champion
Haha thanks! It was mostly inspired by Cole2999 who took his front seat out for road trip storage space. I whipped the platform up the morning before I left with stuff I had lying around the garage. Turns out some old subframe bolts (I think that's what they were) that I had lying around were the right size for the seat rail mounts! And I had just enough color matched carpet left over from my sound system install.Dude, that camping mod looks straight out of a Top Gear special!! LOL")
Do it! Taking some extended time did wonders for my mental health and outlook on life! And thank you!Your road trip looks like it was SUCH a blast!! I need some extended time off myself to pull something like this off. Congrats on the new job!
Nice! There were probably very few people making passes. Hope you had a great time!I got up to the Dragon a couple of weeks ago. The weather has been good this year.
MrFancypants
Autocross Champion
Nice! There were probably very few people making passes. Hope you had a great time!
Definitely a lot fewer people than if I had gone mid September. I could manage most of a run without getting stuck behind traffic. If I'm able to and weather cooperates it'd be great to get up there sometime between now and April before it starts to warm up again.