grambles423
Automotive Engineer
If you have been following my build thread lately, most of you know that I got the Airbag light followed by the electrical death of all electronics in my steering wheel. Later I found that my clock spring was the ultimate cause.
The clock spring is what converts the electrical connection to a electro mechanical unit that allows the connections to be maintained as the wheel is turning. This unit has been known to fail rapidly amongst various MKVs and some MKVI's. Hopefully the new design is far more robust.
Tools Needed
Removing The Steering Wheel
The clock spring is what converts the electrical connection to a electro mechanical unit that allows the connections to be maintained as the wheel is turning. This unit has been known to fail rapidly amongst various MKVs and some MKVI's. Hopefully the new design is far more robust.
Tools Needed
- Small Screwdriver
- Medium Sized Screwdriver
- M12 Triple Square (XZN)
- Torque Wrench
- Rachet
- T25 Torx
- T8 Torx
- 10mm Socket
- Patience
Removing The Steering Wheel
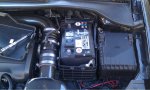
- First, Unhook the battery. Since you dont want the air bag deploying in your face, this step is a definite necessity for safety. Start with the Negative terminal first then followed by the Positive
- Wait about 10-20minutes to ensure all capacitors and electronics have been de-energized. Normally you should be able to go straight to it, but this step is more of a precautionary measure.
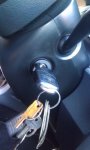
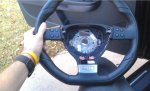
- Place Key in the ignition. This will prevent the steering wheel from locking up
- Turn the Wheel 90* in either direction
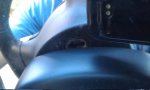
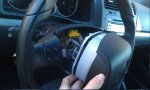
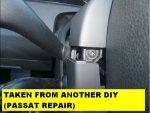
- You can see from this picture that there is a metal spring you must push down on to release the aig bag unit. Using a mirror, you can easily take a screwdriver and pop it downward towards the column.
- Turn wheel 180* the other way and repeat for the other side
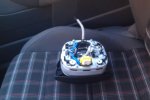
- Once the Air bag unit is loose, pull it straight outand be mindful of the electrical connections.
- Disconnect the black connector. Should be easy enough to do by hand
- Disconnect the air bag igniter connector. There is a white tab that you must pull up on to remove it. I place a flathead behind it to get some leverage to pull up on it.
- Place unit to the side
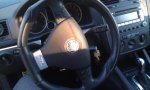
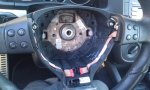
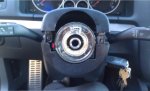
- Now, take note of the general surroundings.
- Using a M12 Triple Square remove the center bolt
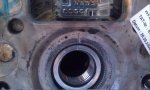
- Take note of the markings for steering wheel alignment.
- Remove Steering Wheel and place out of the way
- Using a flat head pop the upper column garnish upwards. Be careful not to scratch this area.
- Now, Remove the two exposed Torx bolts. There is a Third underneath. You will have to pull down on the column adjustment handle to expose it well enough to get a tool in there.
- Remove the Lower Column garnish
- Now, take note of your surroundings.
- Unhook steering wheel module
- Remove T8 Torx that connects the clock spring to the steering wheel module
- Un do the clips that mount the clock spring and using some dexterity and light effort, remove the clock spring.
- Now reinstall new clock spring.
- Install steering wheel module connectors and T8 torx
- Install Column garnishes
- Install Steering wheel. MAKE SURE YOU HAVE PROPERLY ALIGNED THE MARKINGS!
- Torque Steering wheel bolt down to 50NM (~37.5ft-lbs)
- Install Air Bag connector and Lower Steering wheel connector ( I beleive this is for the horn)
- Push until the rear springs clip in
- DONE!
Attachments
-
 1.JPG98.7 KB · Views: 38,621
 -
 2.JPG28.2 KB · Views: 28,024
 -
 3.JPG63.4 KB · Views: 28,149
 -
 4.JPG50.1 KB · Views: 28,041
 -
 5.JPG73.4 KB · Views: 28,266
 -
 6.JPG72.7 KB · Views: 28,432
 -
 7.JPG48.3 KB · Views: 27,478
 -
 8.JPG80.3 KB · Views: 30,358
 -
 9.JPG82.4 KB · Views: 28,380
 -
 10.JPG86.7 KB · Views: 38,101
 -
 11.JPG56.3 KB · Views: 28,955
 -
 12.JPG49.5 KB · Views: 27,429
 -
 13.JPG58.8 KB · Views: 27,623

