dhockey11
Passed Driver's Ed
This is my first post. I've been lurking for a while now, but just took the first plunge into modding, and I figured I would share my efforts with the community here. Following this DIY guide <http://www.golfmk6.com/forums/showthread.php?t=31038>, I decided I wanted to do a cheapo version of the VWR/Forge style intake. I will describe how I made a fiberglass adapter, but this is really a guide on NOT HOW to DIY. My end product works very well, fits like a glove, and doesn’t look too bad, but it can be made better. Hopefully this thread will spawn discussion on how to do that, and y’all can learn from my mistakes. On to the good stuff.
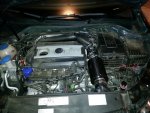
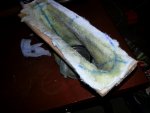
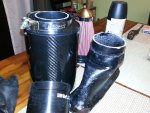
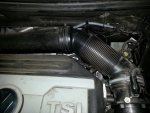
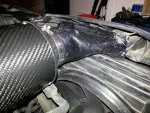
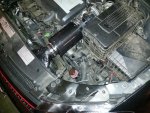
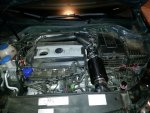
The end product here, could use some finishing detail, but it works.
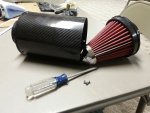
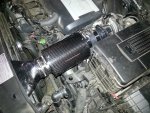
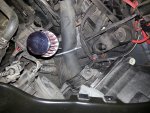
I bought this on ebay for 65$ shipped domestically. The filter says it is cleanable, but there is no replacement info. I'd bet one could make a brandname filter work as well with some effort.
Anyways, I began by removing the stock air box and creating a stencil out of some MDF or similar type material. This stencil needs to fit into the mount from the stock air box to the backside of the grill. Sorry, no pics of this location. The stencil is approximately 8" x 4" rectangular, but I trimmed it until it fit. Then I took the "mouth" of the stock air box, and marked my stencil so I could cut out the middle with a jigsaw. Make sure to leave plenty of room for the mounting tabs.
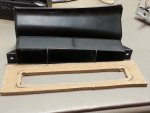
After rough cutting the hole, I used a dremel to fine tune the shape around the stock piece.
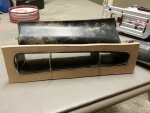
I marked about an 1/8" of an inch around the piece to allow for the fiberglass thickness, and dremmeled the excess out. This was the first thing I did wrong. Don't do this to the mounting (narrow) sides, as the screw holes will need plenty of space to fit the stock mounting hardware.
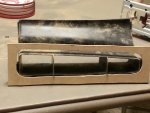
Once I was happy with the stencil, I wrapped it in packing tape to act as a mould release agent. I also wrapped the piece I was going to use to form the 3" round hole. I used some weird fan thing my filter came packed with (no idea what it is for) and a little rubber spacer that went around it. I figured that once the mould set, it would be hard to remove a rigid pipe from the inside of the hole, but I would be able to remove the metal fan piece, and then the flexible rubber bit would be much easier to get out.
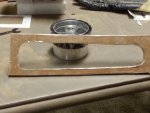
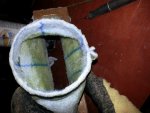
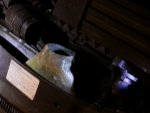
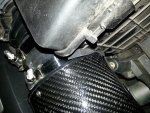
With those set, I cut up some scrap fleece and had it sewn to form a perfectly sized cone. One end was just under 3" ID, and the other end fit into my mdf stencil. I sprayed both the mdf stencil and 3" fan thingymabob with general adhesive and formed my piece. I stuck the fan bit into the small end of me fleece cone, and inserted the other end through the mdf stencil and wrapped it onto the outer surface. The key to this whole thing working is that the stencil is made of something easy to cut yet difficult to bend. Here's what it looks like at this point.
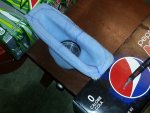
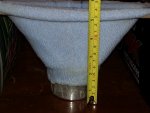
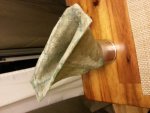
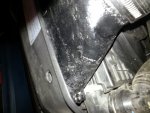
I used some pop cases to hold up the stencil and used the weight of the metal fan thingymabob to stretch the fleece and hold the whole thing in the correct position. A rigid frame would have been much much better than letting gravity do the work. From some dry fitting of my filter housing, I knew I wanted my adapter to be about 4" long, and it worked out nicely. Next step is the fiberglass.
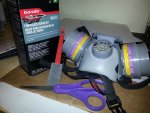
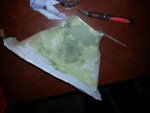
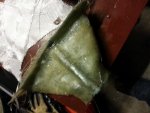
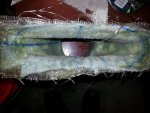
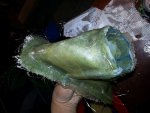
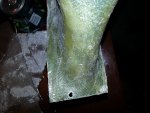
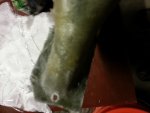
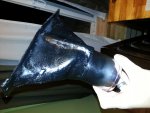
I bought a bondo repair kit from the local parts store for about $20. Make sure you have a respirator to do this next step, fiberglass resin might be nerve gas from the way it smells. Also, don't use a foam brush. It sucked. I mixed about a third of the resin and hardener in a plastic cup, and applied it to my formed fleece. I tried to cover the flange piece. and the inside as much as possible. Once I added the resin, the fleece did sag a bit, so I had to lengthen the form to almost 5". This caused problems later, but wasn't too horrible.
MORE TO COME....

The end product here, could use some finishing detail, but it works.

I bought this on ebay for 65$ shipped domestically. The filter says it is cleanable, but there is no replacement info. I'd bet one could make a brandname filter work as well with some effort.
Anyways, I began by removing the stock air box and creating a stencil out of some MDF or similar type material. This stencil needs to fit into the mount from the stock air box to the backside of the grill. Sorry, no pics of this location. The stencil is approximately 8" x 4" rectangular, but I trimmed it until it fit. Then I took the "mouth" of the stock air box, and marked my stencil so I could cut out the middle with a jigsaw. Make sure to leave plenty of room for the mounting tabs.

After rough cutting the hole, I used a dremel to fine tune the shape around the stock piece.

I marked about an 1/8" of an inch around the piece to allow for the fiberglass thickness, and dremmeled the excess out. This was the first thing I did wrong. Don't do this to the mounting (narrow) sides, as the screw holes will need plenty of space to fit the stock mounting hardware.

Once I was happy with the stencil, I wrapped it in packing tape to act as a mould release agent. I also wrapped the piece I was going to use to form the 3" round hole. I used some weird fan thing my filter came packed with (no idea what it is for) and a little rubber spacer that went around it. I figured that once the mould set, it would be hard to remove a rigid pipe from the inside of the hole, but I would be able to remove the metal fan piece, and then the flexible rubber bit would be much easier to get out.

With those set, I cut up some scrap fleece and had it sewn to form a perfectly sized cone. One end was just under 3" ID, and the other end fit into my mdf stencil. I sprayed both the mdf stencil and 3" fan thingymabob with general adhesive and formed my piece. I stuck the fan bit into the small end of me fleece cone, and inserted the other end through the mdf stencil and wrapped it onto the outer surface. The key to this whole thing working is that the stencil is made of something easy to cut yet difficult to bend. Here's what it looks like at this point.


I used some pop cases to hold up the stencil and used the weight of the metal fan thingymabob to stretch the fleece and hold the whole thing in the correct position. A rigid frame would have been much much better than letting gravity do the work. From some dry fitting of my filter housing, I knew I wanted my adapter to be about 4" long, and it worked out nicely. Next step is the fiberglass.

I bought a bondo repair kit from the local parts store for about $20. Make sure you have a respirator to do this next step, fiberglass resin might be nerve gas from the way it smells. Also, don't use a foam brush. It sucked. I mixed about a third of the resin and hardener in a plastic cup, and applied it to my formed fleece. I tried to cover the flange piece. and the inside as much as possible. Once I added the resin, the fleece did sag a bit, so I had to lengthen the form to almost 5". This caused problems later, but wasn't too horrible.
MORE TO COME....
