jbcritch
Go Kart Champion
DIY for 2011 GTI and the Gentex Auto-Dimming Mirror with Homelink Install – (took me 1 hour due to a little exploring in headliner. Really a 30 to 45 minute job).
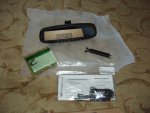
I installed the Mito/Gentex GENK41 mirror which I purchased from www.brandnewauto.com
Here’s the link to the mirror I bought: http://www.brandnewauto.com/AUTO-DIMMING-MIRRORS/GENTEX/GENTEX-AUTO-DIMMING-MIRROR-p8051612.html
Use the coupon code 5OFF to get 5% off your order. My cost for the mirror and VW adapter kit shipped to me was $170.04 including shipping.
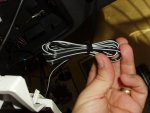
For this install it is important to ensure that you receive the “simple” install kit. This kit includes one wire with two hot plugs and a ground. There are no in-line fuses as some of the install kits have. You also need the “long” wire cover, not the short one. My kit came with the long wire cover at no extra charge.
Kit contents:

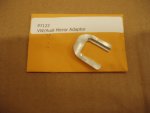
And purchased the available VW adapter kit, Pt. # 50-P7122 from them too: http://www.brandnewauto.com/Shop/Control/fp/SFV/31932/view_page/VWadapter

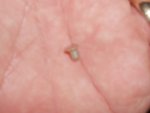
It comes with an allen screw and small brass insert:

I did not disconnect the battery during any of this process. I just made sure the doors were closed during the install (as if that might do any good). You may want to disconnect the battery.
Obligatory disclaimer: I am not responsible for damage to your GTI if you choose to follow this install. It worked for me. Attempt at your own risk.
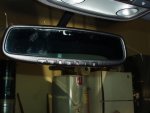
First things first, here’s the mirror you will be removing. Say goodbye:

Tilt it downward and pop it off the stem holding it to the windshield. Its OK to use a bit of force. It’s not held on that strongly.
The back of the mirror looks like this, so you know what you’re dealing with:

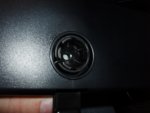
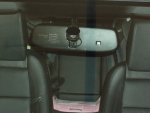
Here’s what you are left with on the windshield:

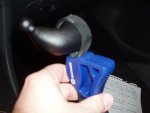
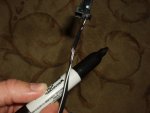
To remove the mirror stem I used a strap wrench:

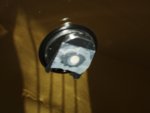
You can go either clockwise or counterclockwise to remove it. It does not matter. I went counterclockwise. ¼ turn and it will pop right off, leaving you with the mirror button:

This is what you will mount the new mirror to using the VW adaptor. I painted the horseshoe shaped piece black:

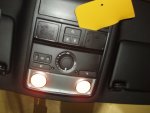
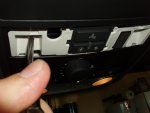
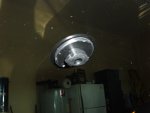
Once you have the mirror out of your way its time to go exploring for power in the headliner. Map lights seem the obvious place, so pop off the speaker looking covers with a credit card or, as I used, a plastic bondo repair tool:

It will release rather easily with very little force. Once it is loose, simiply fold it towards the mirror and it will hang on a hinge of sorts. Once hinged downward, simply pull the speaker looking cover off.
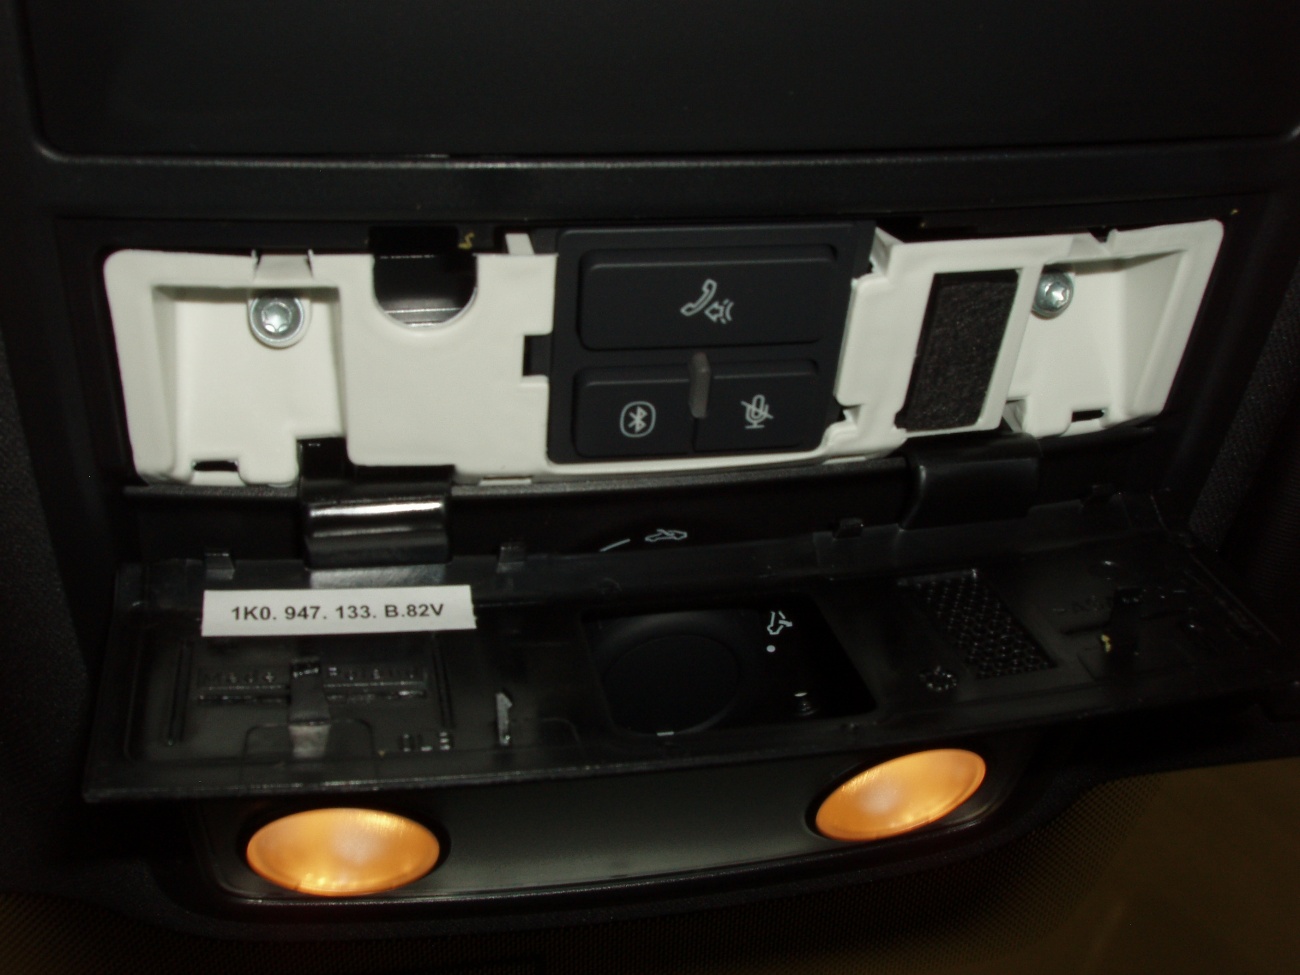
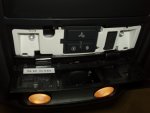
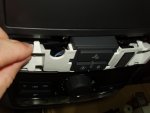
Next are two T-20 torx screws holding in the entire unit.

Remove these fully and then apply a small amount of pressure to release the two front clips on the unit:

Once these release you will be able to swing the unit down, out and off:

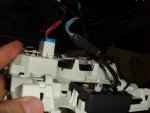
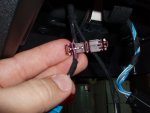
You will see a lot of wires connected by quick connects. The blue bundle is the one you want. The quick connect releases by a small tab in the center of the bundle:

The instructions require both hot and switched power wire. However, the map lights in the GTI gain power once a door is opened and retain their power for at least 15 minutes after the engine is shut off. The Homelink unit does not loose its memory, so there is no need for constant power to the Homelink unit. I chose to power both wires with the switched map light wires.
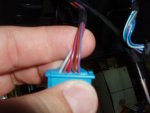
The wire you want is the first/last wire in the blue quick connect. It is red with a blue stripe:

Gentex includes two forms of clip-on wire connectors for wiring the mirror. Red and blue. Use the red ones and not the blue connectors for these connections. Clip both red wire connectors to the switched map light wire. It will look like this:

The wiring harness is made up of all black wires, but one of them has a white stripe. I didn’t want to see the white stripe once the unit was installed so I simply colored it in with a sharpie. Looks great and you cant tell it was just colored in:

You could shrink wrap them too, but this was free, available and easy.
Once the clip-on wire connectors are installed it is time to feed the wires. I attempted to use a coat hanger, but that didn’t work. Instead I simply used a screwdriver to pry down the headliner and shoved the wires one at a time into the head liner. I used a hemostat to grasp them and pull them to me.
Time to find a spot for the ground. You can either tap a new screw into the metal, or do what I did and use one of the two torx screws that hold the entire map light unit to the metal frame for the ground:

I used a dremmel to grind down the paint on the screw first to ensure a good connection. Once you have the ground in place, connect the two other wires. It does not matter which goes to which since they are both (in this instance) connected to the blue/red switched power wire.
Test to ensure the mirror is receiving power. The green light will glow (I was thinking of a way to change the green to red, but oddly enough, the same LED glows red when the buttons are pressed/activated, so I left it green).
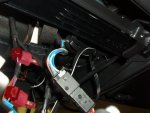
If OK, go ahead and zip tie the wires together with one of the included zip ties:

And shove the bundle into one of the spaces in the headliner:

Now put the map light console back together in reverse.
Hang the painted horseshoe adaptor on the existing mirror base:

Next, tape the brass insert into the hole in the existing mirror base:

Replace the torx screw (it has a pointed end) that comes already installed on the Gentex mirror:
with the allen screw (it has a flat end) provided in the VW adapter kit. Slide the mirror over the button adapter and tighten the allen screw, hook up the power, and slide on the wire cover.


Your Done!
PM me if you need more pics or have questions!
I installed the Mito/Gentex GENK41 mirror which I purchased from www.brandnewauto.com
Here’s the link to the mirror I bought: http://www.brandnewauto.com/AUTO-DIMMING-MIRRORS/GENTEX/GENTEX-AUTO-DIMMING-MIRROR-p8051612.html
Use the coupon code 5OFF to get 5% off your order. My cost for the mirror and VW adapter kit shipped to me was $170.04 including shipping.
For this install it is important to ensure that you receive the “simple” install kit. This kit includes one wire with two hot plugs and a ground. There are no in-line fuses as some of the install kits have. You also need the “long” wire cover, not the short one. My kit came with the long wire cover at no extra charge.
Kit contents:
And purchased the available VW adapter kit, Pt. # 50-P7122 from them too: http://www.brandnewauto.com/Shop/Control/fp/SFV/31932/view_page/VWadapter
It comes with an allen screw and small brass insert:
I did not disconnect the battery during any of this process. I just made sure the doors were closed during the install (as if that might do any good). You may want to disconnect the battery.
Obligatory disclaimer: I am not responsible for damage to your GTI if you choose to follow this install. It worked for me. Attempt at your own risk.
First things first, here’s the mirror you will be removing. Say goodbye:
Tilt it downward and pop it off the stem holding it to the windshield. Its OK to use a bit of force. It’s not held on that strongly.
The back of the mirror looks like this, so you know what you’re dealing with:
Here’s what you are left with on the windshield:
To remove the mirror stem I used a strap wrench:
You can go either clockwise or counterclockwise to remove it. It does not matter. I went counterclockwise. ¼ turn and it will pop right off, leaving you with the mirror button:
This is what you will mount the new mirror to using the VW adaptor. I painted the horseshoe shaped piece black:
Once you have the mirror out of your way its time to go exploring for power in the headliner. Map lights seem the obvious place, so pop off the speaker looking covers with a credit card or, as I used, a plastic bondo repair tool:
It will release rather easily with very little force. Once it is loose, simiply fold it towards the mirror and it will hang on a hinge of sorts. Once hinged downward, simply pull the speaker looking cover off.
Next are two T-20 torx screws holding in the entire unit.
Remove these fully and then apply a small amount of pressure to release the two front clips on the unit:
Once these release you will be able to swing the unit down, out and off:
You will see a lot of wires connected by quick connects. The blue bundle is the one you want. The quick connect releases by a small tab in the center of the bundle:
The instructions require both hot and switched power wire. However, the map lights in the GTI gain power once a door is opened and retain their power for at least 15 minutes after the engine is shut off. The Homelink unit does not loose its memory, so there is no need for constant power to the Homelink unit. I chose to power both wires with the switched map light wires.
The wire you want is the first/last wire in the blue quick connect. It is red with a blue stripe:
Gentex includes two forms of clip-on wire connectors for wiring the mirror. Red and blue. Use the red ones and not the blue connectors for these connections. Clip both red wire connectors to the switched map light wire. It will look like this:
The wiring harness is made up of all black wires, but one of them has a white stripe. I didn’t want to see the white stripe once the unit was installed so I simply colored it in with a sharpie. Looks great and you cant tell it was just colored in:
You could shrink wrap them too, but this was free, available and easy.
Once the clip-on wire connectors are installed it is time to feed the wires. I attempted to use a coat hanger, but that didn’t work. Instead I simply used a screwdriver to pry down the headliner and shoved the wires one at a time into the head liner. I used a hemostat to grasp them and pull them to me.
Time to find a spot for the ground. You can either tap a new screw into the metal, or do what I did and use one of the two torx screws that hold the entire map light unit to the metal frame for the ground:
I used a dremmel to grind down the paint on the screw first to ensure a good connection. Once you have the ground in place, connect the two other wires. It does not matter which goes to which since they are both (in this instance) connected to the blue/red switched power wire.
Test to ensure the mirror is receiving power. The green light will glow (I was thinking of a way to change the green to red, but oddly enough, the same LED glows red when the buttons are pressed/activated, so I left it green).
If OK, go ahead and zip tie the wires together with one of the included zip ties:
And shove the bundle into one of the spaces in the headliner:
Now put the map light console back together in reverse.
Hang the painted horseshoe adaptor on the existing mirror base:
Next, tape the brass insert into the hole in the existing mirror base:
Replace the torx screw (it has a pointed end) that comes already installed on the Gentex mirror:
with the allen screw (it has a flat end) provided in the VW adapter kit. Slide the mirror over the button adapter and tighten the allen screw, hook up the power, and slide on the wire cover.
Your Done!
PM me if you need more pics or have questions!
Attachments
-
 Gentex Mirror with Homelink Install 005.jpg396.8 KB · Views: 41,008
 -
 Gentex Mirror with Homelink Install 009.jpg319.4 KB · Views: 37,740
 -
 Gentex Mirror with Homelink Install 012.jpg297.2 KB · Views: 38,180
 -
 Gentex Mirror with Homelink Install 014.jpg240.5 KB · Views: 39,056
 -
 Gentex Mirror with Homelink Install 015.jpg240.4 KB · Views: 37,511
 -
 Gentex Mirror with Homelink Install 017.jpg347.3 KB · Views: 37,254
 -
 Gentex Mirror with Homelink Install 019.jpg237.9 KB · Views: 36,906
 -
 Gentex Mirror with Homelink Install 021.jpg236.4 KB · Views: 36,467
 -
 Gentex Mirror with Homelink Install 022.jpg248.1 KB · Views: 36,275
 -
 Gentex Mirror with Homelink Install 023.jpg237.4 KB · Views: 36,175
 -
 Gentex Mirror with Homelink Install 025.jpg238.7 KB · Views: 37,100
 -
 Gentex Mirror with Homelink Install 027.jpg234.3 KB · Views: 36,992
 -
 Gentex Mirror with Homelink Install 028.jpg259.5 KB · Views: 39,518
 -
 Gentex Mirror with Homelink Install 030.jpg380.6 KB · Views: 35,906
 -
 Gentex Mirror with Homelink Install 038.jpg280.2 KB · Views: 35,911
 -
 Gentex Mirror with Homelink Install 041.jpg285.4 KB · Views: 35,581
 -
 Gentex Mirror with Homelink Install 043.jpg335.9 KB · Views: 36,259
 -
 Gentex Mirror with Homelink Install 048.jpg215.2 KB · Views: 35,972
 -
 Gentex Mirror with Homelink Install 049.jpg193.8 KB · Views: 37,686
 -
 Gentex Mirror with Homelink Install 052.jpg216.5 KB · Views: 35,882
 -
 Gentex Mirror with Homelink Install 056.jpg343.7 KB · Views: 36,168
 -
 Gentex Mirror with Homelink Install 066.jpg384.1 KB · Views: 35,626
 -
 GTI MKVI mods 008.jpg238.7 KB · Views: 38,085
 -
 GTI MKVI mods 009.jpg394.9 KB · Views: 39,543
 -
 Gentex Mirror with Homelink Install 016.jpg234.9 KB · Views: 38,859
Last edited:
