ma-bo-
Ready to race!
I was fortunate enough to get a salesman who listened to my request to NOT drill holes in my bumper for my factory ordered GTI. I looked at several options such as the tow hook mounts, and flip up types, but decided to mount them using magnets after reading about it somewhere.
I did this about a year ago and have been asked several times to post a how-to, so here is how I did mine:
What you need:
1. Neodymium (rare earth) magnets. You NEED to use this type - regular cheap ones aren't strong enough. I used the ones from MAGCRAFT http://www.rare-earth-magnets.com/
You'll need 6 ring type, and 8 square type.
2. Nylon fasteners to mount your plates to the plate holder. The plastic needs to be cut down, that's why I went with nylon for ease of cutting. They also won't rust. You can use other fasteners, but you'll need a cutoff wheel to trim.
3. Factory mounting bracket.
4. Rear plate trim if you wish. I just purchased a plain, black trim at an auto store.
5. 2-part 5min. epoxy glue.
Sorry for the crappy photos, I wasn't paying attention to quality.
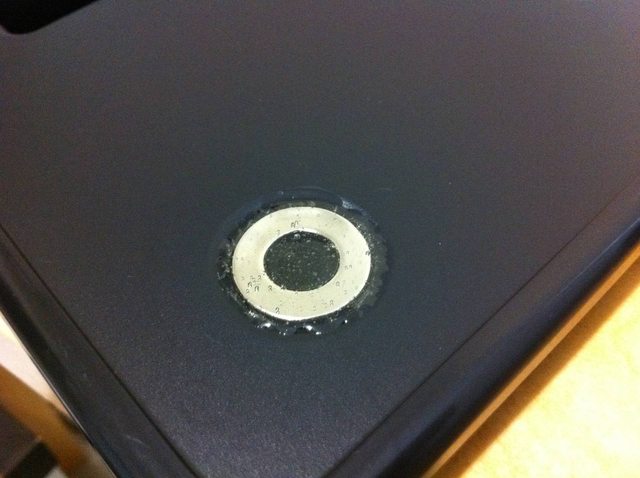
Here are the magnets I purchased. I think the rings are 1" outside diameter, .5" inside diameter. The square ones are .5" I believe. I don't remember exactly, so you'll want to measure the holes in your factory mounting bracket.

Here's the nylon fastener I used:

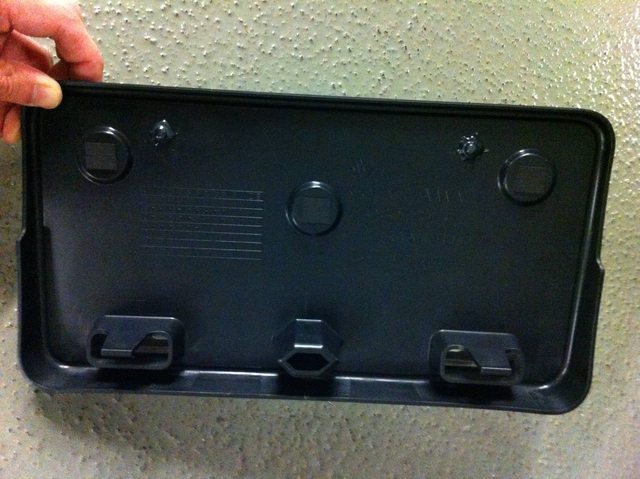
First, try placing the ring magnet in the 3 holes on your mounting bracket. You'll notice that the magnet is just slightly bigger than the round depressions in the bracket. Using an OLFA knife or something similar, shave the round depressions just enough so that the magnet fits snugly into the depressions.


When you confirm that all 3 magnets fit in the depressions, tape the screw hole from the back so no epoxy leaks out. Mix the epoxy and pour over the magnets, completely encapsulating them. Do this for all 3. Although a disc type magnet would have more holding power, I used the ring type so the epoxy could fill the center and keep the magnet in place better.
While the epoxy is setting, remove your front bumper. There are numerous threads on how to do this, so I won't go into detail here.
Once the epoxy has set, attach your plate to the mounting bracket using the nylon fasteners. I just use the top 2 plate holes.
You need to drill 2 holes into the bracket, then insert the nylon fastener. You will then realize that the fastener is too long and will hit the bumper unless you trim the plastic bolt. I had to trim the bolt down, and even cut the plastic nut it comes with in half, to be sure that it won't touch the bumper. I then screwed the nut as best as possible, then epoxied it in place to be sure it won't come loose.
Your front plate assembly is now complete. (sorry, didn't take a photo of this)
You'll want to remove the tape you used to epoxy the magnets, and attach some sort of thin foam pad to the back of the 3 depressions (or just use foam tape from the beginning instead of regular tape). This is to prevent scratches to your paint.
Clip your new plate assembly onto your bumper cover and flip the bumper over.
Place the remaining 3 ring magnets on the back side and mark the general locations.
Remove the magnets and lightly sand the 3 spots so the epoxy will adhere better to the bumper.
Place the magnets again (they will self align) and epoxy them in place. Again, completely encapsulate the magnets so they won't come off.
Once the epoxy is set, re-attach your front bumper.

Your front end is now complete.
To attach and remove your plate assembly, the 3 magnets will self-align, but there are also 2 clips that you need to reach in and unhook when removing. Study the clips before you attach the bracket and you'll know what I mean.
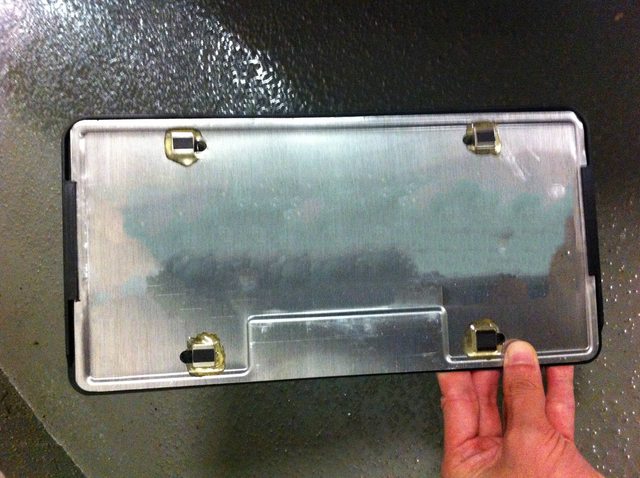
For the rear, mount your plate to the plate trim of your choice using the trimmed nylon fasteners as described above.
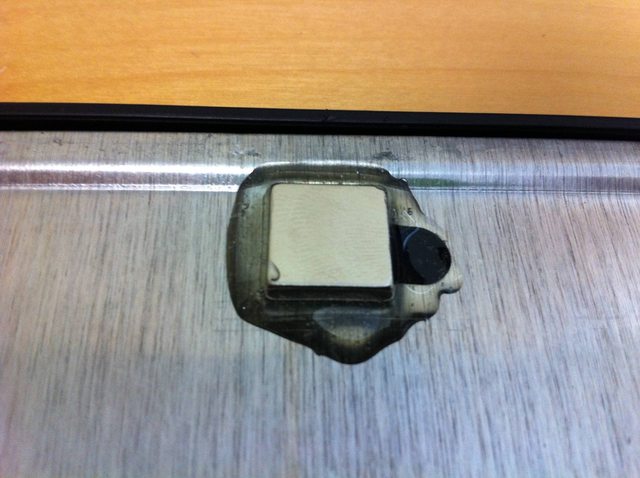
Next, epoxy the square magnets to 4 locations. It's not critical where you mount these, but I ended up attaching them directly to my plate since there was really nowhere on the trim to mount them.
You'll want to attach foam pads to these magnets as well to prevent scratching to your paint.
While the epoxy is setting, remove your rear bumper cover. Search the forum for a how-to.
With the bumper removed, center your plate on the bumper and tape it in place so it doesn't move.

Carefully flip the bumper over and place the remaining 4 magnets to mark the general locations and sand.

Replace the magnets and epoxy them in place.
Once the glue is set, remove your plate and re-attach your rear bumper.
Your rear end is now complete.
When attaching your plate, the magnets will self-align the plate.
And your hole-less bumpers are complete! It sure makes washing and detailing the car a lot easier.
*I will not take any responsibility if you screw up your install, so ask any questions and I will do my best to assist.
I did this about a year ago and have been asked several times to post a how-to, so here is how I did mine:
What you need:
1. Neodymium (rare earth) magnets. You NEED to use this type - regular cheap ones aren't strong enough. I used the ones from MAGCRAFT http://www.rare-earth-magnets.com/
You'll need 6 ring type, and 8 square type.
2. Nylon fasteners to mount your plates to the plate holder. The plastic needs to be cut down, that's why I went with nylon for ease of cutting. They also won't rust. You can use other fasteners, but you'll need a cutoff wheel to trim.
3. Factory mounting bracket.
4. Rear plate trim if you wish. I just purchased a plain, black trim at an auto store.
5. 2-part 5min. epoxy glue.
Sorry for the crappy photos, I wasn't paying attention to quality.
Here are the magnets I purchased. I think the rings are 1" outside diameter, .5" inside diameter. The square ones are .5" I believe. I don't remember exactly, so you'll want to measure the holes in your factory mounting bracket.
Here's the nylon fastener I used:
First, try placing the ring magnet in the 3 holes on your mounting bracket. You'll notice that the magnet is just slightly bigger than the round depressions in the bracket. Using an OLFA knife or something similar, shave the round depressions just enough so that the magnet fits snugly into the depressions.
When you confirm that all 3 magnets fit in the depressions, tape the screw hole from the back so no epoxy leaks out. Mix the epoxy and pour over the magnets, completely encapsulating them. Do this for all 3. Although a disc type magnet would have more holding power, I used the ring type so the epoxy could fill the center and keep the magnet in place better.
While the epoxy is setting, remove your front bumper. There are numerous threads on how to do this, so I won't go into detail here.
Once the epoxy has set, attach your plate to the mounting bracket using the nylon fasteners. I just use the top 2 plate holes.
You need to drill 2 holes into the bracket, then insert the nylon fastener. You will then realize that the fastener is too long and will hit the bumper unless you trim the plastic bolt. I had to trim the bolt down, and even cut the plastic nut it comes with in half, to be sure that it won't touch the bumper. I then screwed the nut as best as possible, then epoxied it in place to be sure it won't come loose.
Your front plate assembly is now complete. (sorry, didn't take a photo of this)
You'll want to remove the tape you used to epoxy the magnets, and attach some sort of thin foam pad to the back of the 3 depressions (or just use foam tape from the beginning instead of regular tape). This is to prevent scratches to your paint.
Clip your new plate assembly onto your bumper cover and flip the bumper over.
Place the remaining 3 ring magnets on the back side and mark the general locations.
Remove the magnets and lightly sand the 3 spots so the epoxy will adhere better to the bumper.
Place the magnets again (they will self align) and epoxy them in place. Again, completely encapsulate the magnets so they won't come off.
Once the epoxy is set, re-attach your front bumper.
Your front end is now complete.
To attach and remove your plate assembly, the 3 magnets will self-align, but there are also 2 clips that you need to reach in and unhook when removing. Study the clips before you attach the bracket and you'll know what I mean.
For the rear, mount your plate to the plate trim of your choice using the trimmed nylon fasteners as described above.
Next, epoxy the square magnets to 4 locations. It's not critical where you mount these, but I ended up attaching them directly to my plate since there was really nowhere on the trim to mount them.
You'll want to attach foam pads to these magnets as well to prevent scratching to your paint.
While the epoxy is setting, remove your rear bumper cover. Search the forum for a how-to.
With the bumper removed, center your plate on the bumper and tape it in place so it doesn't move.
Carefully flip the bumper over and place the remaining 4 magnets to mark the general locations and sand.
Replace the magnets and epoxy them in place.
Once the glue is set, remove your plate and re-attach your rear bumper.
Your rear end is now complete.
When attaching your plate, the magnets will self-align the plate.
And your hole-less bumpers are complete! It sure makes washing and detailing the car a lot easier.
*I will not take any responsibility if you screw up your install, so ask any questions and I will do my best to assist.
Last edited: