GOLFMK8
GOLFMK7
GOLFMK6
GOLFMKV

Sean's Shadow Blue GTI

smanierre

Autocross Champion
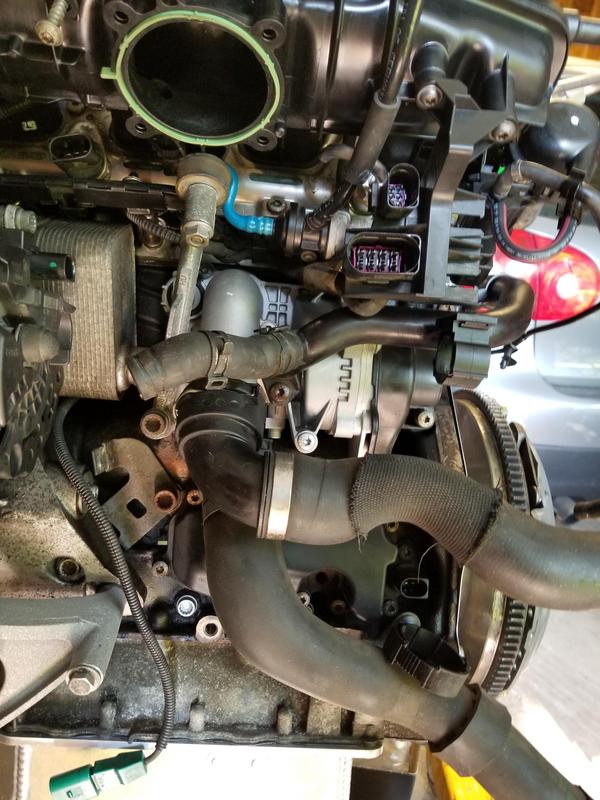
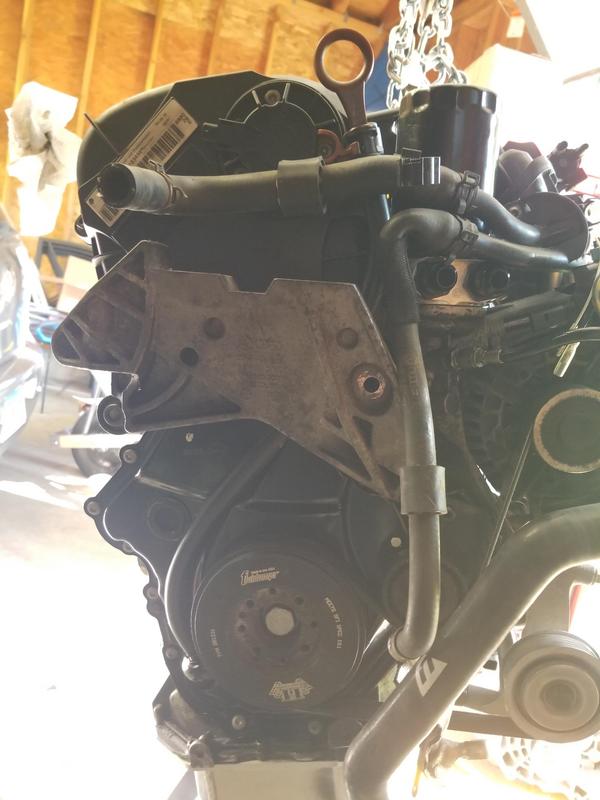
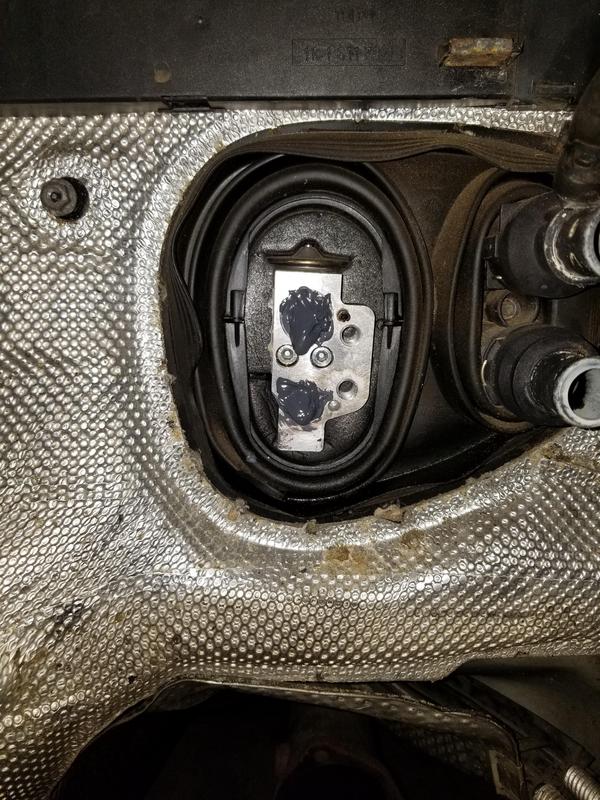
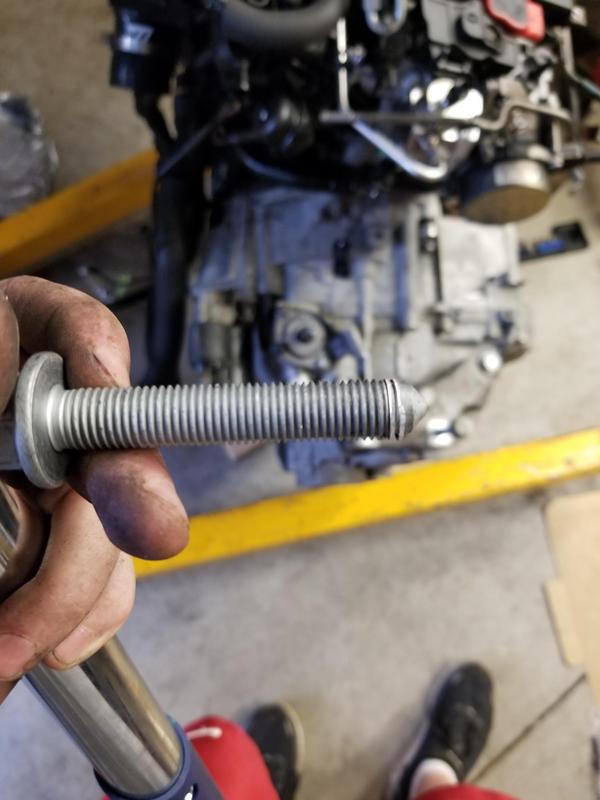
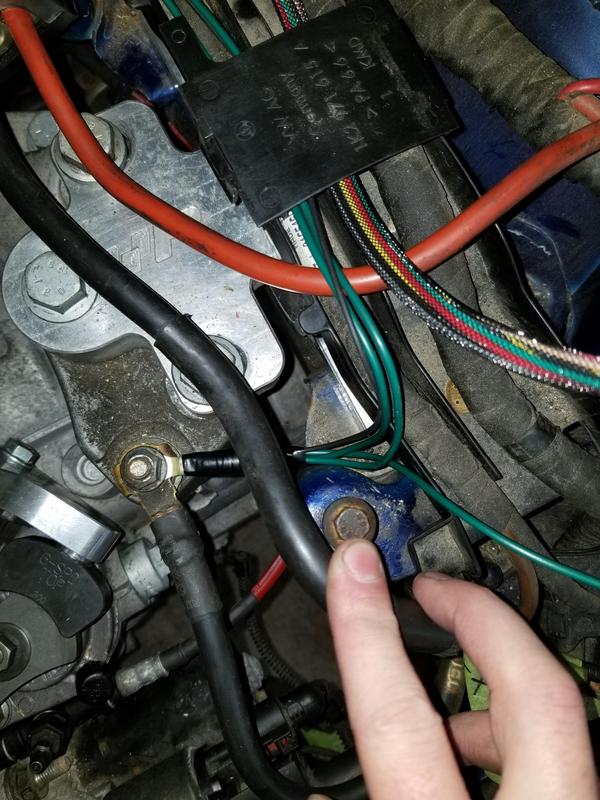
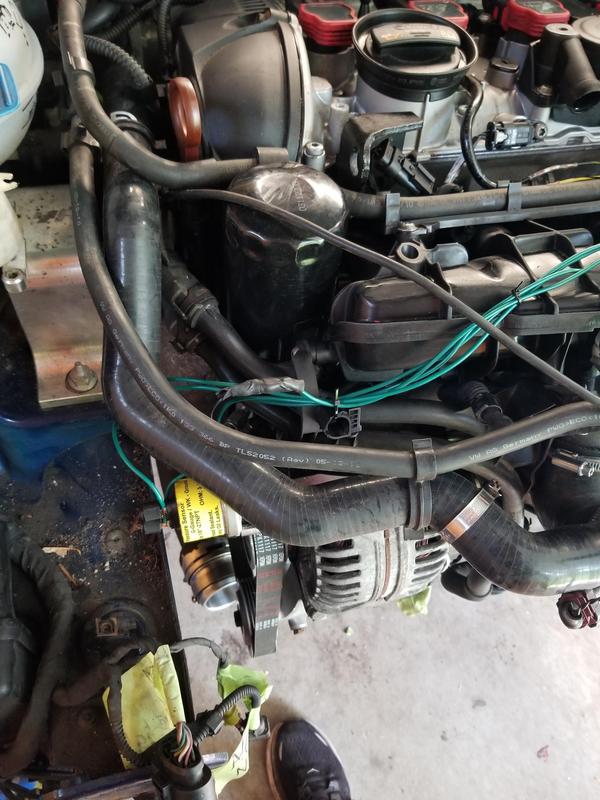
Went out to do some work on it. Got the rear main seal all cleaned up and back on. Got the sealant on and 7/8 bolts when I realized I was missing a bolt. Luckily I had one that fit that was holding my intake to the heat shield so I was able to use that instead. Woulda sucked to have to clean all the sealant off and try again once I found a bolt.


Got my flywheel back on too. Super easy since I just put the crank counterhold tool on the pulley and had it push against the ground. Now i'm trying to see if anyone has a clutch alignment tool locally before I get one online.

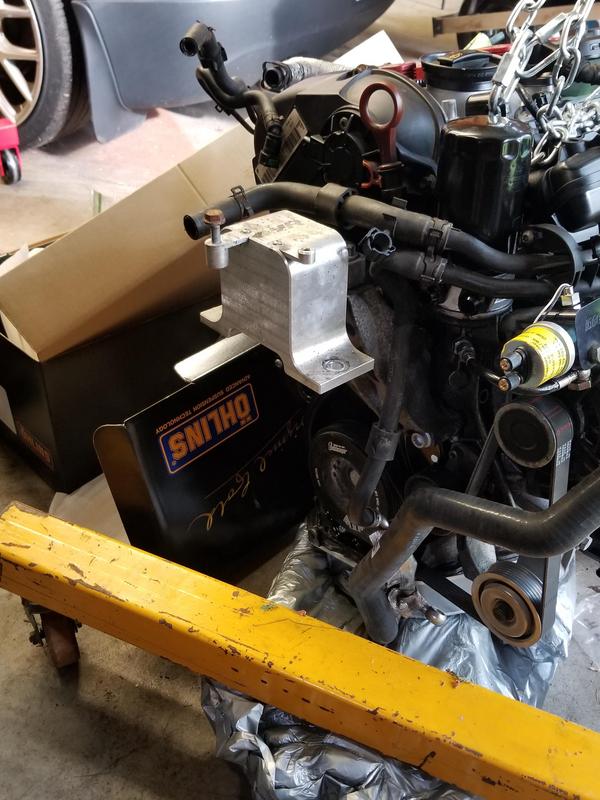
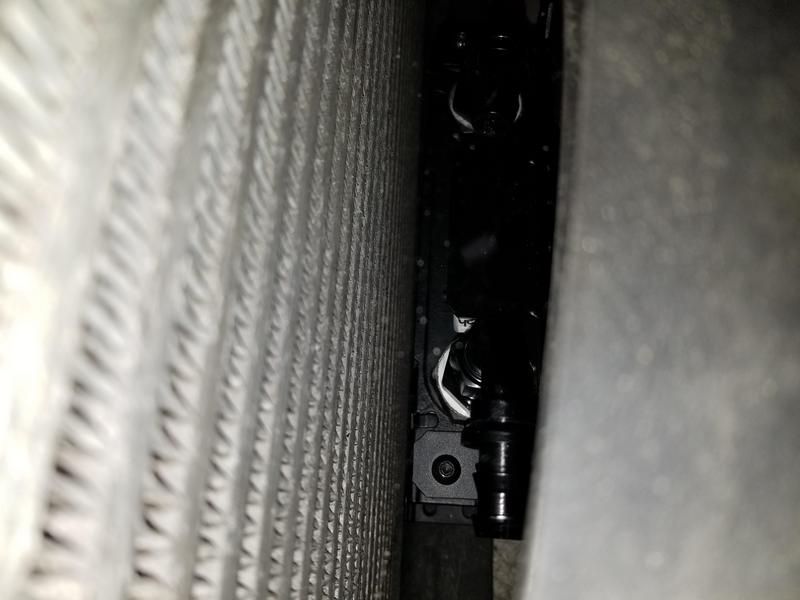
I went to get all the fittings on my oil cooler and the elbows I ordered don't fit on the adapters coming out of the cooler or the plate. It says they're all AN-8, but the adapter side fittings are all way too big for the elbows to thread on.
Plate and cooler adapters: Part Number 22-M22AN08-SE
Plate side elbows: Jegs
Cooler side elbows: More Jegs

Am I crazy for thinking these should work together?
 

smanierre

Autocross Champion
Decided to yolo the clutch. The 3d print failed part way through and I didn't want to wait to try again. Used a socket with a bolt in it that fit pretty well. Also from how it looks is if the trans slides in and it's off center at all, the first time you press the clutch pedal it should center itself since there's no pressure from the pressure plate right?

Gave the dust shield a little snip so I didn't have to take the flywheel back off, don't think it'll be an issue at all. Also they sent me 2 so now I have a second one.

Shop said they wanted the car as fully assembled as possible for the exhaust manifold so I started to throw everything back on. All the hoses from the water pump on:

Throttle body and dv relocate on:

Aux coolant pump on. I need to bolt that holds the bracket to the block but i'll just order that when I pick up the other bolts from VW tomorrow. Hoping tomorrow I can get the trans mated up along with the Stratified charge pipe.

Tossed on the motor mount bracket loosely just to make sure all my hoses were routed right. Going to replace the bolts and torque it down when I get them tomorrow:
 

smanierre

Autocross Champion
Oh boy what a night. Went out with plans to do some light work on the car (get the rest of the miscellaneous pieces on and such). Started with the Hard lines that run along the back of the engine, just 2 bolts real quick.

Next I cranked down my engine mount bracket and attached the motor mount to it for when I drop the motor in, again super easy.

I also made sure that I wouldn't give into temptations and re-install my A/C. I know it's a closed system but I just didn't want to risk stuff getting in there. JB Weld ftw.

Last thing was getting the TOB installed into the trans. Again 3 bolts and as straight forwards as it goes.

Then I got carried away and installed the trans... oops. Holy fuck was it humid out and trying to balance that on the rail of the crane while adjusting the height of a crane and a jack and moving them around and having the engine swinging as I try to push was hard. Finally got it on though and got all the bolts installed without any issue. Also got the starter installed as well but didn't take a pic of that, use your imagination.

Then the actual last thing I did was put on the trans mount bracket so i'd be ready for that side to go in the car. First 2 bolts go in fine, last one SNAP, ripped the threads right out 45 degrees through the +90 degree turn. Probably going to try a helicoil, if not then ye olde drille and tap or something like that. Maybe jb weld, who knows at this point. Tried to retighten it to just 60nm without the 90 but it barely holds 30nm and just keeps spinning. Not the end I wanted after such a productive night.
 

smanierre

Autocross Champion
Went out and got the camber plates onto the fronts. Not too bad at all except that I didn't have a 6mm hex socket so I had to use one in the drill, and luckily it held. The Ohlins come with a spacer that I think is only for the OEM tophats as with it on there the bolt would barely thread through. Also raised up the rears a good amount. If it isn't tall enough i'll drop the control arm and put them all the way up, it's just too hard with there being that much pressure on the spring right now. Also got the turbo outlet pipe on but didn't take any pics, just 2 torx bolts.
With the spacer:

Without the spacer:

Nice and pretty:


Rears raised up:
 

smanierre

Autocross Champion
The JB weld dried where I put it on so I went ahead and got the trans bracket installed again without issue:

Got the heat shield back on as well. Not sure if it's going to fit with the new turbo but if not it's only 2 bolts holding it on:

Put in the heater core hoses for when I put the engine back in, but the lower one is missing a plastic connector on the end, no clue where it went so i'm gonna have to order a whole new hose. Probably gonna order from VW tomorrow so it's here monday.

Got my front coilovers installed on both sides. Decided fuck it and tossed in the spacer, put on some locktite and cranked the bolts down. Getting the shocks into the spindles was a pain as usual but nothing too bad. Right now they are on as little camber as possible, and then i'll get an alignment and adjust it as needed.


Pulled off the test pipe as i'll need to go through emissions once it's running so while it's in the air it made sense. The gasket on the back of the test pipe was completely blown out and there was soot all over the tunnel so that's definitely gonna get replaced.

Lastly I tried to get my wheel studs out using a hex bit but the locktite I put in said no. Gonna grab some bolts and do that method instead since it's much stronger.
 

smanierre

Autocross Champion
I contacted Setrab the other day asking if all the parts I got for my oil cooler setup should fit since they were all -8AN. They said they should and sent me two new adapters. Turns out the two they sent that were labelled -8AN were actually -10AN and the new ones fit fine. You can see the size difference below. I'm gonna order 2 more for the adapter plate and then I should be good to go to get it all installed once those come in and the engine is back in.


Got 2 nuts that I needed to get all my studs out. Had my fiance hold the brake last night just to test and make sure it would work and I was able to crack one of them loose. Will go out either tonight or tomorrow night with her to get them all removed. If anyone wants a stud kit it's all yours if you pay shipping. They're long so they poke out a lot, but they'll work with pretty much any size spacer and if I still have the old lug nuts I can include those which cover them, pic of how they look below:


I was trying to figure out what hoses went to the other 2 ports on the coolant flange, especially since I didn't have the quick connector for the rear hose, turns out if I looked at the part I woulda seen that the rear port and smaller front port are blocked off so i'm actually all set on that front. Last thing I need to figure out before the engine goes in is where do these two hoses go to? If anyone has a pic of their bay that would be very helpful.


smanierre

Autocross Champion
Finally found a shop near me that had the exhaust gaskets so I went out and got the cat and downpipe installed. No issues, but it's always a pain doing it, I wish I went with a full V-band exhaust.

Also started the install on the stratified aux fuel kit. I won't be able to finish it until the motor is in the car but the rest is really just plugging in sensors. I think the only irreversible modification is snipping the fuel line from the LPFP a few inches, besides that it's all plug and play. The fit and finish on it is really nice.
Charge pipe with the injector:

Fuel line from the injector to the HPFP/LPFP, the oem fuel line goes on the T:

Add-a-fuse:

The actual controller for the kit:

Included boost tap for the controller:
 

smanierre

Autocross Champion
Busy busy day. Went out to make sure I had all the stuff needed for when it goes to the shop for the exhaust manifold. I noticed I forgot to attach the swaybar endlinks so I got those on quick. The drivers side is almost fully extended while the passenger side is probably closer to half way. I'll see how it is when the car is on the ground to see if I need longer ones based on the swaybar position.
Drivers side:

Passenger side:

After that I said fuck it and put in the motor, hopefully I didn't forget anything:

Took about 20 minutes of adjusting to get the motor and trans mounts lined up right and everything torqued down. Then I realized I forgot the pendulum mount. Thanks to my brace I have there which is lined up EXACTLY with the bolt hole, I had to undo all of the mounts and wrestle with the engine and trans for about an hour and a half to get that thing in, then another 30 minutes of wrestling with the engine to get the mounts to line up again. 0/10 fuck that brace but at least it's in there.

Trans mount:

Engine mount:

I was starting to hook stuff up after I finished getting it in but realized I was so exhausted I was going to end up making a mistake. Tomorrow i'll try and get the axles bolted up and then as much of the wiring harness as possible installed. I still gotta finish my fuel pump setup and my oil cooler, and drain the trans and refill. Besides that it should be all good to head to the shop hopefully next week. I'd try this weekend but going to Watkins Glen to watch a GT America race.
 

smanierre

Autocross Champion
Got my shift linkage all sorted out yesterday, still need to bleed the clutch line though (ignore the mess of wires):

Got the expansion tank in as well:

Oil pressure and temp sensor wires hooked up. I hooked up the grounds as well but they aren't terminated yet, I need to get some eyelets to crimp on and find a place to put them:

How i'm running the wires for now. I'll ziptie them all together, but want to run the stratified wires also beforehand since some will follow the same path I think:


Also the harness is all hooked up. It was much easier than I thought it would be with the only two tricky plugs being the water pump and fuel rail but they only took a few minutes of messing with. I have to get a nut for the bracket that attaches to the trans beneath the starter but besides that and the sensors that go on the front clip it's all set. For anyone doing it in the future, TAKE PICTURES and label everything. Labels were very helpful, but luckily I had some pics beforehand that I could zoom in and see how stuff went and it really saved me a big headache.
I went out this morning instead of going to the gym and got some more stuff done. Reconfigured my fuel pump setup. I got a longer tube so I could loop it which allows the top to compress down as shown in the pics. I also moved the pump to the other side since the white tube that stuck down from the top was also hitting and preventing compression. The line on the pump isn't seated as far as I would like, but if I have any issues i'll know where to start looking and get a better fitting line. It's on there snug with the hose clamp though so i'm not expecting any issues, especially since it doesn't move.


Install into the tank went smoothly:

Hooked up the battery and turned the key and huzzah, fuel is flowing:

Passenger side axle torqued down, the brace on the bottom that blocked the pendulum bolt also made this a bit of a pain but by rotating the axle I was able to get some better access.

Unfortunately, I didn't check the drivers side one before tightening down all the mounts so now this one is stuck below the flange and has no play to get it above. I'll loosen the ball joint and drop the control arm which should let me pull the hub out enough to get it in place. I'll need an alignment anyways from the new suspension so i'm not worried about undoing the ball joint.

After that is done i'll be figuring out the mounting of the oil cooler on the front clip and then get that on and all the sensors hooked up. Hoping to have it at the shop next week for the manifold, although it'll probably get delayed from something 😒
 

smanierre

Autocross Champion
Was able to get out before work and do some things. Got my control arm dropped on the drivers side and was able to get the axle in position with the transmission flange. Got it all bolted up and the control arm bolted back up to the hub.


I was looking for places to ground my oil sensors and stratified controller. I saw a painted bolt down near the headlights that had some stuff grounded to it so I tried that. Instantly snapped off as it was rusted in there. I'm actually hoping that this was the cause for my drivers side headlight flickering and not staying on. Since the wires are short, i'm going to cut off the connectors, splice them into a longer wire, and then ground it at the same spot I do all the other wires, i'm thinking maybe the bolt on the transmission mount.


smanierre

Autocross Champion
Another busy afternoon. Started off by sorting out all the grounds that needed to be terminated in the bay. Cut off the connectors of the two wires from the headlight harness and spliced them into one. Then joined that wire, the stratified controller ground, and the two oil sensor grounds into one eyelet to mount on the bolt on the transmission mount. Overall looks pretty clean I think.


Some of the wires coming out of the stratified controller were pretty long so I gave em the old service loop with a ziptie

Here's the path the wires are taking. I ziptied them together to keep it cleaner. the 4 green are for the sensors (signal and ground), the cam position sensor for stratified, and the wires to control the aux injector.


Got the new rear pcv hose in as well since the old one was leaking where it connected to the valve:

Tyrolsport MC brace went in also. Had to open up the top hole a bit in order to fit but that was easy with a drill and had no issues getting it installed after:


How the whole bay looks right now:

Getting ready to put the front clip on so just need to finish up everything on there. I snapped this plastic piece off walking by before so JB weld is coming to the rescue again. I was getting tired holding it in place so electrical tape came in clutch


Also think I found a good spot for the oil cooler. The bracket I got should let me only have to drill two holes in the crash bar, and two in the plastic part below, instead of cutting out sections of the crash bar. Also the cooler doesn't make contact with the intercooler so there's less heat exchange there which is nice:

The hoses will come out and just be able to go right up infront of the intercooler and through a hole right on top of the front clip to the adapter plate.
 

smanierre

Autocross Champion
Focused mainly on the oil cooler mounting today. I had a stroke of genius that saved me a lot of work. Instead of having the bracket behind the crash bar, I realized if I put it in front then I wouldn't have to cut any of it, just drill holes for the bolts. I also trimmed the lower plastic so the cooler sits flush with that now instead of sticking out. The hardest part so far about mounting it is drilling through the crash bar. Brand new drill bit and barely made any progress before it was shot. I'll look for a better one at the store tomorrow, or just buy like 5 or 6 of them unless someones got some tips.
Cut lower plastic:

How the cooler will sit in there:


Not much progress on the drilling:

Got the stress bar installed and tightened back down since i'm done working in the trunk. Also got the plastic piece near the latch back in. it's missing more than half the clips though so if it rattles i'll just pull it out.
 

smanierre

Autocross Champion
Smell that? Smells like progress and body odor. Went out to Lowe's and grabbed a carbide tipped mason bit and was able to get the holes drilled. Still took about 10 min per hole, but I was probably going a bit slower than necessary, the cutting oil definitely seemed to help. After getting those bolts mounted I decided it was secure enough where I didn't need the bolts on the plastic below. For now it's not going to be hooked up since I didn't get the proper sized adapters in yet for the oil filter side, but that shouldn't take long once I get the car back.

I tested out my oil temp sensor by using my heat gun to heat up the block the sensor is in and it seems to be working properly. Gonna see if the pressure sensor works when I crank it for the first time with no fuel to build up the pressure.

Got my front clip on and friendly reminder to NOT forget to attach the hood release, or you're in for a bad time.

Got the headlights hooked up and tested out the low beams. Everything seems good with them, so I think that rusty bolt and a bad ground was causing the flickering I was seeing, will know for sure once the engine is started.

Since I moved the battery to the trunk, I had no need for the battery tray anymore. Luckily I saved it though because the intake shield mounts to the rubber grommets on the front of the tray. I was able to just cut off all but those parts that way the intake still mounts properly without taking up space or looking bad over the MC brace. Also highly recommend the dremel oscillating tool, makes cutting through plastic and other things super easy.


Everything looking pretty good. Only things not plugged in are the fog and side marker lights since the bumper isn't on. I may need to adjust the charge pipe as it's got only a few mm of clearance from the rad fans, but i'll see after the first startup if it's rubbing or not.

Next stop once I drain the trans and get the wheels on is the shop to get the exhaust manifold made, notch filled, and an alignment done.
 

smanierre

Autocross Champion
Drained the trans today which was the last thing I had to do before the car went back on the ground. Took the plug out yesterday and just let it drip overnight to get everything out.

After that I got out the rest of my wheel studs and put all the wheels on and put the car on the ground. Rolled it outside and had my fiancee take some pics of it for the new instagram page so i'll drop some here. The link to my dedicated car account is in my signature and that's where i'll be posting most of the updates about things i'm doing with it, i.e. track days and some part reviews if anyone cares to follow. Enjoy the pics and the dogs
Love the way these wheels show off the brakes:

Badgeless is the way to go up front in my opinion, gonna look much better too once the notch is filled. Also it's in monster truck mode so it can get on my friends trailer next week.

Got some much needed sun, she had a bad vitamin D deficiency from being inside for over a year

Jellybean is asking if she can drive it

Olaf is just happy to be here
 

uglybastard

Autocross Champion
Drained the trans today which was the last thing I had to do before the car went back on the ground. Took the plug out yesterday and just let it drip overnight to get everything out.
---
After that I got out the rest of my wheel studs and put all the wheels on and put the car on the ground. Rolled it outside and had my fiancee take some pics of it for the new instagram page so i'll drop some here. The link to my dedicated car account is in my signature and that's where i'll be posting most of the updates about things i'm doing with it, i.e. track days and some part reviews if anyone cares to follow. Enjoy the pics and the dogs
Love the way these wheels show off the brakes:

Badgeless is the way to go up front in my opinion, gonna look much better too once the notch is filled. Also it's in monster truck mode so it can get on my friends trailer next week.

Got some much needed sun, she had a bad vitamin D deficiency from being inside for over a year

Jellybean is asking if she can drive it

Olaf is just happy to be here
+2 for the pupperinos
 
Top