GOLFMK8
GOLFMK7
GOLFMK6
GOLFMKV

Bringing an MK6 back from the grave - My Mk6 Story

ToMMyGuN

Go Kart Champion
Update on finances (with everything purchased (hopefully)):

Total OEM Cost of Parts: $9,902.88
Total Spent on Parts: $3,556.86
Total Savings over OEM Part Cost: $6,346.02

Estimated labor cost saved by doing work myself: 100$/hr x ~60 hrs = $6000

Estimated cost to fix with OEM parts and labor = ~$16,000

Estimated Total Savings from OEM part cost/labor = ~$12,300 or so

Total $ into car = ~$14,000

Estimated Total $ out of my pocket after other car is sold = ~$9,000

Pretty damn good - I am happy with the results. These are just estimates, but they at least paint a picture of how I am doing on the financial front.

Here is my list of part costs:


XGC75

Go Kart Champion
Wow. You must be :happyanim:

But you still need to get it onto the road!

butchered by autocorrect
 

ToMMyGuN

Go Kart Champion
I had the car on the road again yesterday - man the thing goes! Had it up over 100 on a back road - no shuddering/vibration and no pull to one side.

I got the headlight wired up - the left one works great! The right one still doesn't light, which means the is a wiring issue somewhere. I will have too trouble shoot that soon.

Left on the list is replace drivers seatbelt, bleed brakes via vcds, fix hood latch (I broke the connector for the release cable, whoops!), trouble shoot *headlight* wiring, and install the splash guard. Getting real close now!

Sent via tapatalk
 
Last edited:

ToMMyGuN

Go Kart Champion
Well, the car is just about ready for its inspection!

I was troubleshooting the headlight wiring and I found out the right xenon ballast was bad. Fun stuff! So I ordered one from ebay - it will be here on friday. One last nice little surprise to the funds - it was only $160, but still..

I also ordered some tinted side markers - I had to replace one because it is missing from the accident, and I thought the amber looked busy/cluttered on the front end. So I got tinted ones from parts4euro.com. They should be here by the end of the week as well.

Once I get these parts, I can put the bumper on for the last time (as a salvage-titled car, anyways)!

All of the above to-do list is done now: I bled/flushed the brakes via vag-com (damn that is awesome and easy), and a bunch of milky stuff came out the front passenger side. After the flush and bleed, the brakes are just peachy.

I re-installed the steering wheel to its correct position too - I hope I never have to take that damn airbag off again. It is stupid difficult to get off (that's what she said?). I also replaced the driver's seatbelt assembly (easy as pie after I did the passenger side). This took care of my last airbag light, so now I will be light free after I get the new ballast to take care of the last bulb-out light.

The hood latch and linkage is now fixed as well. It actually works to open the hood from inside the car (read: I don't have to hang the cable out of the front grill anymore..)

The only thing I didn't do was install the splash-guard, because I need to wait to put the bumper back on.

The vehicle inspection has to be done on a Tuesday, Wednesday, or Thursday, which means I need to take a day off from work to do it. The problem is I am swamped until the 8th of February.. so the car may sit until then in my garage until I can find the time to take off :mad:

I will try to post up some pics of the car once it is assembled, along with a driving video.

MORE WAITING ON PARTS! (seems to be the theme of my rebuild)
 

ToMMyGuN

Go Kart Champion
Please explain this. I have not a clue how this is possible. I'm very interested.

There isn't a ton of info on the RossTech site about it, but this is their schpeel:

________________________________________________________
Rosstech Website:

Procedure for Bleeding the ABS Brake Pump in many older VW Golf, GTI, Jetta, and Audi TT with Mk20 or Mk60:
[Select]
[03 - ABS Brakes]
[Basic Settings - 04]
Group 001 (may be group 002 in Mk3 VW Golf/Jetta)
[Go!]

This will trigger the ABS pump to turn on for about 10 seconds. You should hear the fairly loud pump clicking during this time.
Click the [Done, Go Back] button and you're all set.
________________________________________________________

Rosstech lists the above procedure for "older cars".

Here is a much better explaination of the procedure (this is exactly what I did, no need for me to re-write it)


(click "on/off/next" instead of continue)
________________________________________________________
From TDI Forums (posted by losvre):

tools & stuff you need
brake fluid (3L)
2 x 11mm spanners
2 x bleed tubes with one way valves on
2 x receptacle at least 1L in capacity
first you need access to the front bleed nipples, i jacked up the front, placed on axle stands and removed both wheels.
then put the spanner, bleed tube and receptacle on each side.
open the brake fluid resevoir and have your fluid ready to keep the resevoir topped up at all times. i got a friend to do this to speed things up, it's probably possible on your own but will take a while longer.
goto ABS, basic settings blah blah whatever it is and click from 000 up to 001 and then you get a MSG on the screen saying "PRESS AND HOLD PEDAL" or words to that effect. whilst doing this the ABS pump is activated and the pedal can be felt kicking back
(002) it stops pumping and your told to relase the pedal and open the front 2 bleed nipples, then you need to click to continue
(003) it will tell you to wait for 10 secs whilst the ABS pump is activated and fluid is pumped out of the now open bleed nipples
(004) it tells you to pump the pedal 10 times and then close the bleed nipples, then you need to click to continue
(005) "PRESS AND HOLD BRAKE PEDAL" untill told to stop
(006) it stops pumping and your told to relase the pedal and open the front 2 bleed nipples, then you need to click to continue
(007) it will tell you to wait for 10 secs whilst the ABS pump is activated and fluid is pumped out of the now open bleed nipples
(008) it tells you to pump the pedal 10 times and then close the bleed nipples, then you need to click to continue
(009) "PRESS AND HOLD BRAKE PEDAL" untill told to stop
(010) it stops pumping and your told to relase the pedal and open the front 2 bleed nipples, then you need to click to continue
(011) it will tell you to wait for 10 secs whilst the ABS pump is activated and fluid is pumped out of the now open bleed nipples
(012) it tells you to pump the pedal 10 times and then close the bleed nipples, then you need to click to continue
(013) "PRESS AND HOLD BRAKE PEDAL" untill told to stop
(014) it stops pumping and your told to relase the pedal and open the front 2 bleed nipples, then you need to click to continue
(015) it will tell you to wait for 10 secs whilst the ABS pump is activated and fluid is pumped out of the now open bleed nipples
(016) it tells you to pump the pedal 10 times and then close the bleed nipples, then you need to click to continue
(017) ABS BLEED PROCESS COMPLETE!
once your done approx one litre of fluid will have been expelled from each caliper
points to note, i did not go full travel on the pedal every time, i probably only used about 75% of the pedal travel and i pumped the pedal slowly to prevent damaging the master cylinder seal which everyone is always banging on about.
so from the above you can see it's 4 complete cycles, not 17 cycles as someone suggested but 17 is the number you'll see on the left at the end when it says it's completed.
________________________________________________________

It isn't really practical for just bleeding the brakes, as it expels alot of fluid if you go through the whole thing, but if you stopped after one cycle it would probably be ok. I manually bled the brakes at each wheel after the fact just to make sure there was no air in the system, and there wasn't - the VCDS procedure expelled all of the air. I am super glad I ended up getting the cable, thanks again Ross-Tech! :clap:


This made sense for me because I had air in the master cylinder and probably the abs pump that I couldn't get out with a regular bleeding procedure. For small amounts of air in only the brake lines, it would probably be easier to just use the tried and true 2 man pump-and-run method that we all have done before (1 guy opens the screw, other guy pushes brake to floor, guy 1 closes screw, repeat x2 then switch to the next wheel).
 

ToMMyGuN

Go Kart Champion
The car is Done!


Everything works great! After some chilly (-5 deg F in the garage) drama with the headlight wiring and some AFS/Xenon Range coding, it is finally finished. I took it on a long test drive tonight - man the Xenons are awesome, especially with afs! It really seems to make a difference.

Here is a pic of them both working (a joyous sight for the guy that wired them):


And the brights:

(it's tough to see how bright they are in the garage with the garage light on, but y'all know what they look like)

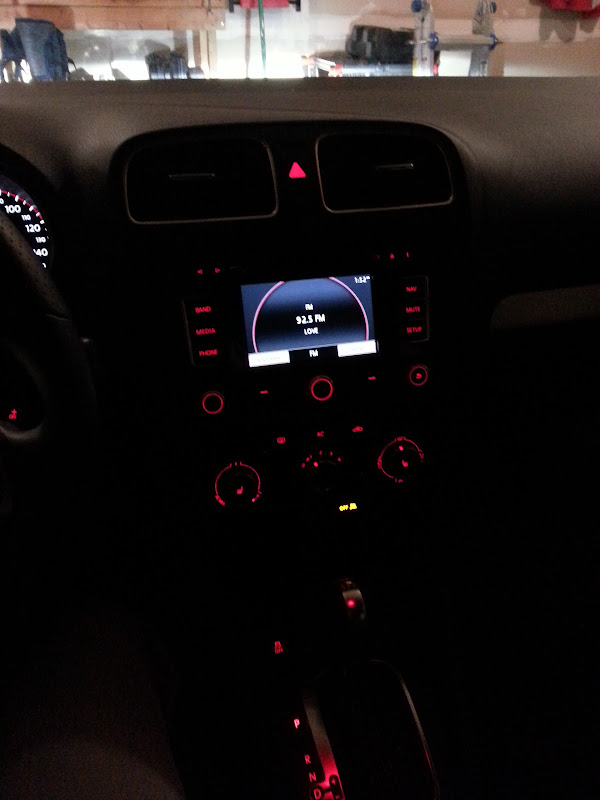
The radio/navi are a rockin':


I am digging the red LED map lights too - nice to have some illumination that isn't driver-blinding incandescent light


AND NO MORE DASH LIGHTS! YEEEEEAAAAHHHH :thumbup:


Launch control is working as well.. well, the hardware/software side of it is
working. Trying to launch in -15 deg F is not working, however :laugh: The ensuing wheel spin and tire smokage was epic.

The car handles really well. I like how it feels like a big go-kart. This motor is awesome too, it really seems to deserve the praise it has garnered from the automotive press.

The only part I am waiting on are tinted side markers I got from parts4euro.com. I think they get here Saturday. I just have to put on the splash guards and install the side markers and it is ready for the road!


After I tow it up to Royalton, MN for an inspection and get it titled, I will of course give it a good wash. I am going to take it in for an alignment too. I am hoping to take a day off next week and make up some time on a saturday or something.. I don't think I can just let it sit in my garage haha.

I took my wife out for a ride in it and she said "O, it's pretty bumpy, eh?"... ruh roh. I proceeded to tell her how it is sportier than anything we've ever had, and that I can put on springs that will improve the ride quality (DG springs, amongst other things, improve ride quality, right? :cool:). I already have a list of mods in my head, and if I can get the wife to buy into any of them, I am golden.

Thanks for the support guys! Hopefully this will now become a traditional build thread, not a (re)build thread :thumbsup:
 

Vwfreak1

Go Kart Champion
There was a lot of skeptical people about your project/re-build, I'm glad you did it all the way through!
 

Zillon

Go Kart Champion
I took my wife out for a ride in it and she said "O, it's pretty bumpy, eh?"... ruh roh. I proceeded to tell her how it is sportier than anything we've ever had, and that I can put on springs that will improve the ride quality (DG springs, amongst other things, improve ride quality, right? :cool:). I already have a list of mods in my head, and if I can get the wife to buy into any of them, I am golden.

Don't take this as an offending comment, but looking at the other cars in the garage, I can see why she'd say that.

The GTI ain't no Pontiac. And that's a good thing. :thumbsup:

If you really wanted to improve ride quality, though, I'd look at picking up a set of 17" wheels and ditching the 18s.
 
Top