As promised in a previous post, I would make a little DIY and write-up with my thoughts on upgrading the throttle body on my MK6 GTI.
Grams 70mm Throttle Body Upgrade for MK6 GTI
"The Grams 70mm Throttle Body for the Volkswagen GTI MK5/MK6 is designed in mind for either a completely stock or heavily modified engine. The Throttle body provides a precision-honed oversize bore to allow more air into the intake, thus allowing for greater breathability of your GTI. This will have a slight increase of horsepower and torque with a tremendous noticeability in throttle response. To ensure the best performance, throttle response and driveability, each TPS sensor is calibrated to meet the exact requirements of the vehicles engine management system."
https://www.ecstuning.com/b-grams-p...6-throttle-body-black-series/g09-09-0710~gpd/
As everyone may already know, Volkswagen is KNOWN for putting cheap plastic parts in their products in order to cut manufacturing costs and weight in their cars. In some places, this just isn't need. Enter the throttle body. The throttle body connects your charge pipe from your inter-cooler to your intake manifold and can be a huge choke point, kind of like those pancake pipes.
INSTALLATION
Tools needed:
T30 Socket
Ratchet (small)
Hose Clamps
Flat-Head Screw Driver
Flashlight (it gets dark)
Towel
Mirror
Girlfriend with tiny hands")
So without further ado, let's get started:
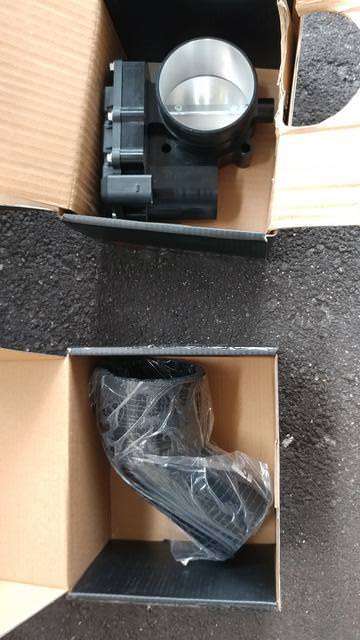
1. Unboxing the new glory!

2. Open the hood and reveal the engine bay!
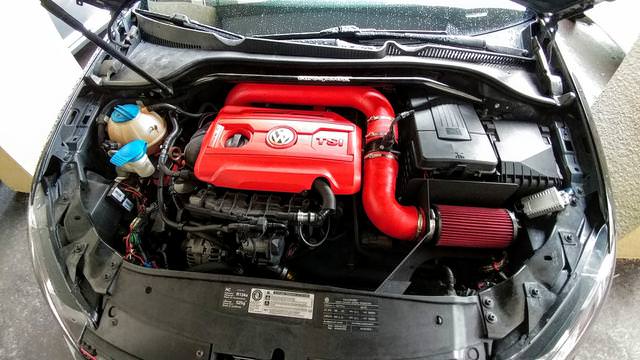
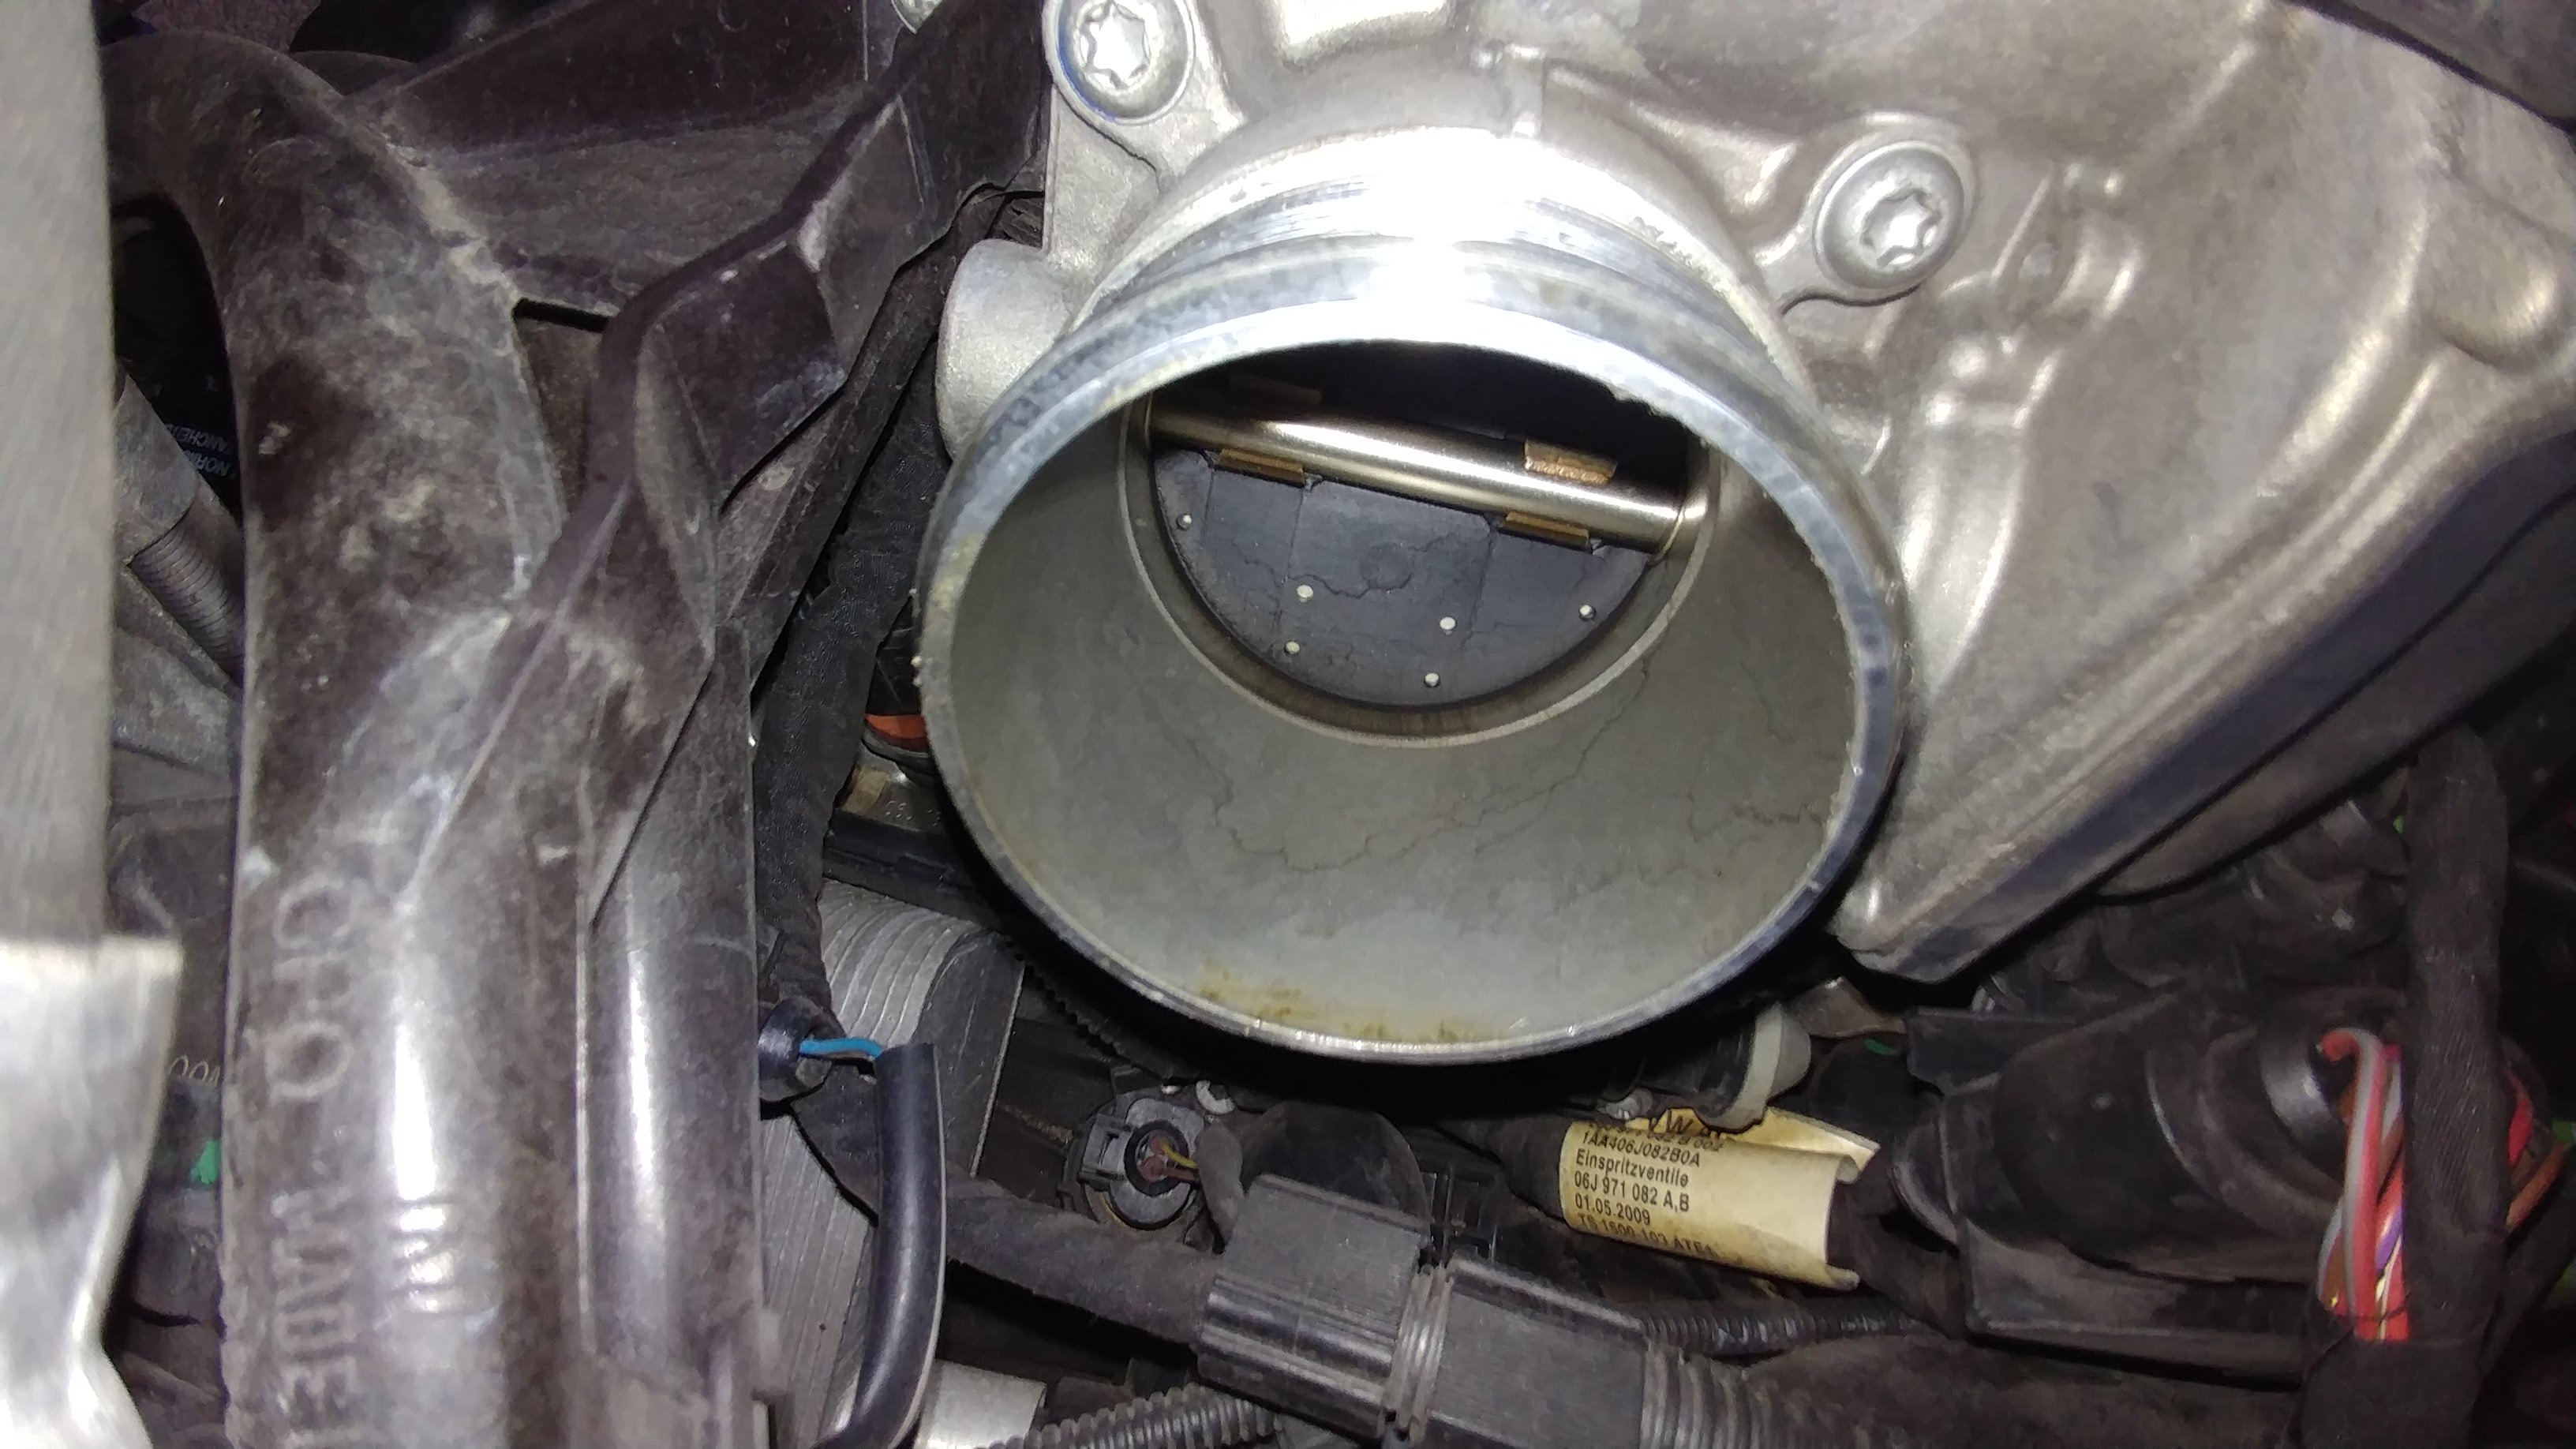
3. Locate the throttle body. It is located in the front of the engine bay, right underneath the intake manifold and connects to your charge pipe leading from the inter-cooler.


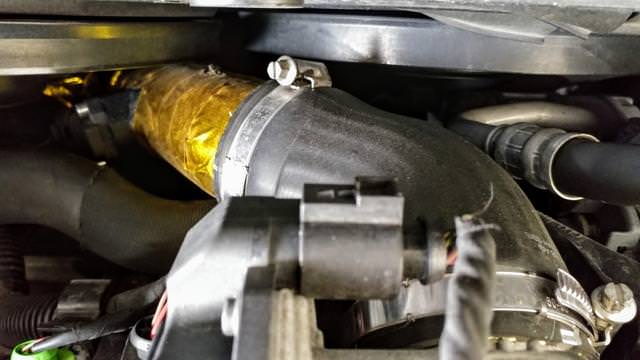
4. Remove the hose clamps from the hose that connects the throttle body to the charge pipe with a flat head screwdriver. (both seen here)
5. This part is where it gets tricky, and smaller hands really benefit. Place a rag underneath the throttle body covering the charge pipe. This is done for many different reasons. One, it protects from any debris falling into the charge pipe. Two, if you drop a screw holding the throttle body in place, it lands on a cushy soft rag and prevents the pain and agony of searching through the engine bay.

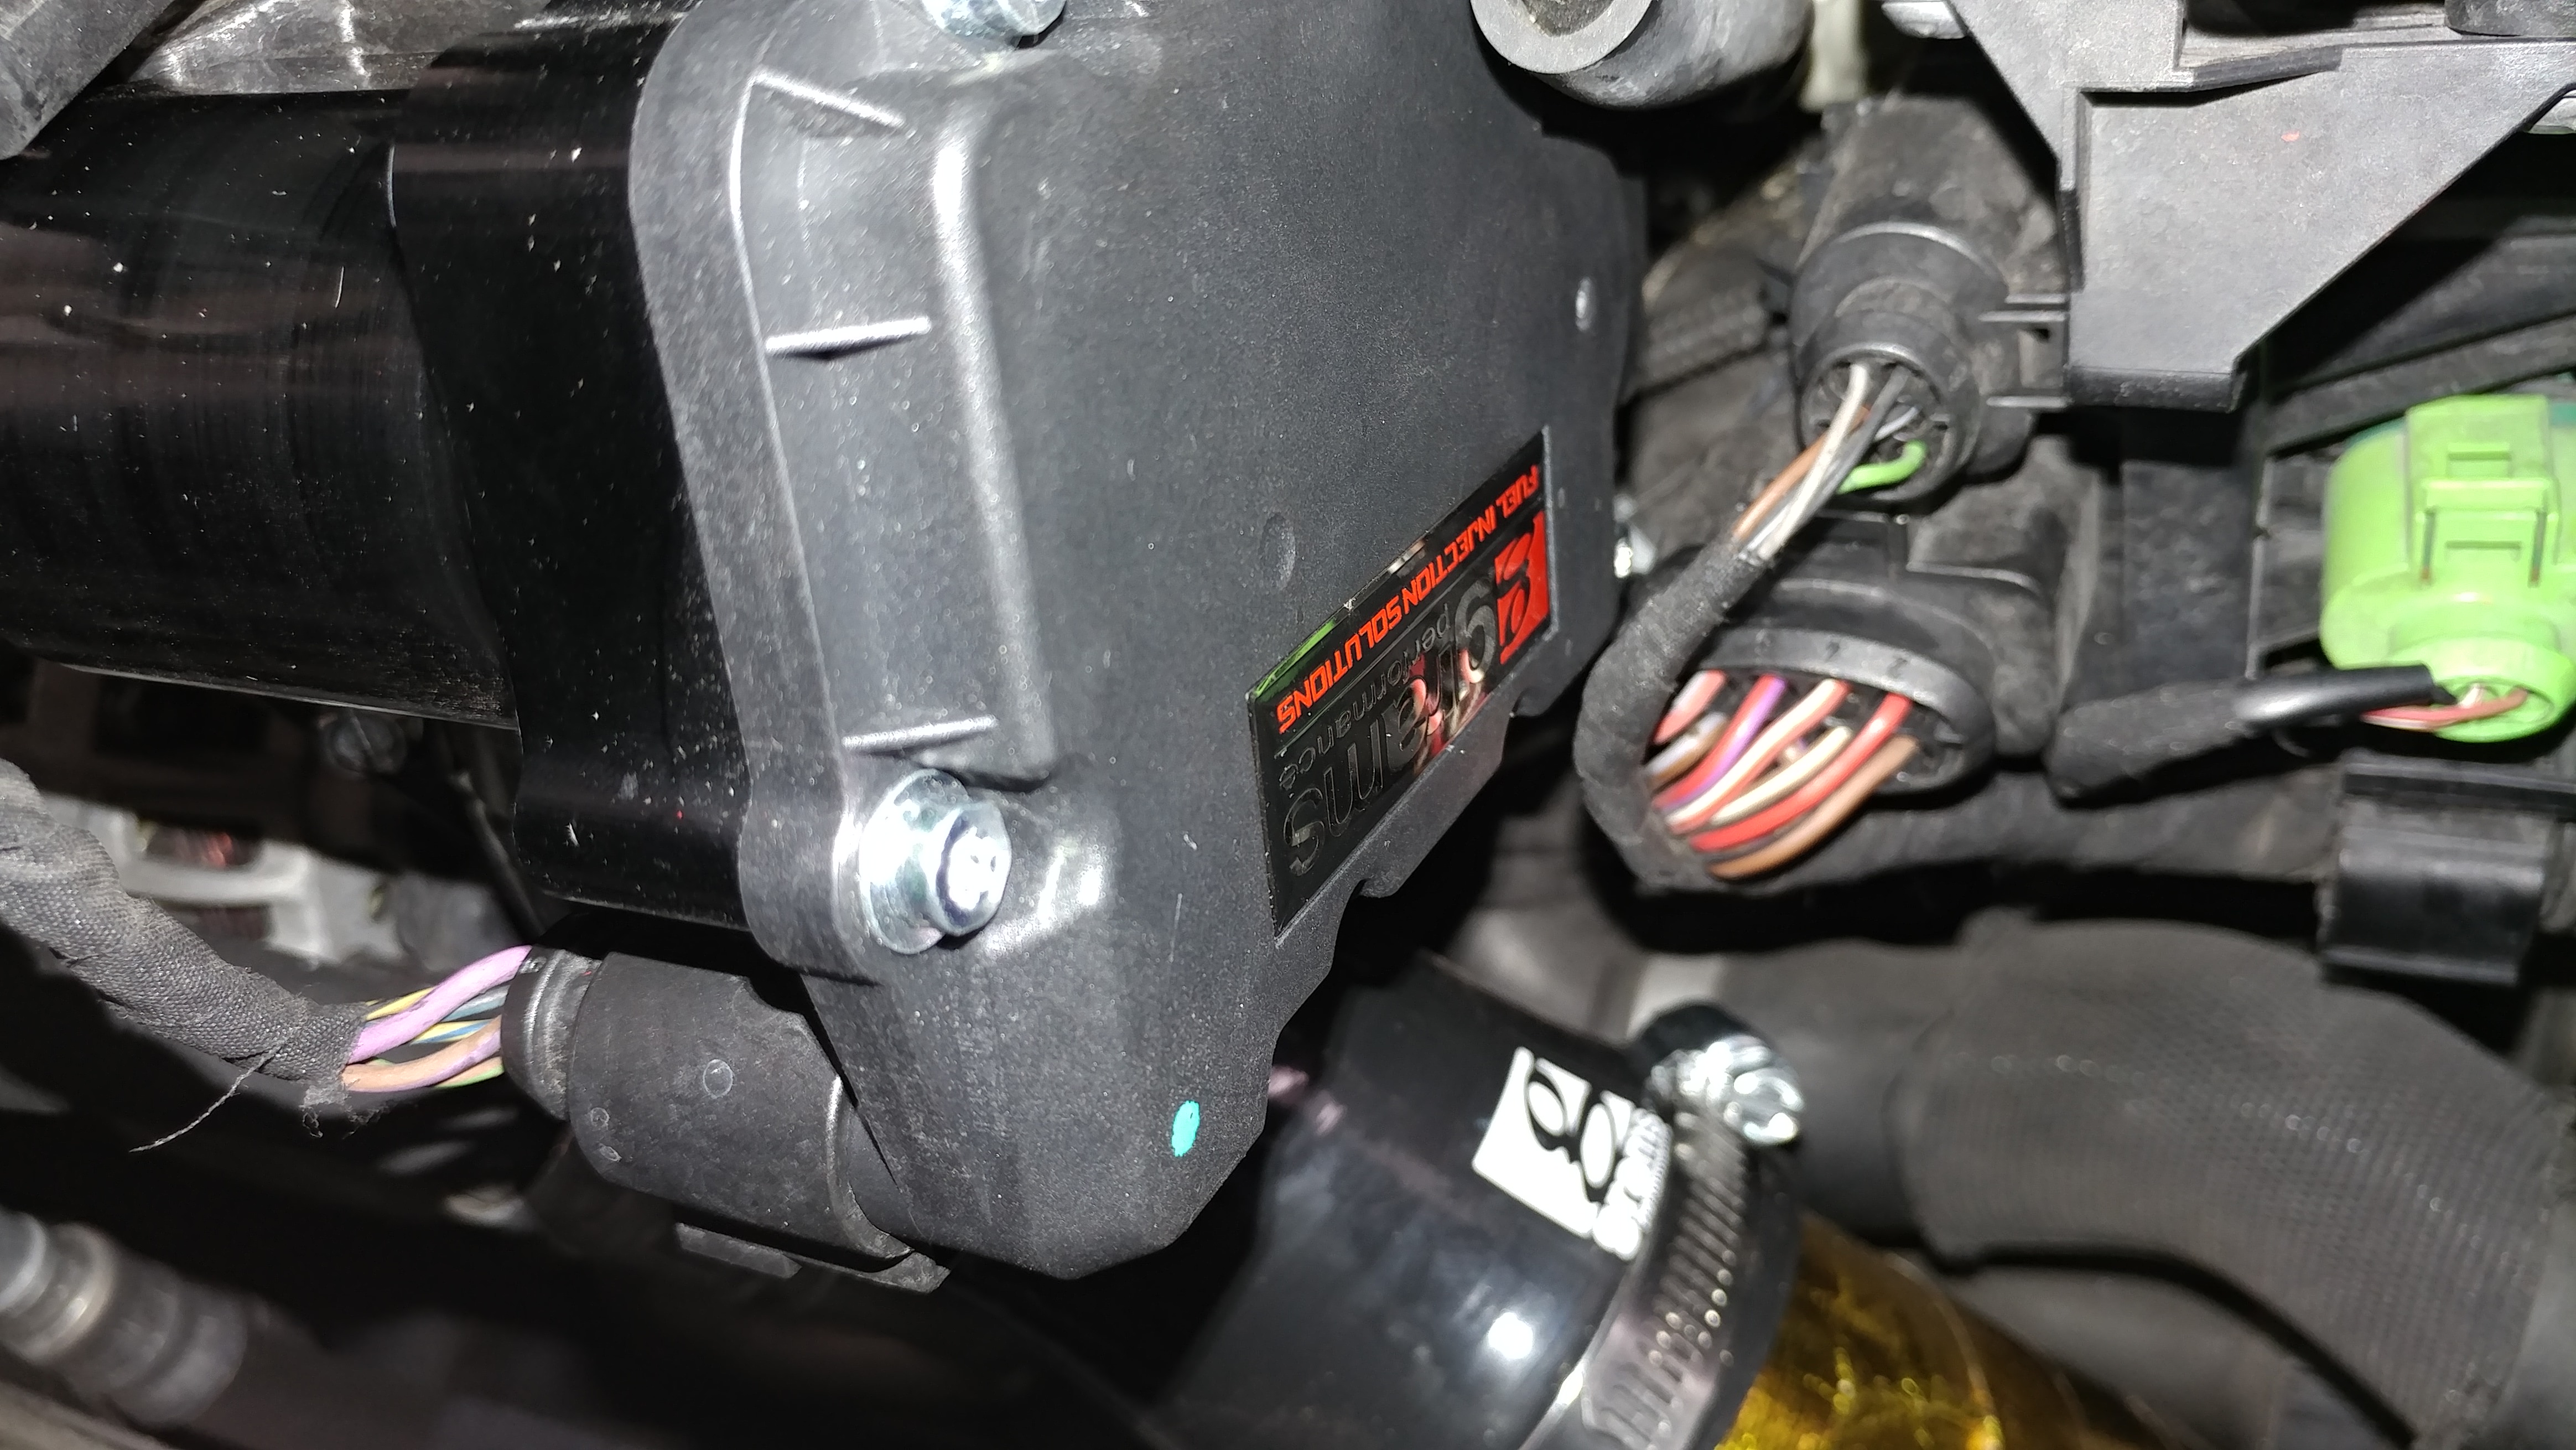
6. Unscrew the four screws holding the throttle body to the intake manifold with your T30 socket and ratchet. One screw can be seen here.
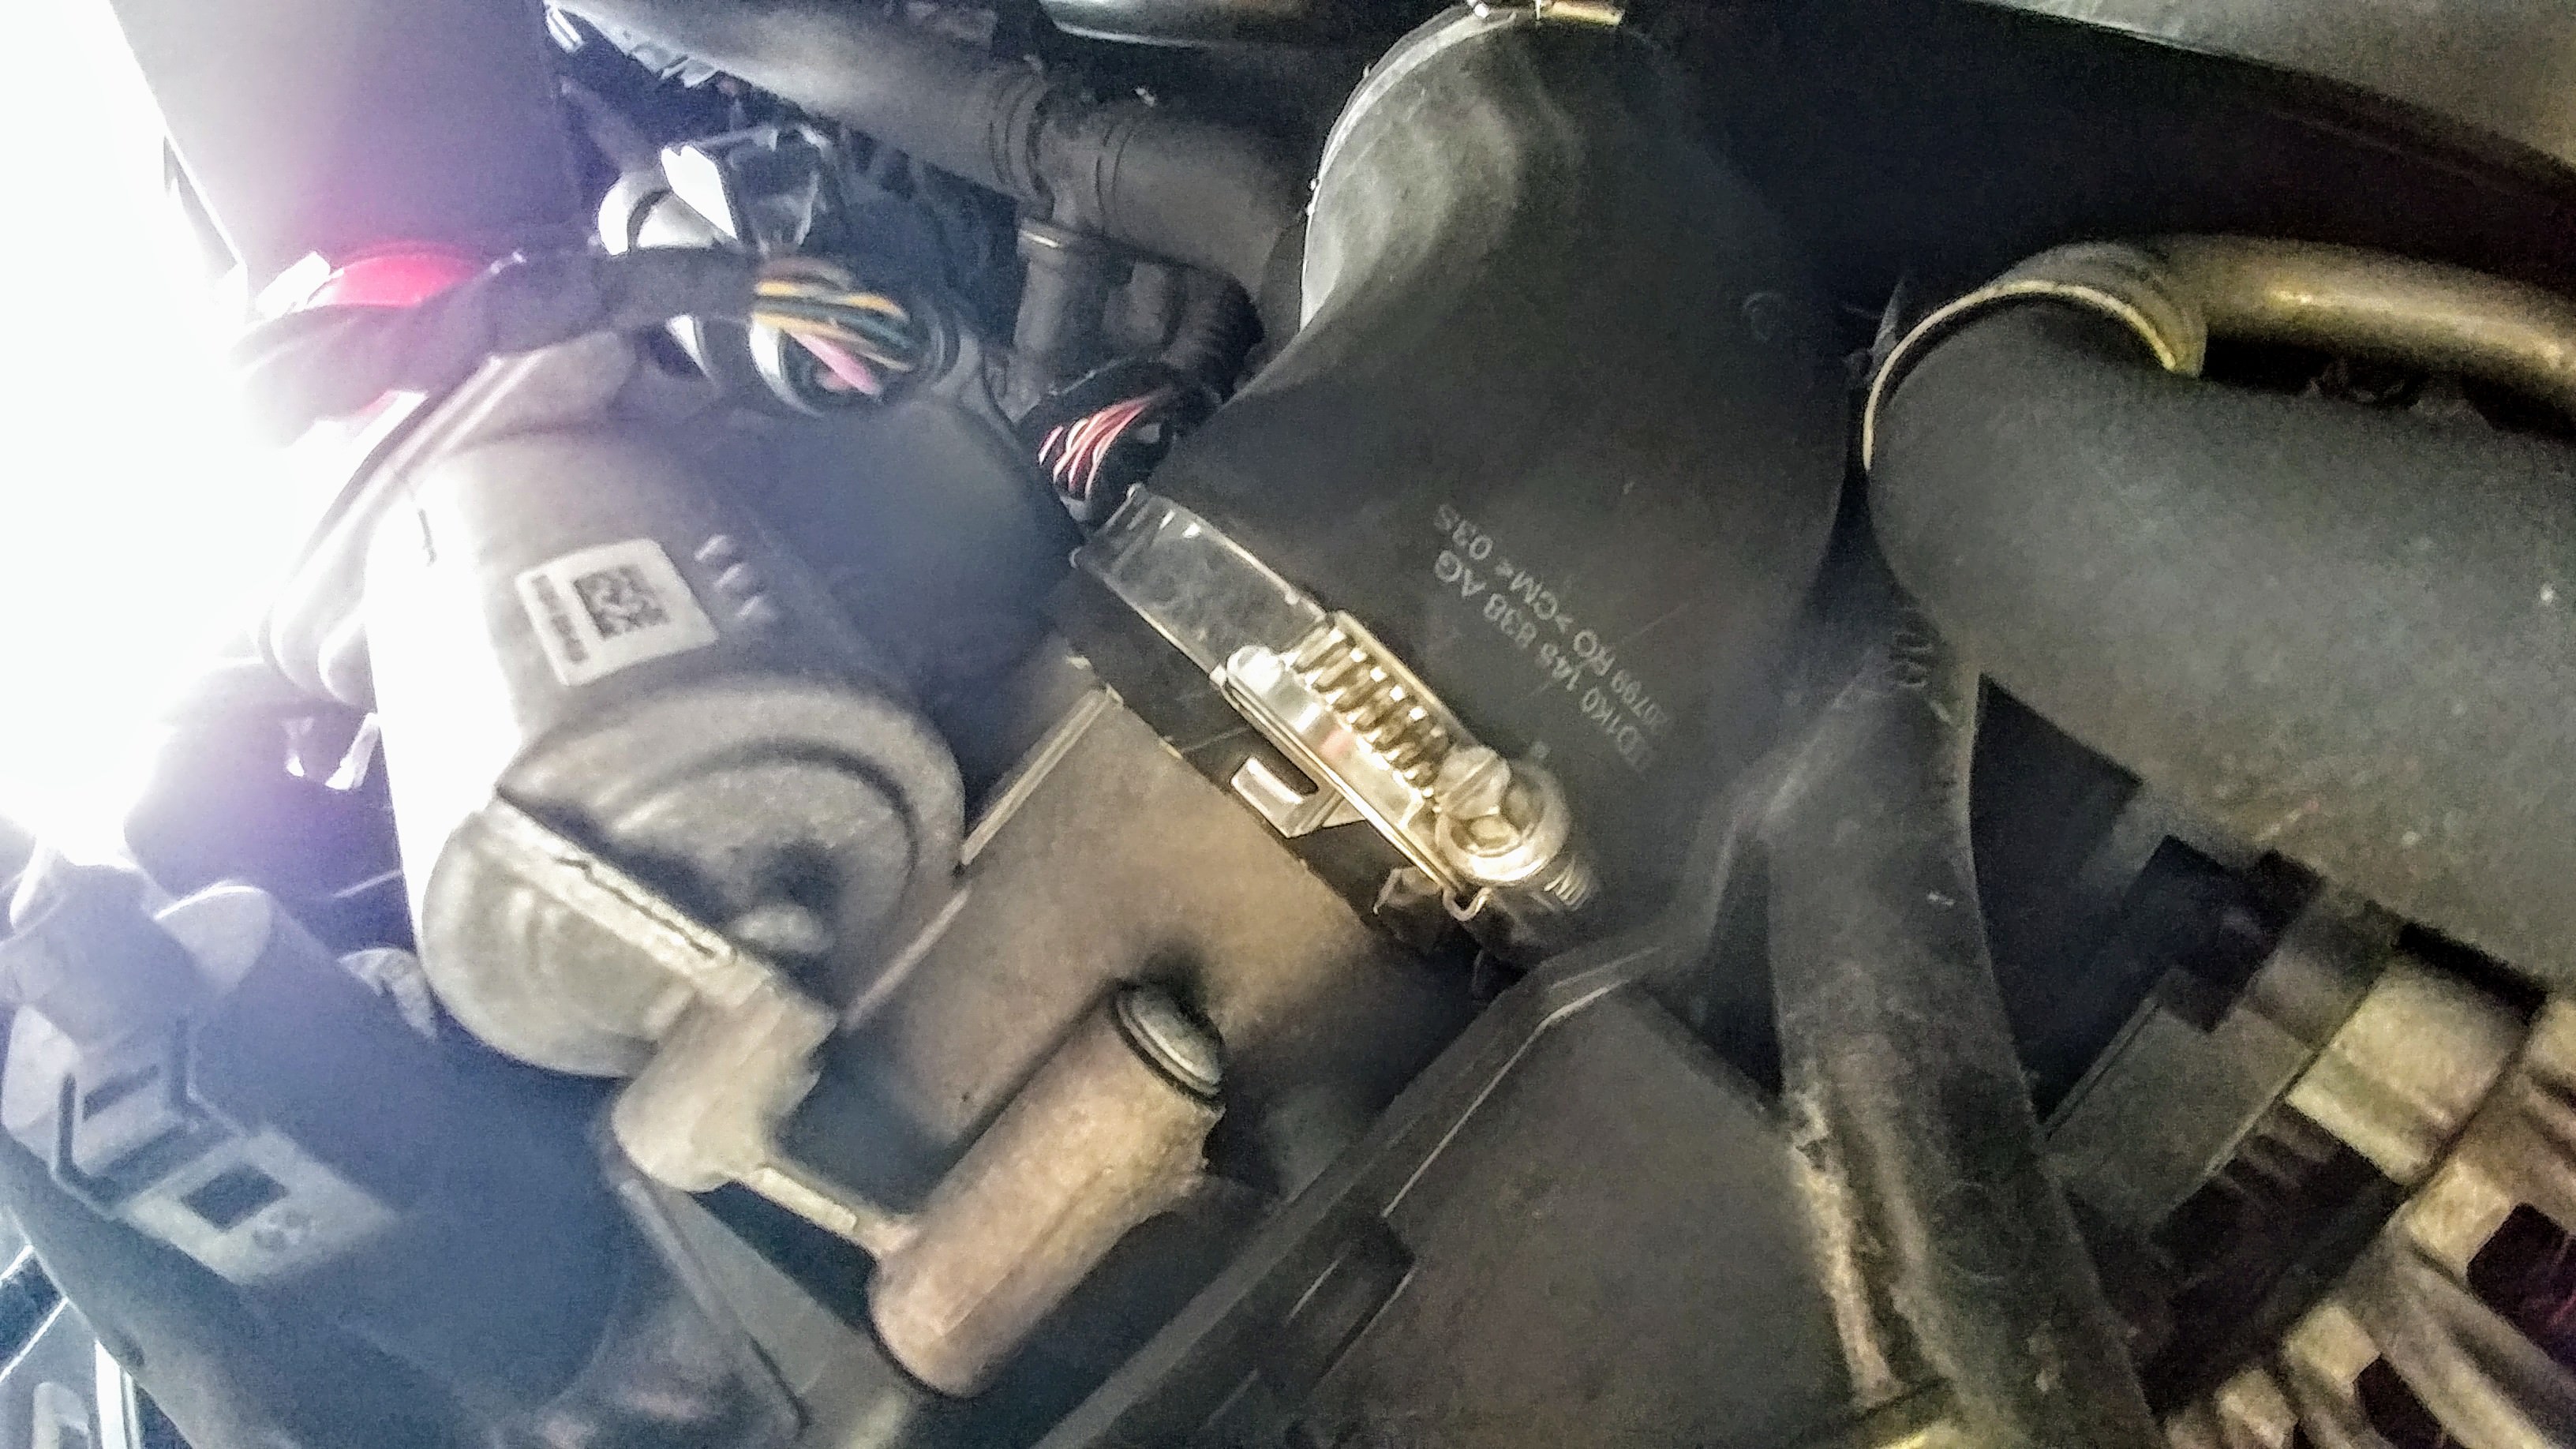
The remaining three line around the throttle body. This is where a mirror, placed on the rag and a light source (pointing upwards) really comes in handy. This way you can see the screws and remove them without dropping. The far left screw is a VERY tight squeeze and this is where my girlfriend came in MAJOR handy. :happyanim:
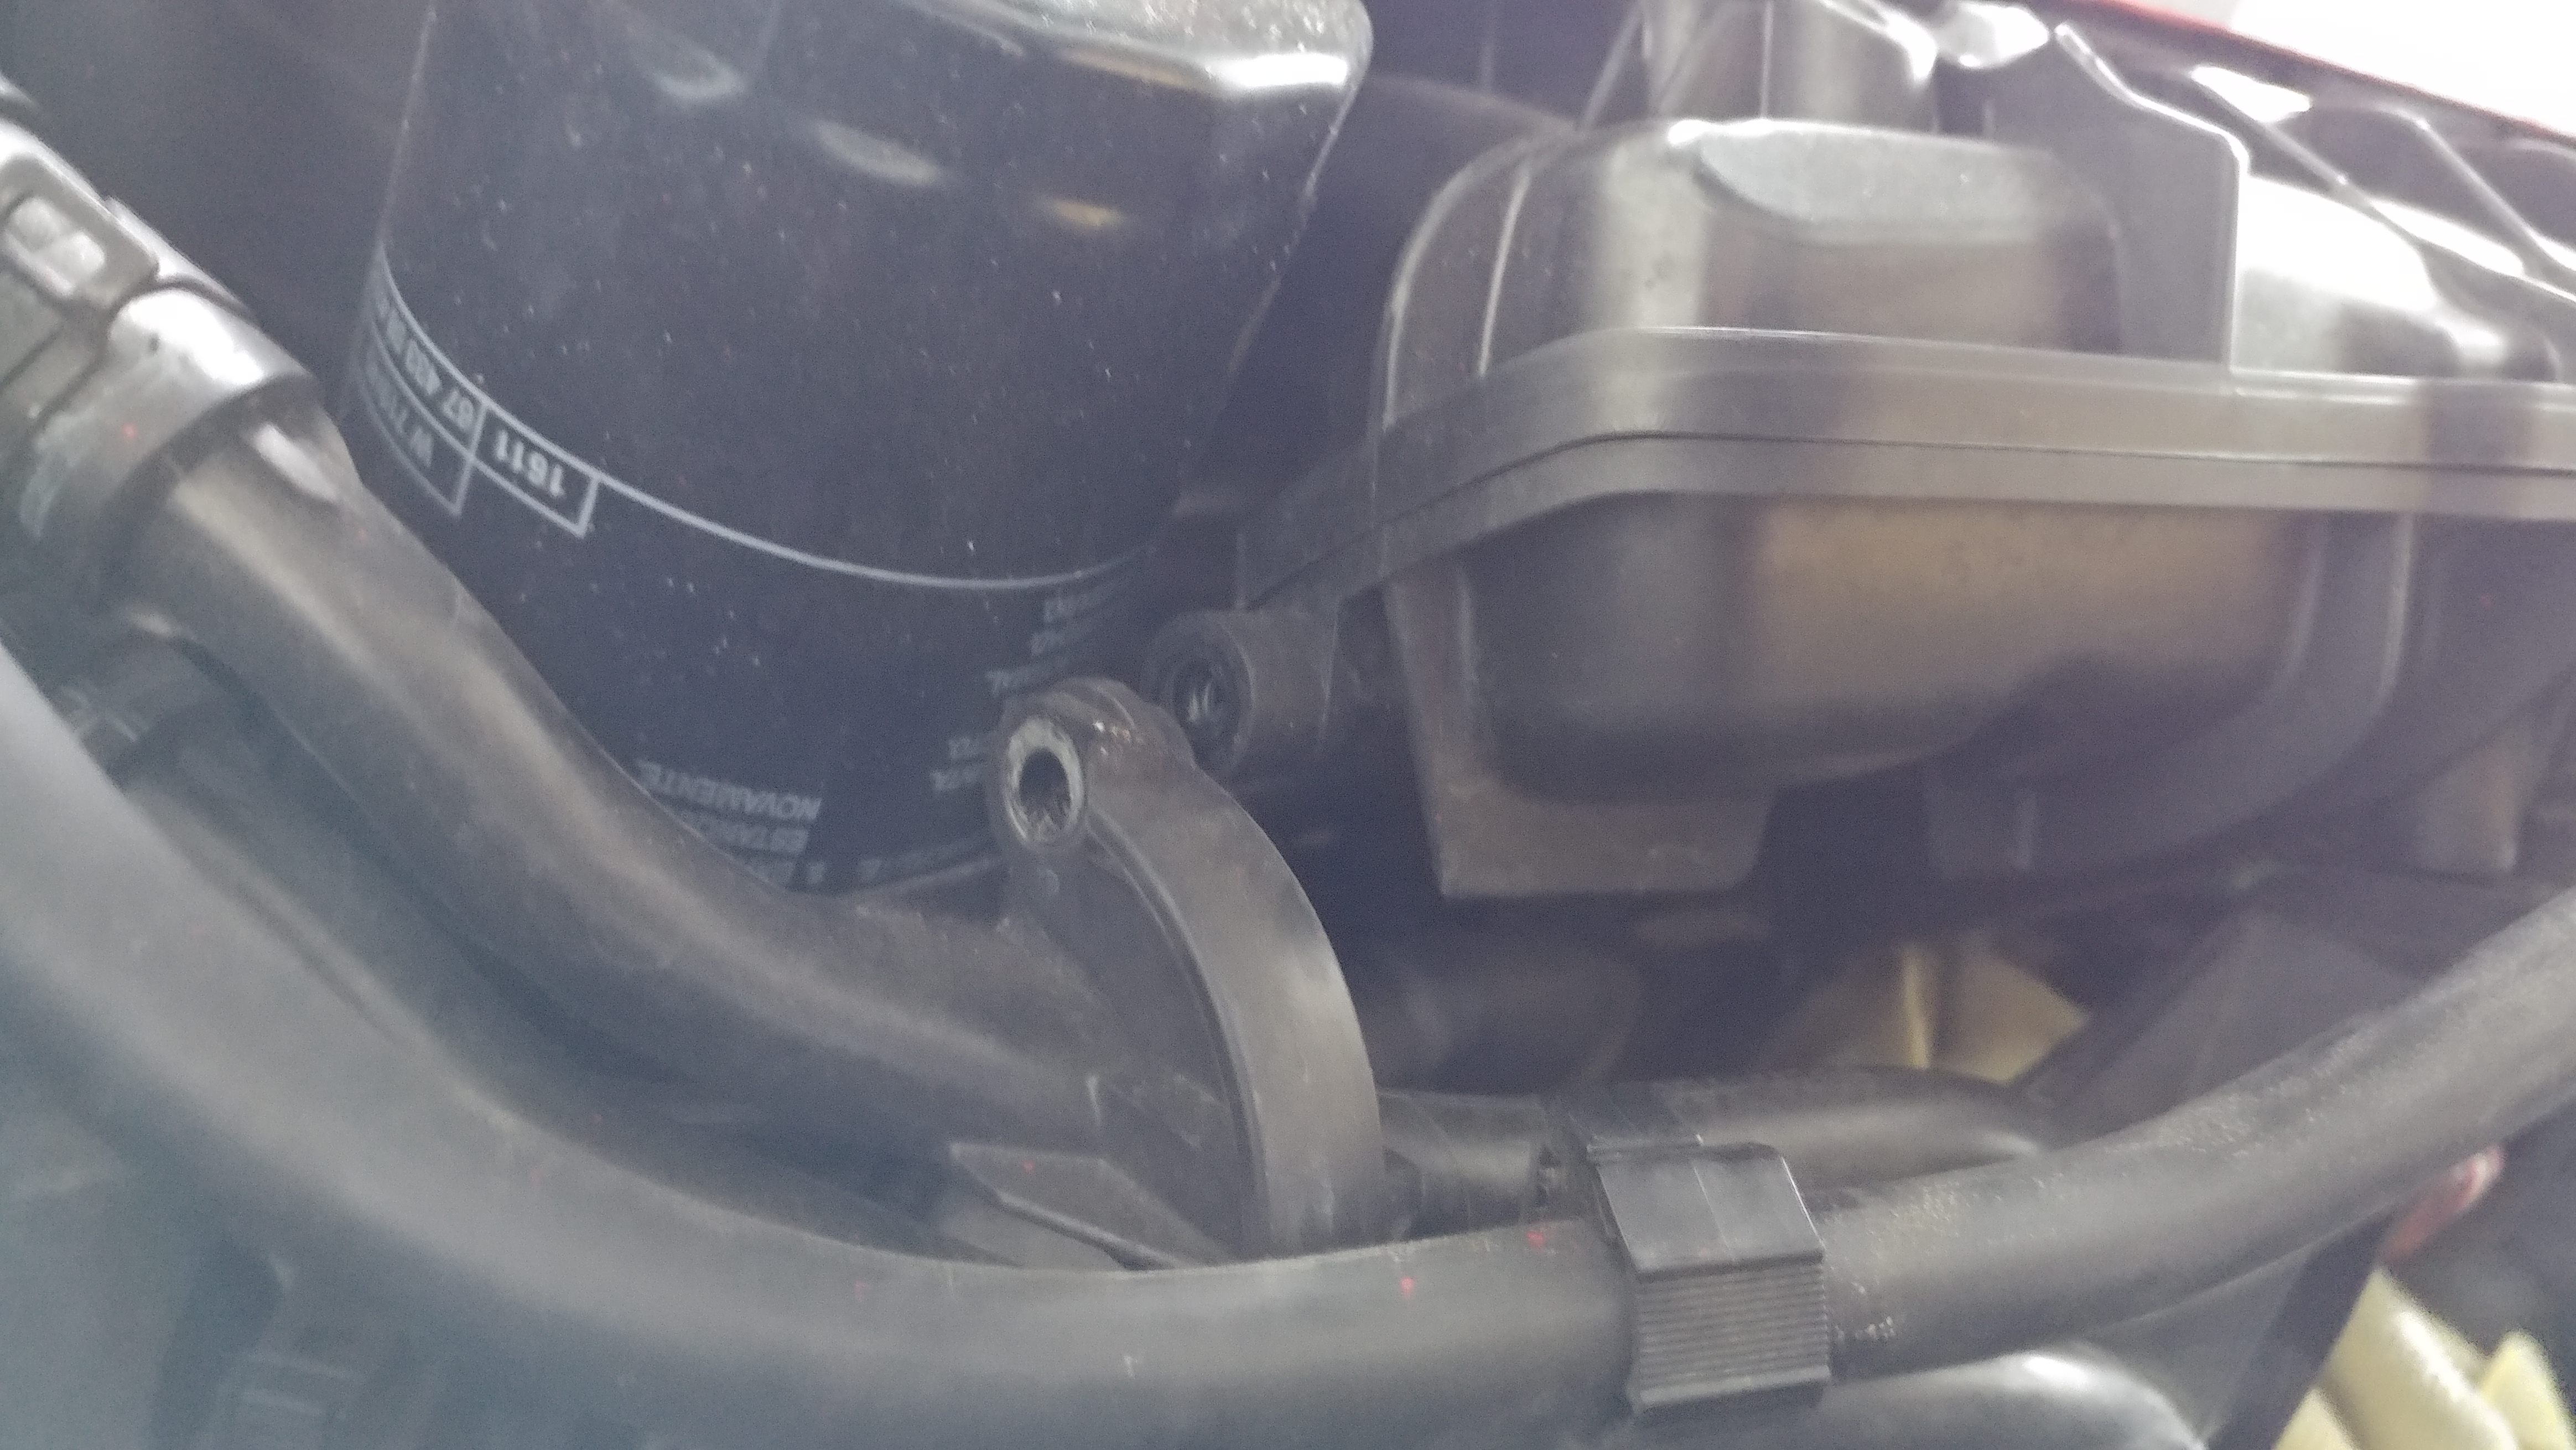
NOTE: I removed this screw holding the lines to the intake manifold to be able to access the rear screw on the throttle body!
7. After all four screws are removed, safely unplug the connector on the front of the throttle body.
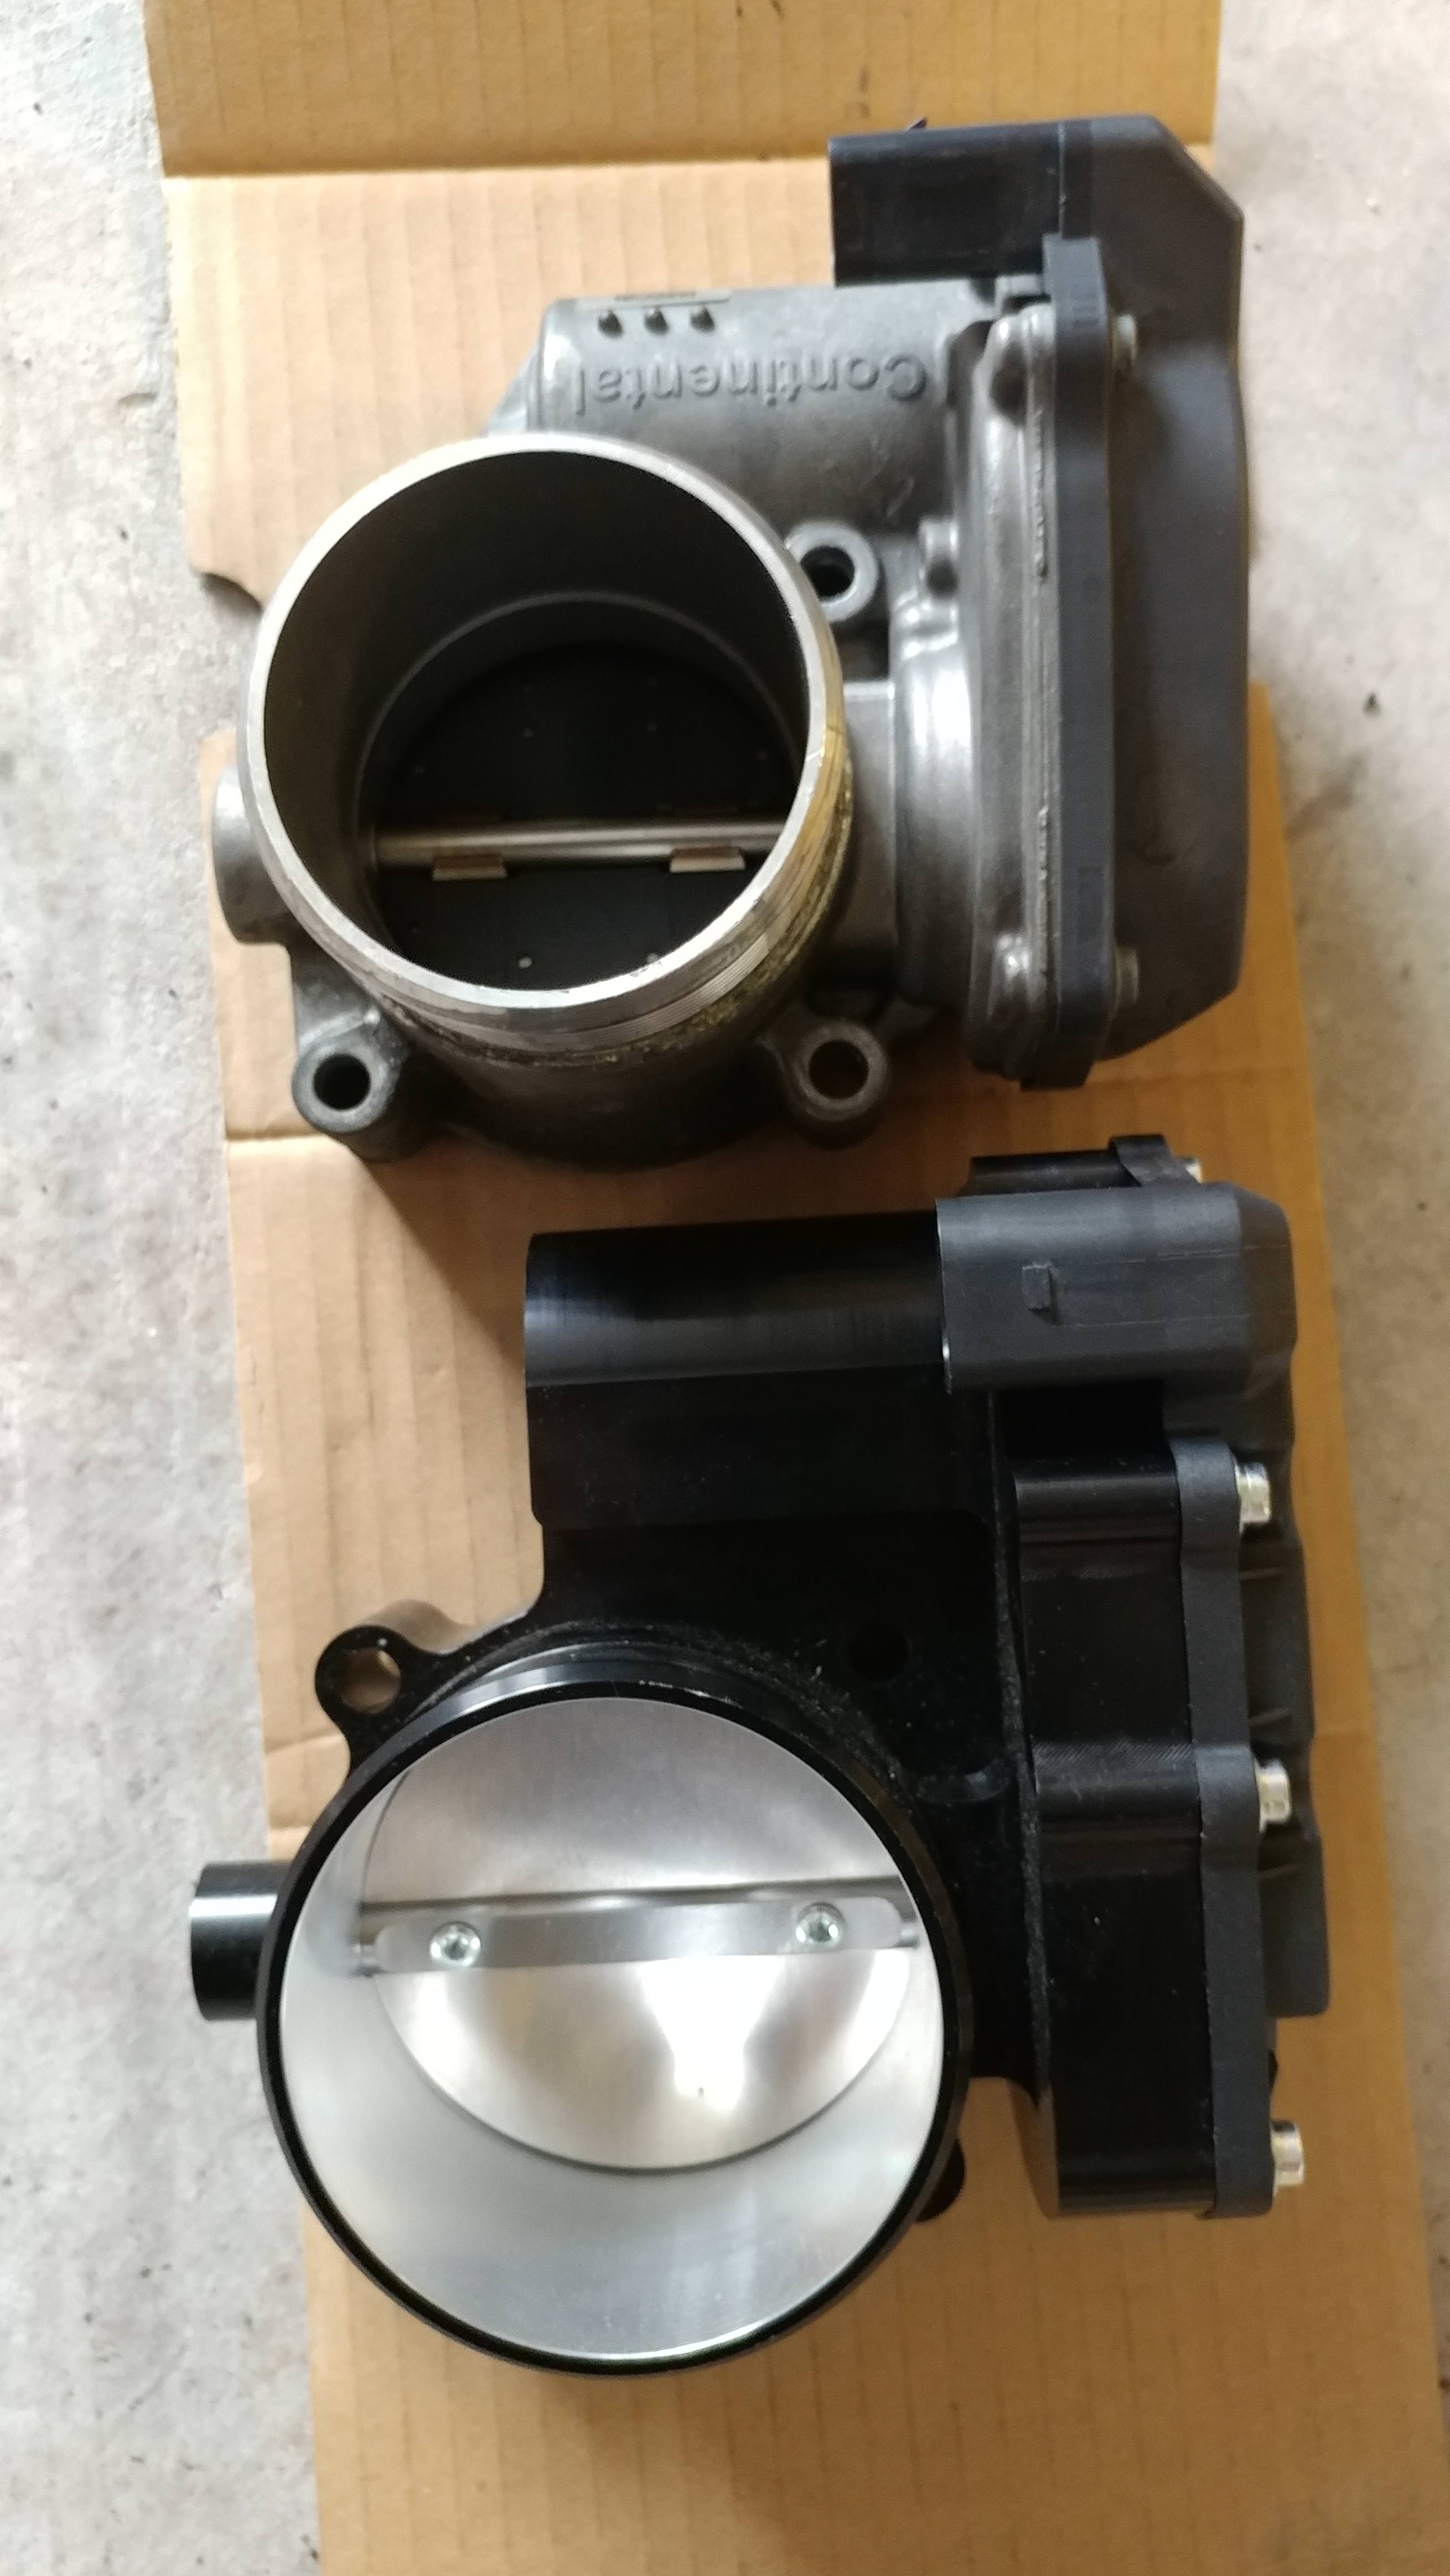
8. Compare the pitiful (but faithful) throttle body you removed to the new glory.


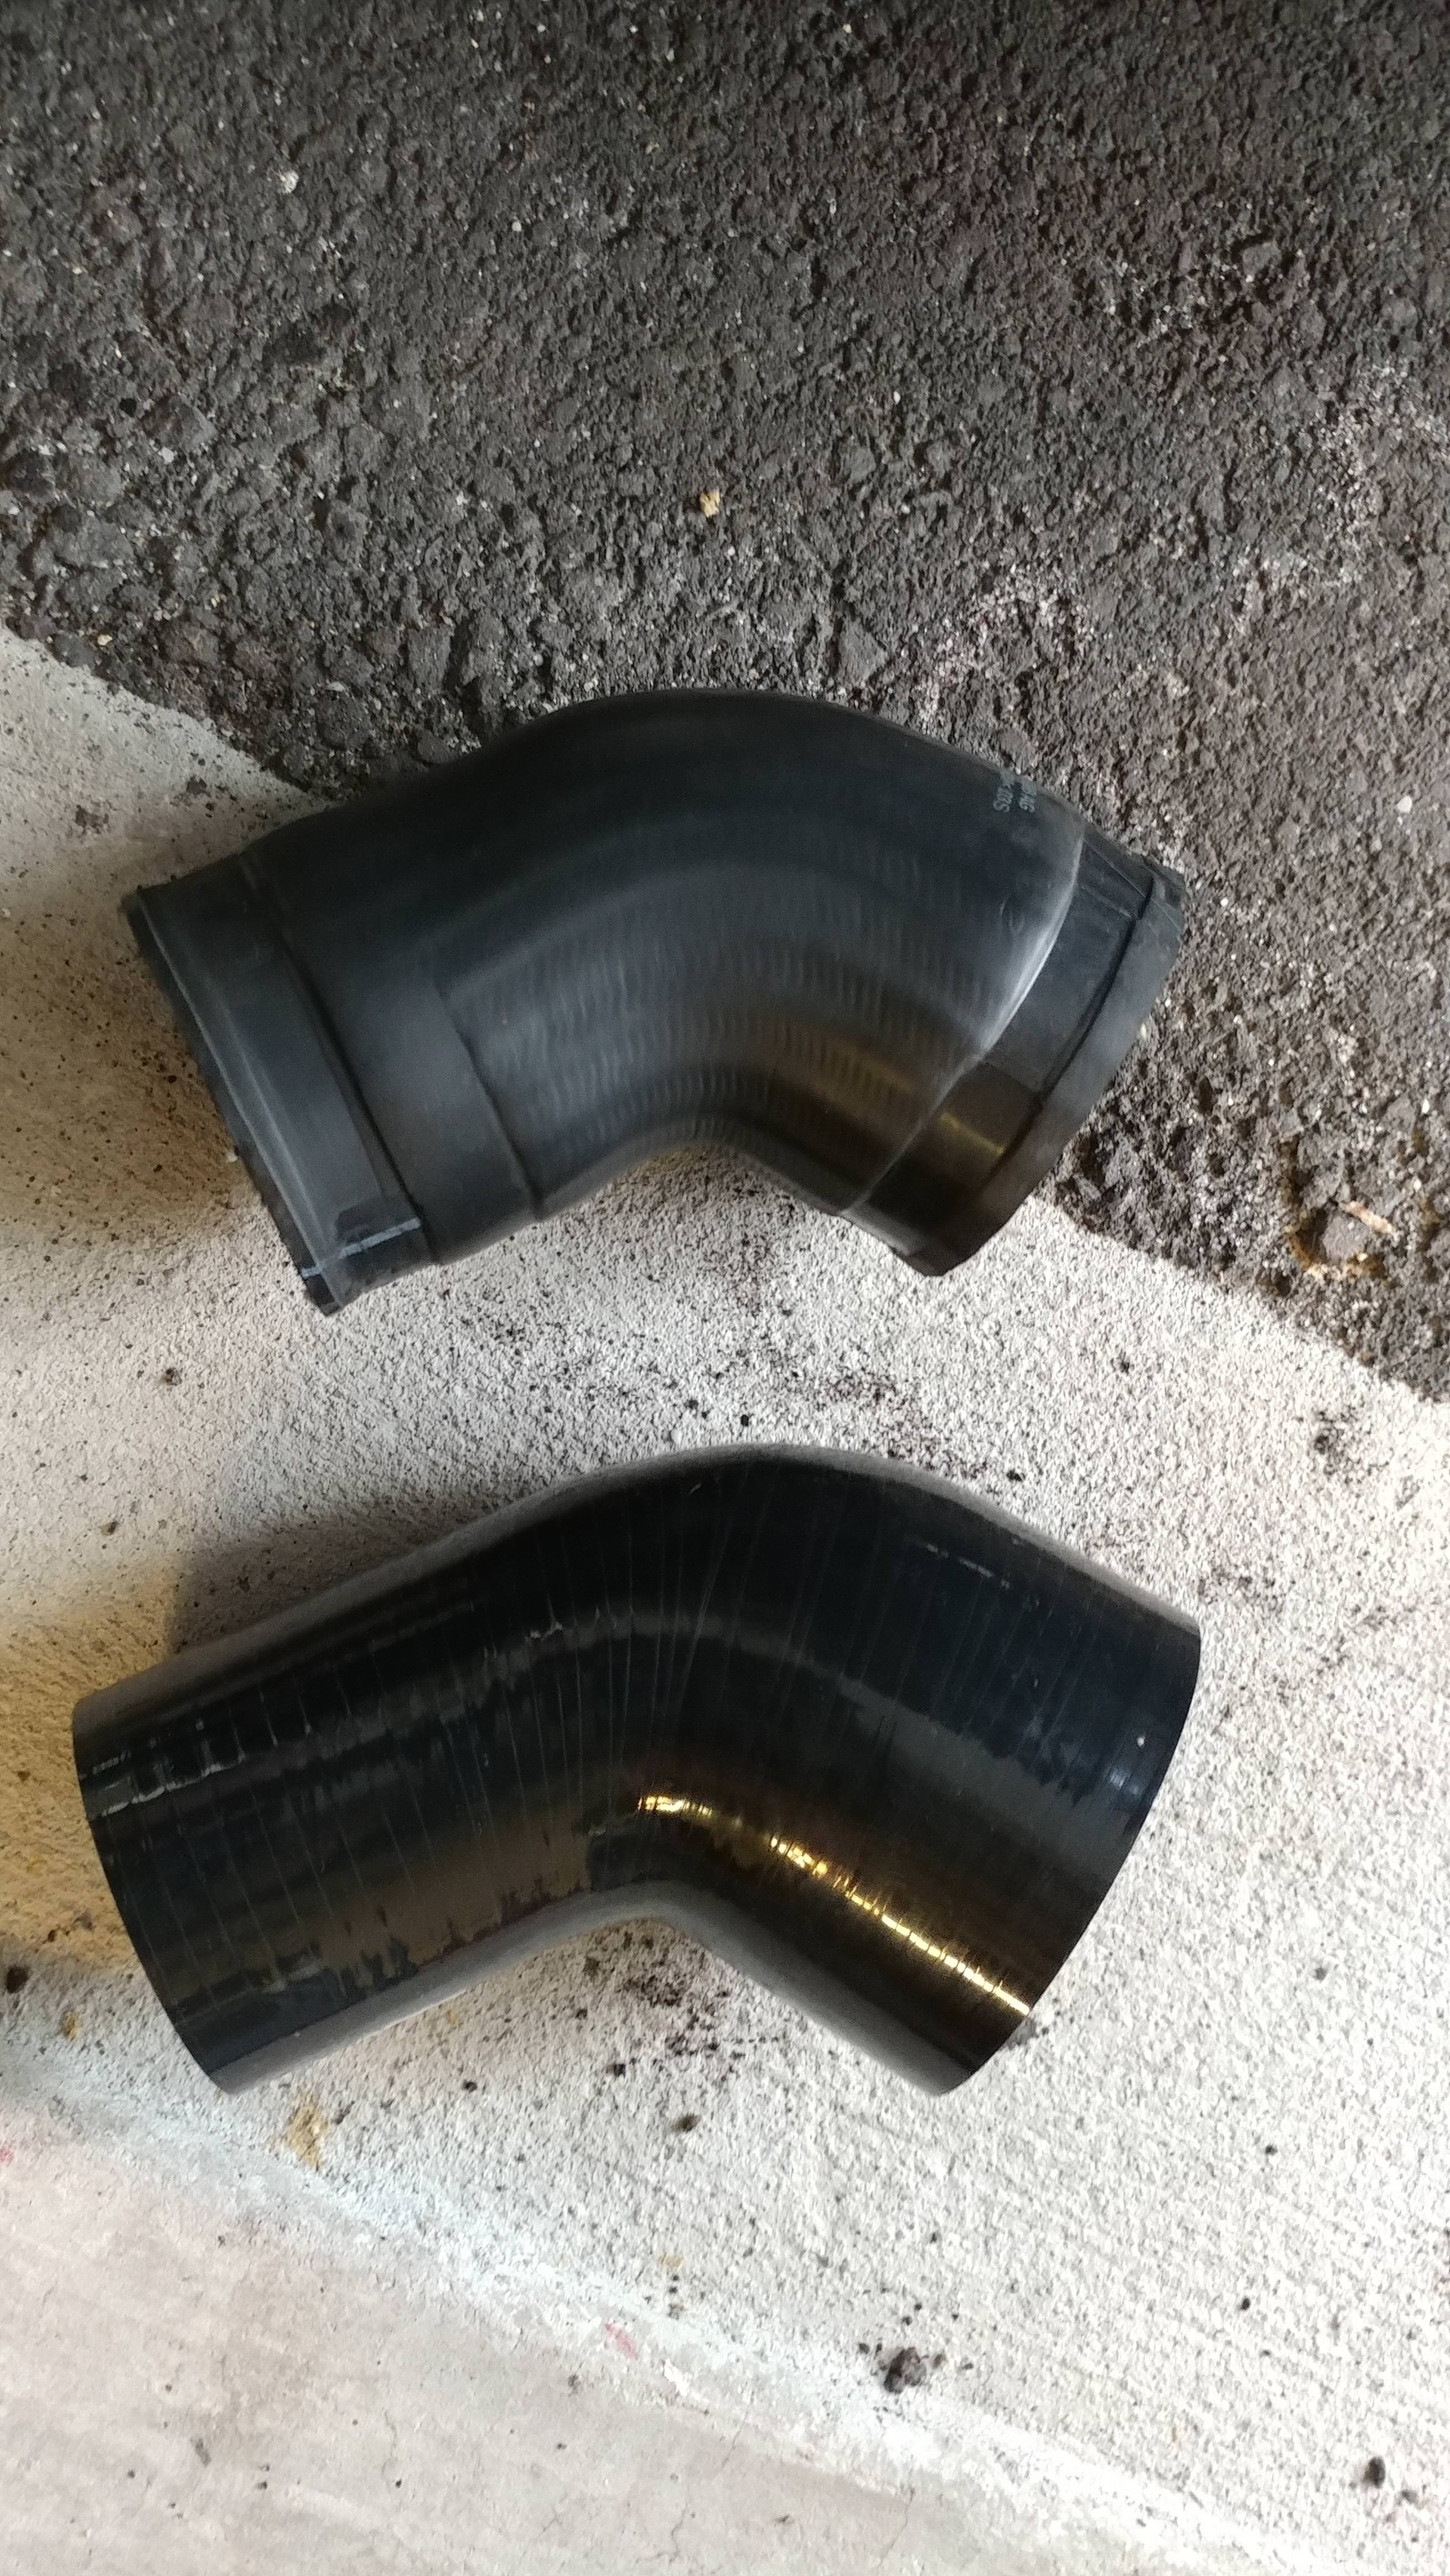
9. Compare the old hose and the new hose that you will replace.
10. Install new throttle body. In order to do this, just line it up and start hand threading the screws to get them held in place. Tighten with your T30 socket. After this, remove the mirror, light source, and towel.
11. Next, install the hose connecting from the throttle body to the charge pipe. Once you have spent 10 minutes trying to force the hose in that tiny crevice, install the hose clamps and tighten down with a flat-head screwdriver.
12. Last, reinstall all additional screws that you removed and the connector for the throttle body.
This should be the finished product!

IMPRESSIONS
Overrall, I am extremely impressed with this product. There is a huge difference in the throttle response, that you can easily feel (and is very audible). I DO seem to have really reduced that sort of lag feeling that I have been having. There were no codes thrown with this either whatsoever. One thing I did notice, is on cold starts sometimes you will have to attempt to start twice before it will turn over. I'm guessing at this point the ECU hasn't learned the new throttle body and this was written the morning after install. The first turnover after installing wasn't an issue though. Grams and ECSTuning have both said that you "shouldn't" need any tuning for this product. I will revisit this is a later post.
I will follow up with a video link later.
I hope this DIY has helped anyone attempting to upgrade or just replace their throttle body and not spend hundreds of dollars at a dealer to do a 30 minute job.
Grams 70mm Throttle Body Upgrade for MK6 GTI
"The Grams 70mm Throttle Body for the Volkswagen GTI MK5/MK6 is designed in mind for either a completely stock or heavily modified engine. The Throttle body provides a precision-honed oversize bore to allow more air into the intake, thus allowing for greater breathability of your GTI. This will have a slight increase of horsepower and torque with a tremendous noticeability in throttle response. To ensure the best performance, throttle response and driveability, each TPS sensor is calibrated to meet the exact requirements of the vehicles engine management system."
https://www.ecstuning.com/b-grams-p...6-throttle-body-black-series/g09-09-0710~gpd/
As everyone may already know, Volkswagen is KNOWN for putting cheap plastic parts in their products in order to cut manufacturing costs and weight in their cars. In some places, this just isn't need. Enter the throttle body. The throttle body connects your charge pipe from your inter-cooler to your intake manifold and can be a huge choke point, kind of like those pancake pipes.
INSTALLATION
Tools needed:
T30 Socket
Ratchet (small)
Hose Clamps
Flat-Head Screw Driver
Flashlight (it gets dark)
Towel
Mirror
Girlfriend with tiny hands
So without further ado, let's get started:
1. Unboxing the new glory!
2. Open the hood and reveal the engine bay!
3. Locate the throttle body. It is located in the front of the engine bay, right underneath the intake manifold and connects to your charge pipe leading from the inter-cooler.
4. Remove the hose clamps from the hose that connects the throttle body to the charge pipe with a flat head screwdriver. (both seen here)
5. This part is where it gets tricky, and smaller hands really benefit. Place a rag underneath the throttle body covering the charge pipe. This is done for many different reasons. One, it protects from any debris falling into the charge pipe. Two, if you drop a screw holding the throttle body in place, it lands on a cushy soft rag and prevents the pain and agony of searching through the engine bay.
6. Unscrew the four screws holding the throttle body to the intake manifold with your T30 socket and ratchet. One screw can be seen here.
The remaining three line around the throttle body. This is where a mirror, placed on the rag and a light source (pointing upwards) really comes in handy. This way you can see the screws and remove them without dropping. The far left screw is a VERY tight squeeze and this is where my girlfriend came in MAJOR handy. :happyanim:
NOTE: I removed this screw holding the lines to the intake manifold to be able to access the rear screw on the throttle body!
7. After all four screws are removed, safely unplug the connector on the front of the throttle body.
8. Compare the pitiful (but faithful) throttle body you removed to the new glory.
9. Compare the old hose and the new hose that you will replace.
10. Install new throttle body. In order to do this, just line it up and start hand threading the screws to get them held in place. Tighten with your T30 socket. After this, remove the mirror, light source, and towel.
11. Next, install the hose connecting from the throttle body to the charge pipe. Once you have spent 10 minutes trying to force the hose in that tiny crevice, install the hose clamps and tighten down with a flat-head screwdriver.
12. Last, reinstall all additional screws that you removed and the connector for the throttle body.
This should be the finished product!
IMPRESSIONS
Overrall, I am extremely impressed with this product. There is a huge difference in the throttle response, that you can easily feel (and is very audible). I DO seem to have really reduced that sort of lag feeling that I have been having. There were no codes thrown with this either whatsoever. One thing I did notice, is on cold starts sometimes you will have to attempt to start twice before it will turn over. I'm guessing at this point the ECU hasn't learned the new throttle body and this was written the morning after install. The first turnover after installing wasn't an issue though. Grams and ECSTuning have both said that you "shouldn't" need any tuning for this product. I will revisit this is a later post.
I will follow up with a video link later.
I hope this DIY has helped anyone attempting to upgrade or just replace their throttle body and not spend hundreds of dollars at a dealer to do a 30 minute job.
Last edited:

