DUTCHswift
Ready to race!
DUTCHswift's Premium 2012 Golf R
This thread is so that I can keep a record of my R like I did with my GTI. I will update this to keep track of my progress, so stay tuned. :beer:
My Last Build: 2013 Volkswagen GTI
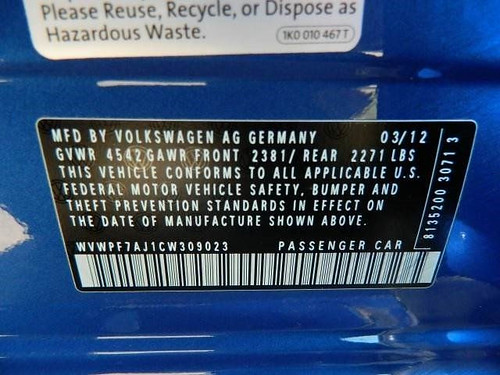
FACTORY SPECS:
- 2012 Golf R Premium Trim
- Rising Blue
- Titan Black Interior
- 6 Speed Manual
- Xenon Headlights
- 4-door
- Miles: 12,109 (<When I Bought It)
EXTERIOR:
- Gloss Black Front & Rear VW Logos
- Ghost Knit CF Lip
- DUTCH Parts Co. Front Splitter
- DUTCH Parts Co. Side Skirt Splitters
- OEM Roof Rack w/ THULE Fairing
- OEM Bike Rack
- USMillWorks Front Plate Mount w/ Quick Disconnect
- Rolled/Pulled Front Fenders
- Gecleant Glass Rear Wiper Delete
- OEM Euro R LED Taillights
- Smoked Rear Bumper Side Markers
- Body Work:
INTERIOR:
- Digital Pressure Gauge
- Center Console Mounted E-Level Controller
- False Floor with Full Polished Hardline Trunk Setup
- OEM First Aid Kit
- OEM .:R Line Monster Mats
- NewSouth Vent Pod Boost Gauge
- Golf R Seat Inserts
- Ash Tray Mounted ZAETECH Pressure DigiGauge
- BMS Short Throw Clutch Stop
- DeAutoKey LED Interior Light Set & Reverse Lights
- OEM Euro Dash Cubby
ENGINE:
- OEM R8 Oil Cap
- OEM R8 Coolant Cap
- OEM Black Washer Fluid Cap
- BFI Stage 1 Dogbone Insert
- CTS Turbo Golf R 3" Catless Turbo Back Exhaust
- CTS Turbo MK6 Golf R Air Intake System
- CTS Turbo Heat Shield Golf R / FSI Specific
- Autotech FSI High Pressure Fuel Pump Upgrade Kit
- APR Stage 2+ w/ NLS & LC (Stock, 91, 93, 100) - 329WHP / 351WTQ
BRAKES / SUSPENSION:
- StopTech Sport Front & Rear Brake Pad Sets
- Adam's Rotors Front & Rear Drilled & Slotted Brake Rotors
- Accuair E-Level
- Accuair VU4
- Air Lift Performance Series Struts
- Air Lift Double Bellow Rears
- Air Lift 4 Gallon Polished Tank
- Dual 400c Compressors
- Dual SMC Check Valves
- Dual 1/4" Water Traps
- 3/8" Air Lines
- Black Controller
- Wireless Key Fobs
- TyrolSport Sub Frame Bushings (Front/Rear)
- Passenger Side Frame Notch
- IDF Rear Adjustable Upper Control Arms
- Airlift Performance Rear Shocks
WHEELS:
OEM Wheels
OEM Talladegas
- 18" x 7.5" et51 (225/40 R18 Nexen All-Seasons)
2018 Show Wheels
OZ Futura (Brushed Faces w/ Mirror Polished Windows & Powder Coated Clear)
- 19 x 9 et45 (225/35-19 Nitto NT555's)
- 1.5" Lips / 7.5" Barrels
- Reverse Mount Faces
- 5X112
2016/2017 Show Wheels
OZ Futura (Faces Mirror Polished and Powder Coated Clear)
- 18 x 10 et26 (225/40-18 Nitto NeoGen's)
- 2.5" Lips / 7.5" Barrels
- Reverse Mount Faces
- 5X112
2015 Show Wheels
OZ Futura (Faces Powder Coated Audi Quartz Grey Metallic)
- 18 x 9.5 et27 (et22 w/ 5mm Spacers)
- 2.5" Lips / 6.5" Barrels
- Sandwich Mount Faces
- 5X112 Redrilled
VAGCOM:
- Window Up/Down, Sunroof Open/Close with KeyFob
- Disable Open Door Chime
- ESC Defeat
- Disable Rear Window Wipe when in Reverse
IN THE WORKS FOR 2018:
- New wheels...
WISH LIST:
- 034 Motorsports Aluminum Dogbone Insert
- Audi TTS Engine Cover Kit
- BFI SCHWARZ Shift Knob (Air Leather)
- CTS Turbo Charge / Discharge Pipes
- EZT Carbon Fiber Steering Wheel
- RECARO Sportster CS Seats
- Whiteline Front Lower Control Arm Bushings and Brackets
- APR FMIC or IE FMIC
- Golf R City Lights or DeAutoKey LED Bi-Xenon City Lights & Puddle Lights
SHOWS:
2015
- Dubs On Defrost 8
- New England Dustoff
- Vacationland VAG Fair
- Wolfsgart 6.0
- Volksbahn
- Hot Import Nights
- H2Oi
- Staggered
- First Class Fitment
2016
- New England Dustoff
- Vacationland VAG Fair
- Westside VW
- Wolfsgart 7.0
- Volksbahn
- First Class Fitment
2017
- New England Dustoff
- Vacationland VAG Fair
- Wolfsgart 8.0
- H20i (H2No)
FEATURES:
- StanceNation: LESS IS MORE // BRIAN JENSEN’S FITTED MK6 R.
This thread is so that I can keep a record of my R like I did with my GTI. I will update this to keep track of my progress, so stay tuned. :beer:
My Last Build: 2013 Volkswagen GTI
FACTORY SPECS:
- 2012 Golf R Premium Trim
- Rising Blue
- Titan Black Interior
- 6 Speed Manual
- Xenon Headlights
- 4-door
- Miles: 12,109 (<When I Bought It)
EXTERIOR:
- Gloss Black Front & Rear VW Logos
- Ghost Knit CF Lip
- DUTCH Parts Co. Front Splitter
- DUTCH Parts Co. Side Skirt Splitters
- OEM Roof Rack w/ THULE Fairing
- OEM Bike Rack
- USMillWorks Front Plate Mount w/ Quick Disconnect
- Rolled/Pulled Front Fenders
- Gecleant Glass Rear Wiper Delete
- OEM Euro R LED Taillights
- Smoked Rear Bumper Side Markers
- Body Work:
9/16/15 @ ~30k Miles:
- Front Bumper License Plate Holes Filled
- Painted Side Markers
- New Painted Tow Hook Cover
- Fix Hood Clear Coat
6/15/18 @ ~80k Miles:
- Brand New Front Fenders w/ Folded & Seam Sealed Edges
- Rear Quarter's Fixed From Rubbed Off Paint & Bent Body Lines
- New Center Front Bumper Grille
- Re-Painted Side Front Bumper Grilles
- Re-Cleared GhostKnit Front CF Lip
- Re-Cleared/Blended Front Bumper
INTERIOR:
- Digital Pressure Gauge
- Center Console Mounted E-Level Controller
- False Floor with Full Polished Hardline Trunk Setup
- OEM First Aid Kit
- OEM .:R Line Monster Mats
- NewSouth Vent Pod Boost Gauge
- Golf R Seat Inserts
- Ash Tray Mounted ZAETECH Pressure DigiGauge
- BMS Short Throw Clutch Stop
- DeAutoKey LED Interior Light Set & Reverse Lights
- OEM Euro Dash Cubby
ENGINE:
- OEM R8 Oil Cap
- OEM R8 Coolant Cap
- OEM Black Washer Fluid Cap
- BFI Stage 1 Dogbone Insert
- CTS Turbo Golf R 3" Catless Turbo Back Exhaust
- CTS Turbo MK6 Golf R Air Intake System
- CTS Turbo Heat Shield Golf R / FSI Specific
- Autotech FSI High Pressure Fuel Pump Upgrade Kit
- APR Stage 2+ w/ NLS & LC (Stock, 91, 93, 100) - 329WHP / 351WTQ
BRAKES / SUSPENSION:
- StopTech Sport Front & Rear Brake Pad Sets
- Adam's Rotors Front & Rear Drilled & Slotted Brake Rotors
- Accuair E-Level
- Accuair VU4
- Air Lift Performance Series Struts
- Air Lift Double Bellow Rears
- Air Lift 4 Gallon Polished Tank
- Dual 400c Compressors
- Dual SMC Check Valves
- Dual 1/4" Water Traps
- 3/8" Air Lines
- Black Controller
- Wireless Key Fobs
- TyrolSport Sub Frame Bushings (Front/Rear)
- Passenger Side Frame Notch
- IDF Rear Adjustable Upper Control Arms
- Airlift Performance Rear Shocks
WHEELS:
OEM Wheels
OEM Talladegas
- 18" x 7.5" et51 (225/40 R18 Nexen All-Seasons)
2018 Show Wheels
OZ Futura (Brushed Faces w/ Mirror Polished Windows & Powder Coated Clear)
- 19 x 9 et45 (225/35-19 Nitto NT555's)
- 1.5" Lips / 7.5" Barrels
- Reverse Mount Faces
- 5X112
2016/2017 Show Wheels
OZ Futura (Faces Mirror Polished and Powder Coated Clear)
- 18 x 10 et26 (225/40-18 Nitto NeoGen's)
- 2.5" Lips / 7.5" Barrels
- Reverse Mount Faces
- 5X112
2015 Show Wheels
OZ Futura (Faces Powder Coated Audi Quartz Grey Metallic)
- 18 x 9.5 et27 (et22 w/ 5mm Spacers)
- 2.5" Lips / 6.5" Barrels
- Sandwich Mount Faces
- 5X112 Redrilled
VAGCOM:
- Window Up/Down, Sunroof Open/Close with KeyFob
- Disable Open Door Chime
- ESC Defeat
- Disable Rear Window Wipe when in Reverse
IN THE WORKS FOR 2018:
- New wheels...
WISH LIST:
- 034 Motorsports Aluminum Dogbone Insert
- Audi TTS Engine Cover Kit
- BFI SCHWARZ Shift Knob (Air Leather)
- CTS Turbo Charge / Discharge Pipes
- EZT Carbon Fiber Steering Wheel
- RECARO Sportster CS Seats
- Whiteline Front Lower Control Arm Bushings and Brackets
- APR FMIC or IE FMIC
- Golf R City Lights or DeAutoKey LED Bi-Xenon City Lights & Puddle Lights
SHOWS:
2015
- Dubs On Defrost 8
- New England Dustoff
- Vacationland VAG Fair
- Wolfsgart 6.0
- Volksbahn
- Hot Import Nights
- H2Oi
- Staggered
- First Class Fitment
2016
- New England Dustoff
- Vacationland VAG Fair
- Westside VW
- Wolfsgart 7.0
- Volksbahn
- First Class Fitment
2017
- New England Dustoff
- Vacationland VAG Fair
- Wolfsgart 8.0
- H20i (H2No)
FEATURES:
- StanceNation: LESS IS MORE // BRIAN JENSEN’S FITTED MK6 R.
RECENT PICTURES:


The GTI:

The GTI:
Last edited: