GOLFMK8
GOLFMK7
GOLFMK6
GOLFMKV

APR K04 TSI DIY Install

rauch

Ready to race!
Can someone give me the part # for the two M10 XZN bolts that hold the heat shield to the block in step 7?

Took a quick look at the online catalog... Couldn't find it for you. Its probably somewhere along the lines of 6mm x 1.0. You don't have to use the XZNs as replacements. Frankly, they're a pain in the ass. Your local hardware store should have 6mm x 1.0 x 3/4" in stock with a hex head. Just check the threads with the ones you pull out of the bin to make certain the diameter and thread pitch are correct and that they aren't too long (unless you feel confident cutting it to exact length.

They may be 8mm x 1.0. I just know for sure that the oil return are 6mm x 1.0. Had to drill and tap the threads. No biggie.

Sent from my Nexus 6 using Tapatalk
 

XGC75

Go Kart Champion
I just want to say that this guide was very helpful but just passing the word of caution to those undertaking this on their own. Check all the bolts heads especially the ones you cannot see clearly.

The guide was spot on for type of bolt heads for me except for the top nut for the turbo bracket. In the guide, it states that it is a 6mm allen plug but it was actually a triple square on my car.

The nut is kind of in a hard to see space and I thought that since the guide did not have any differences so far that it most likely will be correct. I put in the 6 mm allen and it was snug (again this made me feel like this was the correct head) and then when I torqued it to loosen it, it was stripped. After the fact, I took my cell phone and took a picture and it looked was a M8 triple square =(.

This was the last thing that I needed to get the turbo out. I tried ignoring the bracket but since the bracket was there, I could not angle the turbo out.

Anyway, I said f it and put everything back and now im having a shop do it since they probably have the tools necessary to remove that stripped bolt and get it done.

For those thinking about doing it this, the guide is awesome, just be super careful before removing bolts you cannot see clearly so you do not have to go what I have to go through.

This must be what happened to my turbo support bracket bolt. I came at it with a 6mm allen and it stripped within 40Nm of torque. I was really surprised - a 7mm allen fit in there after that. I ended up getting the turbo out with the bracket still installed to the turbo.

Eventually it took a 7/32" allen socket, a 2' 1/2" drive breaker bar, a pipe wrench on the outer head and several days of soaking with PB blaster to pop it loose. I was 2 minutes from just ordering a new bracket.

Uninstall issues I encountered:

Coolant fucking everywhere. Even if you drain the coolant elsewhere, you'll get the same 1 pint of coolant from the lines. Have a bucket ready.

Install notes:

Install the oil feed line last of all the lines. It's unusually difficult to install the coolant return line with the oil feed line in the way. Also, don't fully torque the coolant return line until getting the turbo support bracket back into place. Otherwise, in case you need to twist the line like I did, you'll either bend the line or loosen the whole banjo bolt to get the bracket fitted.

I didn't have a thick washer for the coolant return line banjo/CHRA position. I did have two extra washers so I used two washers in that location. The line clears, however I'll be watching for leaks from the extra voids.
My wastegate nipple (CTS-sourced turbo) was butting up against the motor mount, crimping the N75 vacuum feed line. I'll need to bend the nipple to get it out of the way. Hope I don't snap it.

I'm sure I'll have other notes by the time my install is fully completed. I'll come back with pictures as well.
 

lilfleck

Go Kart Champion
Keep us informed.

I plan on clamping the coolant line before disconnecting in hopes to control the flood. I remember last time, it was everywhere. A big f'n mess. Good tips on the order of reassembly. Luckily it is the same as in Grambles guide :p But I know when you're under there, some things just go out the window since you know how it came apart.
 

XGC75

Go Kart Champion
Here are my thoughts about the process. I ran into some unique issues during my install due to having a curmudgeoned kit, but in case anyone else either pieces together their own kit or runs into similar issues here's a reference for your solution.

Well, at least I'm not going to need the car for a week.

Hit some roadblocks on the way to getting the k03 out. Downpipe bolts were a bitch as usual. The XZN12 banjo for the coolant return didn't want to budge - of course you can't fit a socket wrench on it, but the vice grips kept gauging the bit without breaking the banjo. Fortunately the bit has a 10mm bolt head pattern so I could get some purchase on that, but not before eating my fucking 10mm wrench. It was a Craftsman, too. Not the best of them but not some cheap Chinese shit either. Oh, then coolant. Smelly 85k mile coolant, everywhere.


The manifold bolts were so easy. Getting it out the top wasn't bad, either. You might notice the turbo support bracket is still attached to the k03 - that's because the bolt with the 6mm allen head now has an 8mm circular hole where the allen part used to be. Going to try to torch it off tomorrow.


Now here's the real fun part. The compressor housing I bought didn't come with the vaccuum plumbing fittings. Whatever, I thought, I'll go to Autozone. When Autozone didn't have anything, I hit up Pepboys. Then Ace Hardware. Then Home Depo. Nothing. At this point, I know it's not going to be until two weekends from now that I can get this thing together and running and I'm not to enthused about it, but at least it'll happen becuase MSC will have the fitting I need, right?

Nope.

So fuck me :iono:


Not a bad looking turbo for 85k miles and much thrashing. Not a scratch.

Got the fittings figured out. Had to drill open the M8 threads and install some 5/16"-27 threads for off-the-shelf fittings. The 90 degree fitting isn't a barbed end but a screw, which ended up being a plus because the barb probably wouldn't have fit. I sealed the threads with OEM gasket maker. It's OEM for Honda and Nissan, so it's good enough for me in this application.

Before:


After:


Though I'm not all that concerned about the barbs on the exterior, I did have to bore out these holes from a ~5mm pinhole to the full 5/16" bore so that I could tap them out. It's not so much a problem for the functionality or tuning as it is for potential noise. Hopefully that's not an issue.

Things went back into the car super easy. Had some downpipe studs overnighted so I didn't have to deal with the old ones (surprised USP's turbo swap kit didn't come with any, though...). I also got some new bolts, one for the wastegate mounting amd one for the turbo support bracket (for obvious reasons). The bolts to the manifold are torqued surprisingly loose. The one thing that did give me trouble on the reinstall was the heat shield. It's simply hard to get to those bolts, and hard to figure out how the thing lines up.

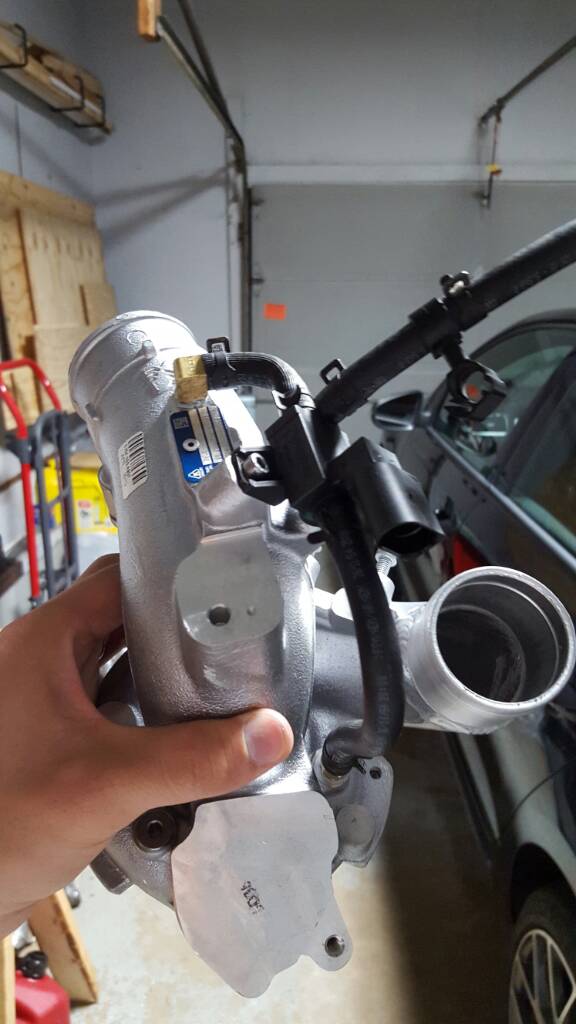
Some concessions I noticed about my particular setup: 1) The compressor housing is clocked a bit too forward. The intake coupler (which is curiously from an older-style Uni DV relocation kit, when the rest of the kit is by CTS) really presses up against the vacuum lines.

2) My intake is much much smaller than the intake coupler. This is actually a good thing, because with the turbo clocked as forward as it is this is surely the only intake out there that would fit. The intake coupler fortunately doesn't buckle when it's tightened up to the intake, which also pulls it just barely away from the vacuum lines.

3) The N75 to Wastegate vacuum line is buckled in two locations. One is caused by pressing right up against the motor mount. The other is simply because it's too much of a bend in too little space. Now that the TOP is installed it's harder to see and get to, but I'm sure that it's not crimped to the point of cutting off the pressure to the wastegate.

Last issue was the coolant flush. As I noted above, the coolant lines were definitely not drained fully. At my buddy's recommendation I disconnected the coolant return line and let the electric pump drain out the rest of the coolant. Once it was drained I put a gallon of distilled water to try and cut out the old coolant. Once it drained clear I reinstalled the coolant return line and filled the reservoir with my 50/50 G12 and distilled water mix. And the system refused to draw the mix. :confused:

Turns out that the electric pump runs a separate circuit that includes the block and tirbo, but not the radiator. So because the radiator was full, the other circuit couldn't take on new coolant. This morning after the engine cooled I siphoned out about a gallon from the radiator through the return line (started the siphon only by squeezing the cold side radiator pipe - got to figure out why that worked), filled with more new coolant mix and it finally took. Only about a half a reservoir, though, so I'm somewhat concerned there may be air bubbles in the circuits somewhere. Driving to the shop didn't draw any additional coolant at any rate.

The car started right up the first time and I only got a couple minutes of smoke from behind the engine. After that the car drove great. Pretty normal behavior all the way to Team VW in Merrillville, IN. Only hit 3lbs boost max, though.
 

XGC75

Go Kart Champion
The rebuild process is just fine. It's the "piecing your own kit together" part that is a pain. Making sure you have all the installation fittings, tools, fluids, couplers, bolts, etc. Getting all this is right in one fell swoop is a big benefit of just buying a kit from a vendor. It's a bit simpler when you buy used kits, because there's no worry of not having everything available for the CHRA. At least in my build that turned out to not be much of an issue.
 

lilfleck

Go Kart Champion
I can attest to that. Ran into a lot of stupid & stressful issues during the install for my first one. Hoping this next go around goes more smoothly.
 

lilfleck

Go Kart Champion
When are you coming back to the dark side? It's been nearly a year hasn't it?

Yep, it's been a year. I'm (hopefully) going K04 this weekend.

Getting all my ducks in order:


My buddy got a new addition to his garage which should make the job a bit easier this go around:
 

lilfleck

Go Kart Champion
It's a Quickjack BL-5000. Only downside is that its a bit too small for even our car! Meaning, it doesn't reach both jack points exactly. I had to mount a little before the jack point.

Otherwise, it made working under the car SO much better. It goes up a lot higher than I normally would go with a traditional jack and jack stand. I still had jack stands for safety (on top of the QuickJack safety point)...

It saved time raising and lowering for sure. Super great in that regard.
 

SilverSurferS4

Passed Driver's Ed
Just a tip for removing the upper 6mm allen turbo support bracket bolt (the one with the welded nut on the bracket). This bolt is a pain to remove when the engine is cold and I suspect this leads to people stripping the hex head on the bolt. I was able to removed it using a 6mm allen key by hand, however I needed to use a propane torch to heat the bolt and the nut on the bracket up first (heated it up for about 5-10minutes). I suggest resisting the urge to break this bolt lose when cold and risk stripping the allen head, heat it up and save yourself the potential headaches.
 

XGC75

Go Kart Champion
^^ good advise. It's cheap compared to the alternative.

Also, just check to make sure it's a 6mm Allen and not something else. A mirror and light is also a good investment[emoji106]

Sincerely, XGC75
 
Top