GOLFMK8
GOLFMK7
GOLFMK6
GOLFMKV

Sean's Shadow Blue GTI

smanierre

Autocross Champion
Took some time the other day and got my oil pressure and temp gauges installed. Decided to use the mounting holes with some bolts to keep it secured to the plastic, just to make sure it's not possible for it to pop out on the track. Also drilled another hole through the plastic for all the wires to run through. Since it blocks the cigarette lighter, I decided to pull the ground, power, and headlight signal from that cable which made it nice and easy. The signal wires for the sensors were really short so I had to splice them to a longer piece under the steering wheel which I then ran through the same hole as my battery relocation wire. Overall only took about 45 minutes and wasn't too bad.
Pod mounted to plastic with screws

Trimmed the screw length a bit with a dremel since clearance with the piece above is a bit tight

Hole for the wires to go through

Two signal wires being routed under the steering wheel and through the firewall

Power and ground wires being routed around the back to be hooked up to the outlet power

Clipped off the connector and got the splices on for the gauges. In hindsight I could have just spliced the connector back in as well, but I don't think anything would have fit in there with the pod installed.

Quick test and they light up fine, and even dim with the headlights on

Some shrink tape for good measure

The two signal wires coming through the firewall

Final product looks pretty good, Once I get the engine back in i'll hook up the sensors to the iAbed block and should be good to go
 

smanierre

Autocross Champion
Got my engine the rest of the way timed up last night. Spun it a couple of times with no issue so everything seems good. Waiting on new bolts for the accessory bracket and then i'll be able to continue with that, hoping they get here tomorrow or wednesday. Also order my ohlins and probably going with ground control camber plates as i've heard really good things about them.
 

Roadrunner_GTI

Drag Racing Champion
Got my engine the rest of the way timed up last night. Spun it a couple of times with no issue so everything seems good. Waiting on new bolts for the accessory bracket and then i'll be able to continue with that, hoping they get here tomorrow or wednesday. Also order my ohlins and probably going with ground control camber plates as i've heard really good things about them.

The engine turned sideways on the stand gives me major anxiety 😅
 

smanierre

Autocross Champion
The engine turned sideways on the stand gives me major anxiety 😅
It was only like that temporarily as I was going to work on getting the accessory bracket and other parts on the front of it. Rotating the pic so it's upright definitely gives it a weird look
 

smanierre

Autocross Champion
Went to go out and get my accessory bracket installed and I ordered the wrong size bolts. I got I m10 and i'm pretty sure I needed m8s so I gotta re-order those. May call vw tomorrow to see if they can tell me exactly what I need, but i'm pretty sure they'll just give me the wrong part number again. I did make some good progress on the coilovers though. The quality on them looks like everything I expected. Super clean and simple. I set the rear spring perches to the suggested height, but as you can see in the photos, the perch is off the mount a bit when the car is in the air, i'm thinking that will be an issue if say my back wheels come off the ground, but is it something I should be concerned about? I'll end up adjusting them to whatever height is best for performance, but if it is the height it's at now then that seems a bit strange. I also started with 20 clicks on the dampers which is the lower end of what they suggest for street. They suggest 7 for track so i'll probably end up tightening it up to there once it's driving, but just want to feel it looser first.


Drivers rear strut installed

There's about a pinky width between the perch and the body of the car:

Passenger rear side

Fronts as they are now. I need to wait for my camber plates to come in before I can finish assembly of them and get them installed


smanierre

Autocross Champion
Got a good amount done on the car today. Ended up just re-using the bolts for the accessory bracket, others said they have multiple times with no issue. If I have to pull it off again i'll replace them. Got the upper and lower timing covers on without issue. The sealant for the lower cover came in a mini caulk tube thing which made it super easy to lay the bead, definitely one of the better ones i've done.
Oil chain tensioner in:

Sealant bead on the timing cover:

All sealed up with new upper timing cover gasket as well:

Got the accessory bracket on and installed the oil cooler adapter plate. I have the cooler itself, just need to get the lines now and figure out where i'm going to mount it. This one has the thermostat built in as well so it should get up to temp faster.

Alternator on with adapter for the oil temp and pressure sensors:

I finally trimmed the bolt (middle bolt) since it was about 1/2" too long before. Now it can be fully tightened and sits flush:

Oil pressure and temp gauges that came with the cluster. Just need to wire them up once the engine is in but that will be really simple:

A/C dummy pulley and bracket. I know the ac compressor doesn't sap and power when it's not on, but hey it's about 10-15lbs (probably more) of weight saved so 🤷‍♀️:


Put in the dip stick tube and fluidampr back on to round off the night:

Now i'm just waiting on the water pump union so I can get the pump installed, then i'll move onto the vac pump, hpfp, and intake manifold/injectors. We getting there.
 

smanierre

Autocross Champion
Went out and got a few oil filters (planning on using 2 for a break in, then a third for the first 1k or so just to be safe) and tossed one of them on there.

Figured the vacuum pump wouldn't be in my way too much for the intake mani/water pump so I got that on there. Also started on the HPFP. Install is pretty straight forwards on the nostrum one except you just have to use a tool to ensure the bracket/spacer is centered. Now just need to wait for the intake mani to be on to get the high and low pressure fuel lines on and it'll be good. Has a nice clean "custom" kinda look to it which makes it stand out as well.


Also picked up some terminal covers from autozone while I was there and put those on. Still need to figure out a way to secure the battery but thats gonna be one of the last things most likely.
 

uglybastard

Autocross Champion
Went out and got a few oil filters (planning on using 2 for a break in, then a third for the first 1k or so just to be safe) and tossed one of them on there.

Figured the vacuum pump wouldn't be in my way too much for the intake mani/water pump so I got that on there. Also started on the HPFP. Install is pretty straight forwards on the nostrum one except you just have to use a tool to ensure the bracket/spacer is centered. Now just need to wait for the intake mani to be on to get the high and low pressure fuel lines on and it'll be good. Has a nice clean "custom" kinda look to it which makes it stand out as well.


Also picked up some terminal covers from autozone while I was there and put those on. Still need to figure out a way to secure the battery but thats gonna be one of the last things most likely.
A few rivnuts and a brackets, maybe?
 

smanierre

Autocross Champion
A few rivnuts and a brackets, maybe?
I was thinking something along those lines, just haven't gotten around to giving it much thought yet
 

smanierre

Autocross Champion
Went to go get my water pump on and after putting in the union, I realized I never ordered a new gasket for it 😒 
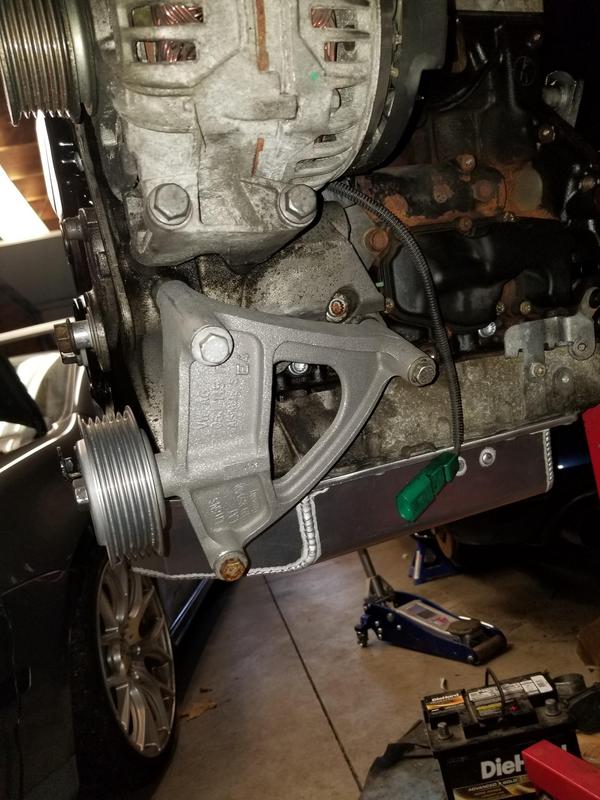
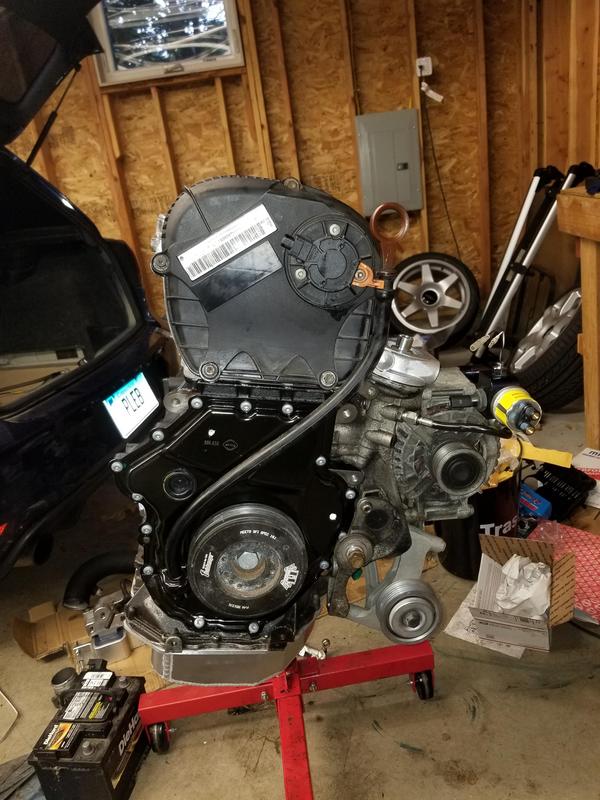
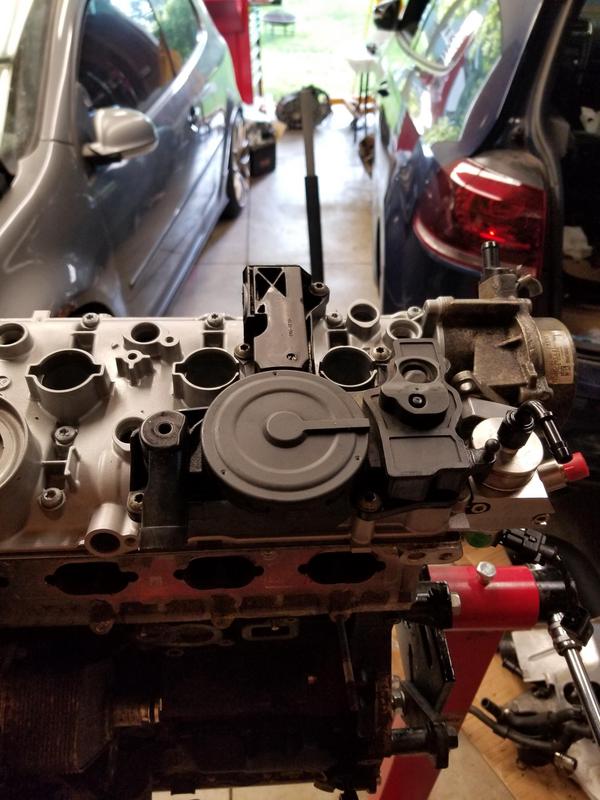
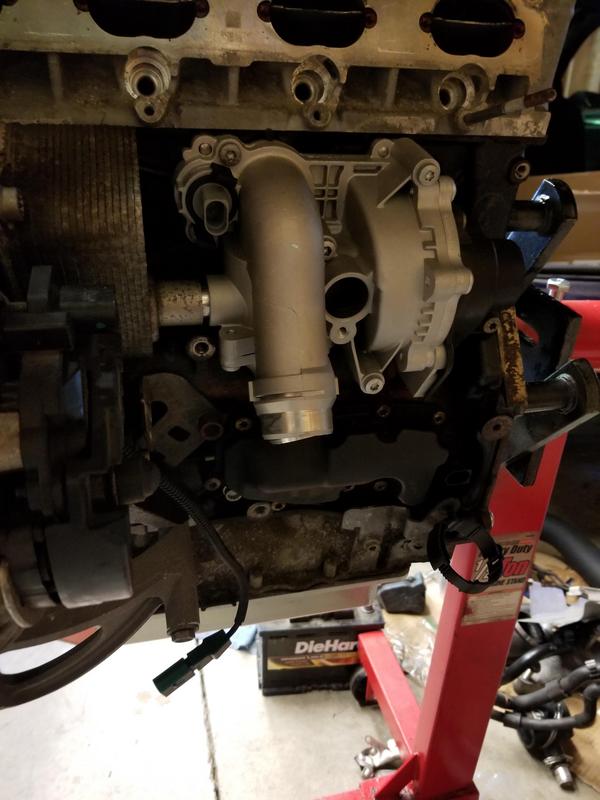
so now I gotta wait for that. Instead I decided to just get some other random stuff on that wouldn't interfere with that or the intake manifold. I also did some research and found there's a place about 15 minutes from me that sells Sunoco race E85 so I don't need to worry about that. Gonna start with a few 5 gallon cans but they're about $80 each. If I go through it fast enough i'll get a 54 gallon drum which cuts the cost to about $9 per gallon, so half what the 5 gal ones cost. Still expensive, but racecar. Picture time
Water pump union in:

Replaced the gasket on the PCV valve. Didn't have any issues with it before, but it's cheap. Install is straight forwards, torqued to spec in order:


I tossed in the rear hose for the time being just to keep stuff out of the back port, but this will be replaced as I believe the o-ring is bad on it, had a lot of oil residue around this area.

Got the engine cover studs back in. I would prefer not to have them there because i'm not going to run the cover, but they act as covers for the holes that allow access to the head bolts (now arp studs). I may trim off the top part since it's only needed to the point where the nut is:

Those other three holes also allow access to the head bolts, but I don't know where I put the plugs. Luckily I got a part number from someone on fb and they are only ~$3 a piece, so those will be ordered also.
Got a new serpentine belt and through it on, about as straight forwards as it gets:

Lastly I cleaned the flaps that sit in the head to direct airflow. They were caked pretty good in carbon, but because they don't get too hot it wasn't cooked on. A couple brake cleaner hallucinations later and they came out pretty clean. The stratified injector in the charge pipe should clean the rest over time and keep them clean. Second pic is the carbon I scraped off first with the razor blade, then took off a similar amount with the brake cleaner and paper towels. I put them into the head so I don't lose them or forget to put them in later:


smanierre

Autocross Champion
Parts finally came in so I got the water pump installed. Really straight forwards with this much access to it. Only tricky part was getting the belt on but really not that hard. Really hoping I don't end up with a leak from the gasket. I wish it came with an aluminum belt cover as well but realistically it won't make a difference and no one will really see it


Got the plugs to cover the head bolt holes:

Swapped over the fuel rail and sensors from the old intake mani to the new. Only replacing it because I got a P02015 just before I parked it. Swap over was straightforwards. Also replaced the fitting for the HP fuel line since the nostrum kit came with a new one.
Before

After

New fitting

Didn't take pictures but I got the injectors installed also, they came with the HPFP and are OEM from an MK7 R. Same fitment and quality, just more flow. They didn't want to go in initially but I was able to tap them in lightly with a hammer and a screwdriver (I know, not a good idea, but it worked). Also it was good I put those flaps in the other day because I didn't even think about them when putting the manifold on today.

Next step now is to finish up the HPFP install which just needs the hard fuel line installed. After that i'll be taking it off the stand to put on the clutch and mate up the trans. After that it's going in the car and hopefully I can get it to the shop quickly for the manifold. Also gonna see if the shop can figure out my turbo oil/coolant feed/return lines since I really don't wanna, and fill the notch on my hood as well.
 

smanierre

Autocross Champion
Got the hard fuel line on. Only took about 15 min as it's just the two nuts and most of that was ensuring it was seated correctly in the fittings.


Almost forgot the intake manifold support which would have been a pain to get on after with that satan bolt down on the bottom.

Now the chains are on the engine lift points and the crane is primed. Hoping tomorrow I can get it on the ground to get the clutch/flywheel/trans mounted on it. I'm thinking two stacks of wood to support it where the pan meets the block that way the pan has no chance of getting crushed under the weight of the engine. Really want it in with the front clip on by wednesday, that way I can get the camber plates in and get the suspension installed then have it on the trailer to go down to the shop this week.


smanierre

Autocross Champion
Top